Definitions
SSF - Spectral Sensitivity Function CLUT - Color Look Up Table WB - White Balance
The term “Spectral Sensitivity” is commonly interchanged with “spectral response” or “color response” and is used to create a “color profile” or “CLUT”
Why
I have been playing with vkdt a lot lately and in the documentation it has a section on “how to characterize the color response of your camera” that really piqued peaked my interest. Typically, each camera comes with a 3x3 matrix, from the manufacturer, embedded in the images it takes in order to convert from the camera color space to, say, XYZ or sRBG color space. It has instructions for using either color profiles or a color checker on top of the default 3x3 D65 color matrix usually embedded in the raw file. In summary, the options are (if I had to rank them):
- color profiles (SSF to CLUT via
vkdt-mkclut)- Download the pre-measured SSF by finding your camera in
- Estimating the estimating spectral response (via vkdt-mkssf) by either
- reverse-fitting them to dng profiles (.dcp)
- matching two images of ColorChecker color charts (under two illuminants)
- Measuring the spectral sensitivity yourself
- 3x3 D65 color transform matrix
- color checker (Spyder Checkr 24 to radial basis map via vkdt colour module)
- Stored as the line in the colour checker image .cgf upon rbf fitting. Applying to other images is done by copying the colour module rbmap line
param:colour:01:rbmap:.... I haven’t actually tried this, and I need to read more about radial basis functions, so you should reference the actual docs
- Stored as the line in the colour checker image .cgf upon rbf fitting. Applying to other images is done by copying the colour module rbmap line
It was the “measuring the spectral sensitivity yourself” that really activated my neurons
How
Use your camera as a self-spectrometer
I stumbles on an excellent series by Glenn Butcher on pixls.us about The Quest for Good Color. It has 4 parts and they are packed with good information
- 1. Spectral Sensitivity Functions (SSFs) and Camera Profiles
- 2. Spectral Profiles “On The Cheap”
- 3. How Close Can IT8 Come to SSF?”
- 4. The Diffraction Grating Shootout
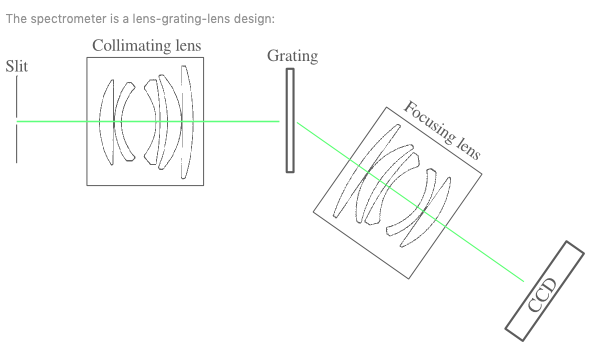
I followed part 1 and 2 on how to build a contraption for measuring sensor spectral sensitivities. Typically, the easier and more accurate method is using a monochrome, but that is expensive. The cheaper, yet more processing-heavy method is using a sort of “one-shot” self-spectrometer. You essentially pass light through a slit, into a diffraction grating, then onto the sensor (or a diffusion screen to be captured).
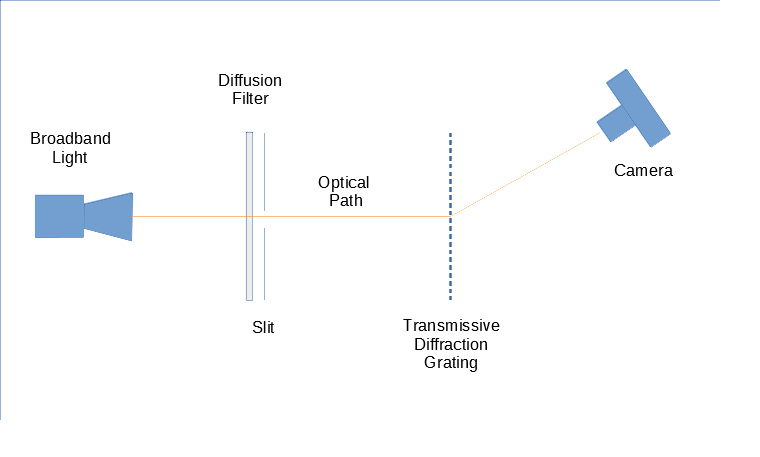 https://discuss.pixls.us/t/the-quest-for-good-color-2-spectral-profiles-on-the-cheap/18286/1
Build
I built the entire contraption on a 3D printer. It is designed to be self contained so I can easily move it around.
The first thing I had to figure out was what angle do I need to hold the camera from the incoming optical path. Using visible light range 380 to 750 nanometers (nm), the median wavelength is 565.
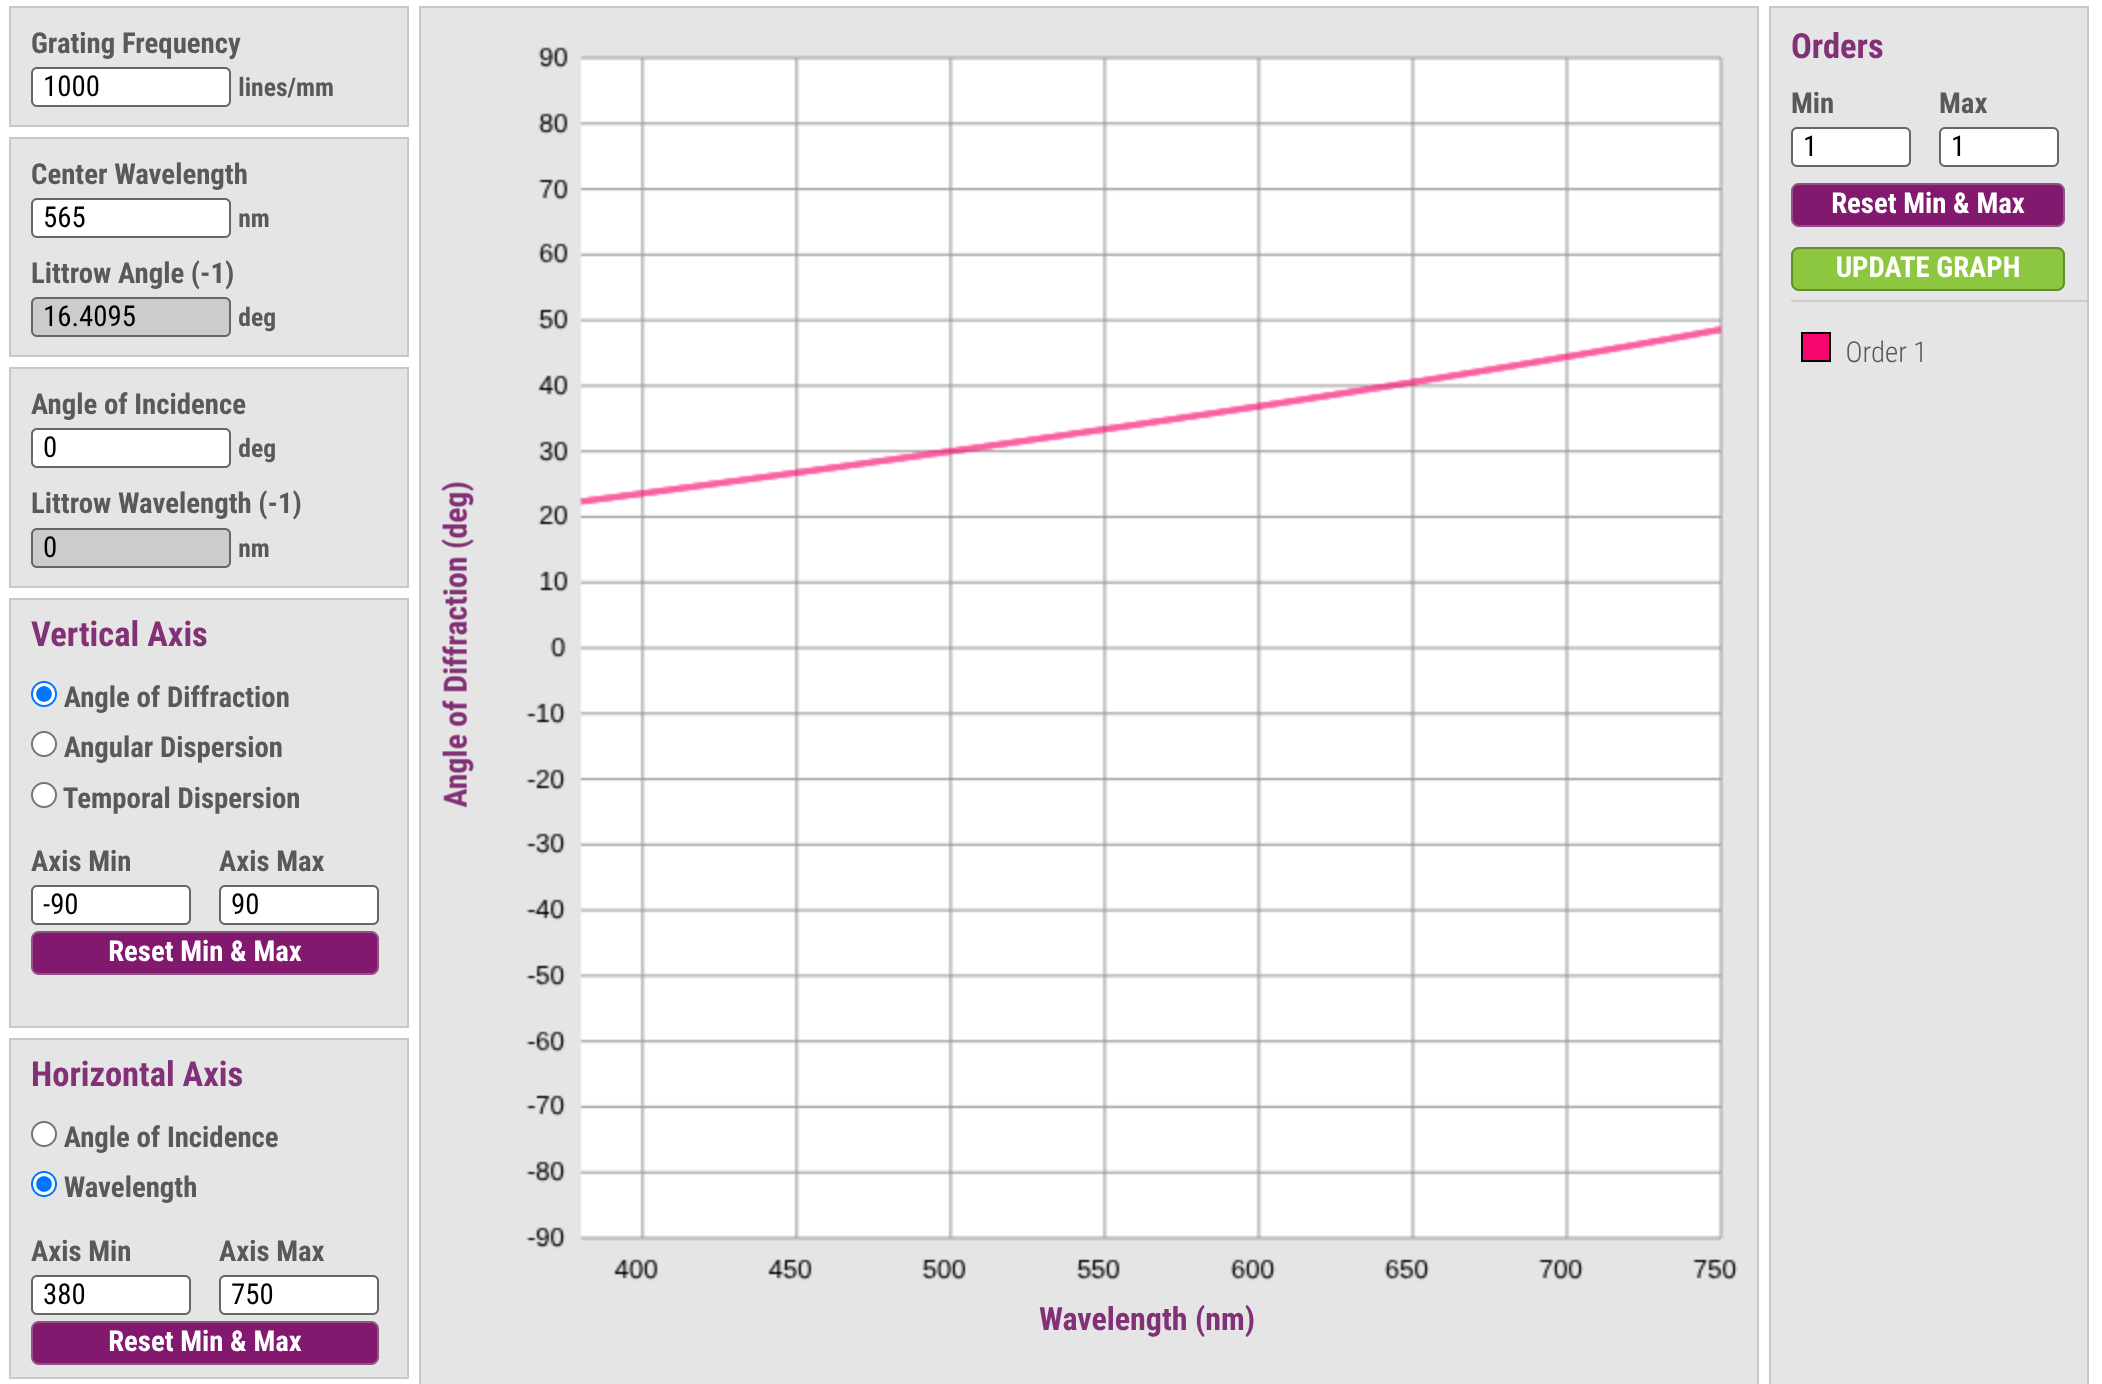 https://www.plymouthgrating.com/guidance/grating-calculator/
We can see the first order diffraction for visible light is going to come out at 22-49 degrees, so i designed the median angle to be 32.8deg
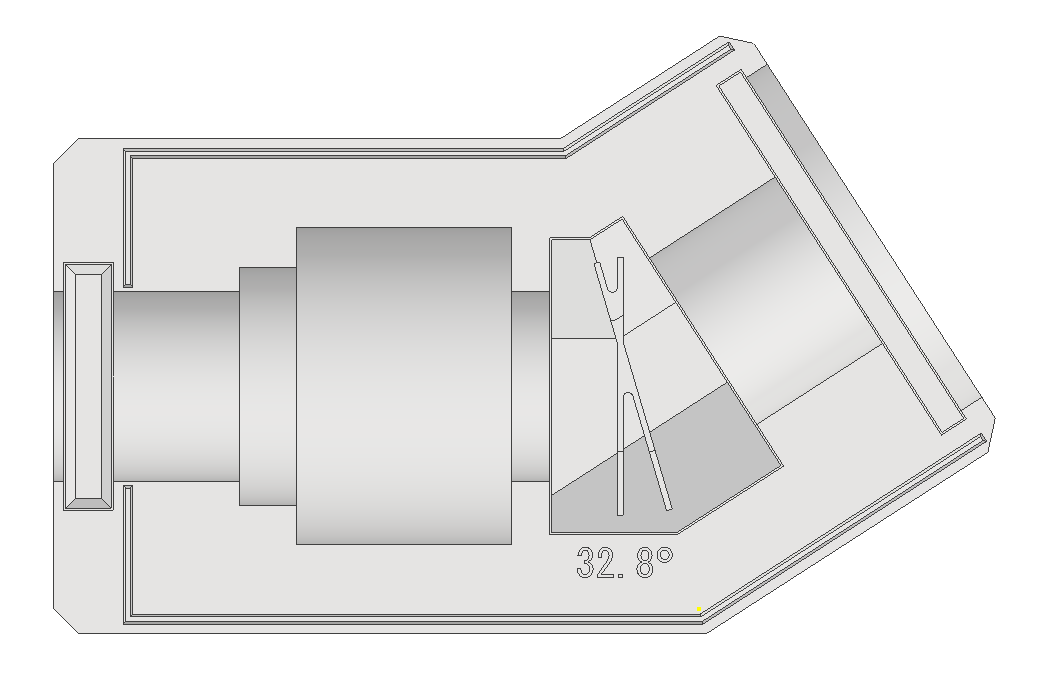
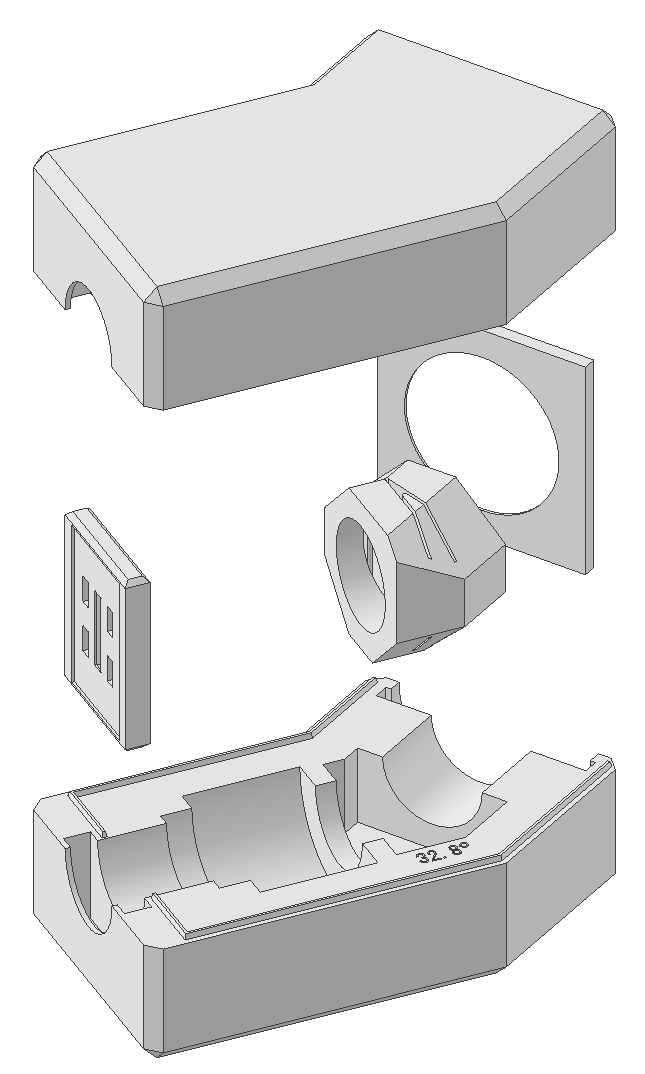
For the diffraction grating, I have seen it being held at many different angles. Either perpendicular to the incoming light, parallel to the sensor, or somewhere in-between. I designed a holder to to be able to slot the grating at any of the three.
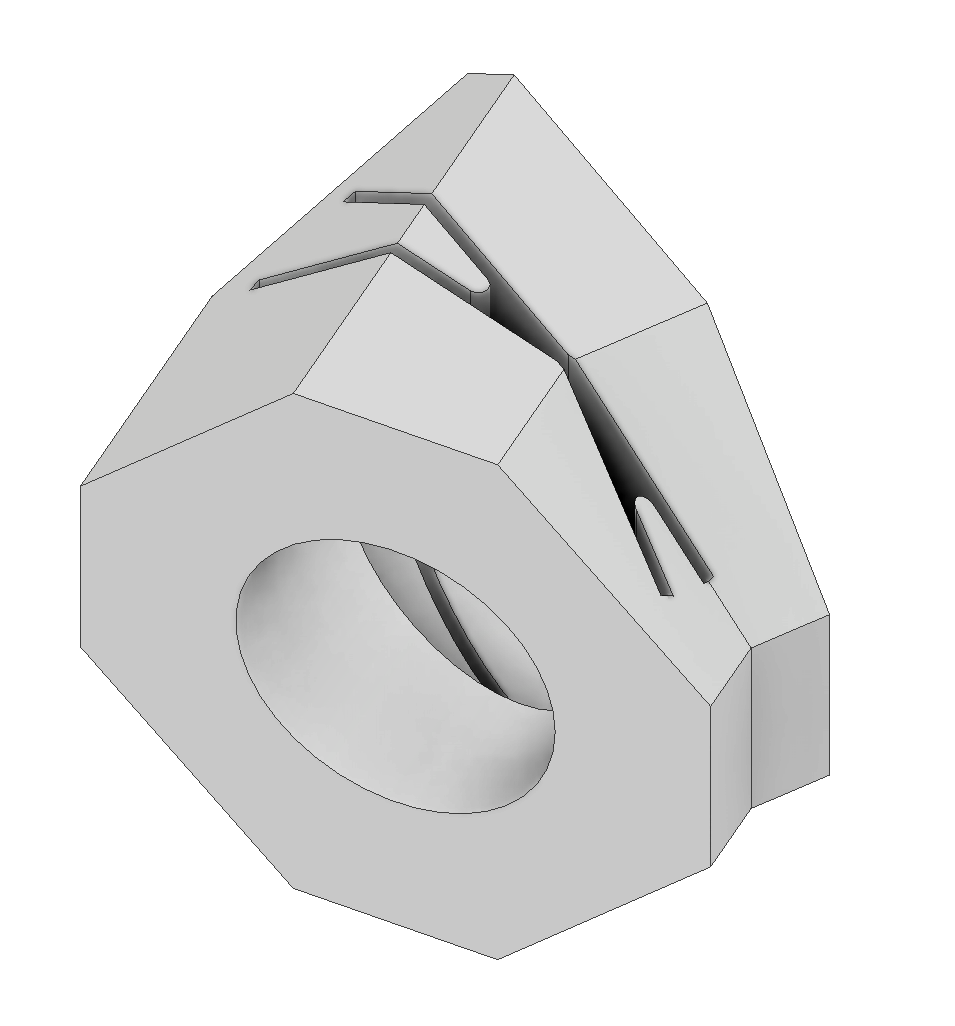
I added a cutout to place a collimating lens. (I used a Nikon F-mount 50mm set a infinity focus to mimic a collimating lens) but Glenn states in part one of the series that the “diffusion filter accomplishes essentially the same thing”. After trying it out, I was not able to get the with-collimating lens setup to work so left the cutout empty.
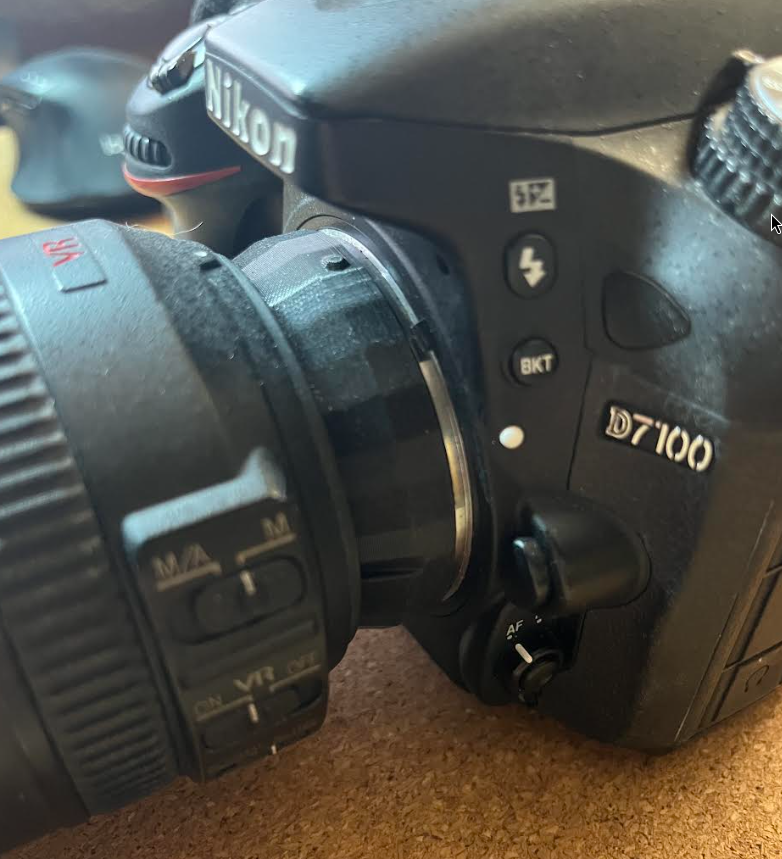
The camera lense is an old Nikon NIKKOR 18-200mm 1:35-5.6 G ED DX kit lens. The focus ring is rough and I think one of the aperture shutters are broken as I see something dangling on the inside sometimes, but it seems to work okay. I designed a custom bracket that firmly twists onto the lens hood to hold it in place relative to the enclosure.
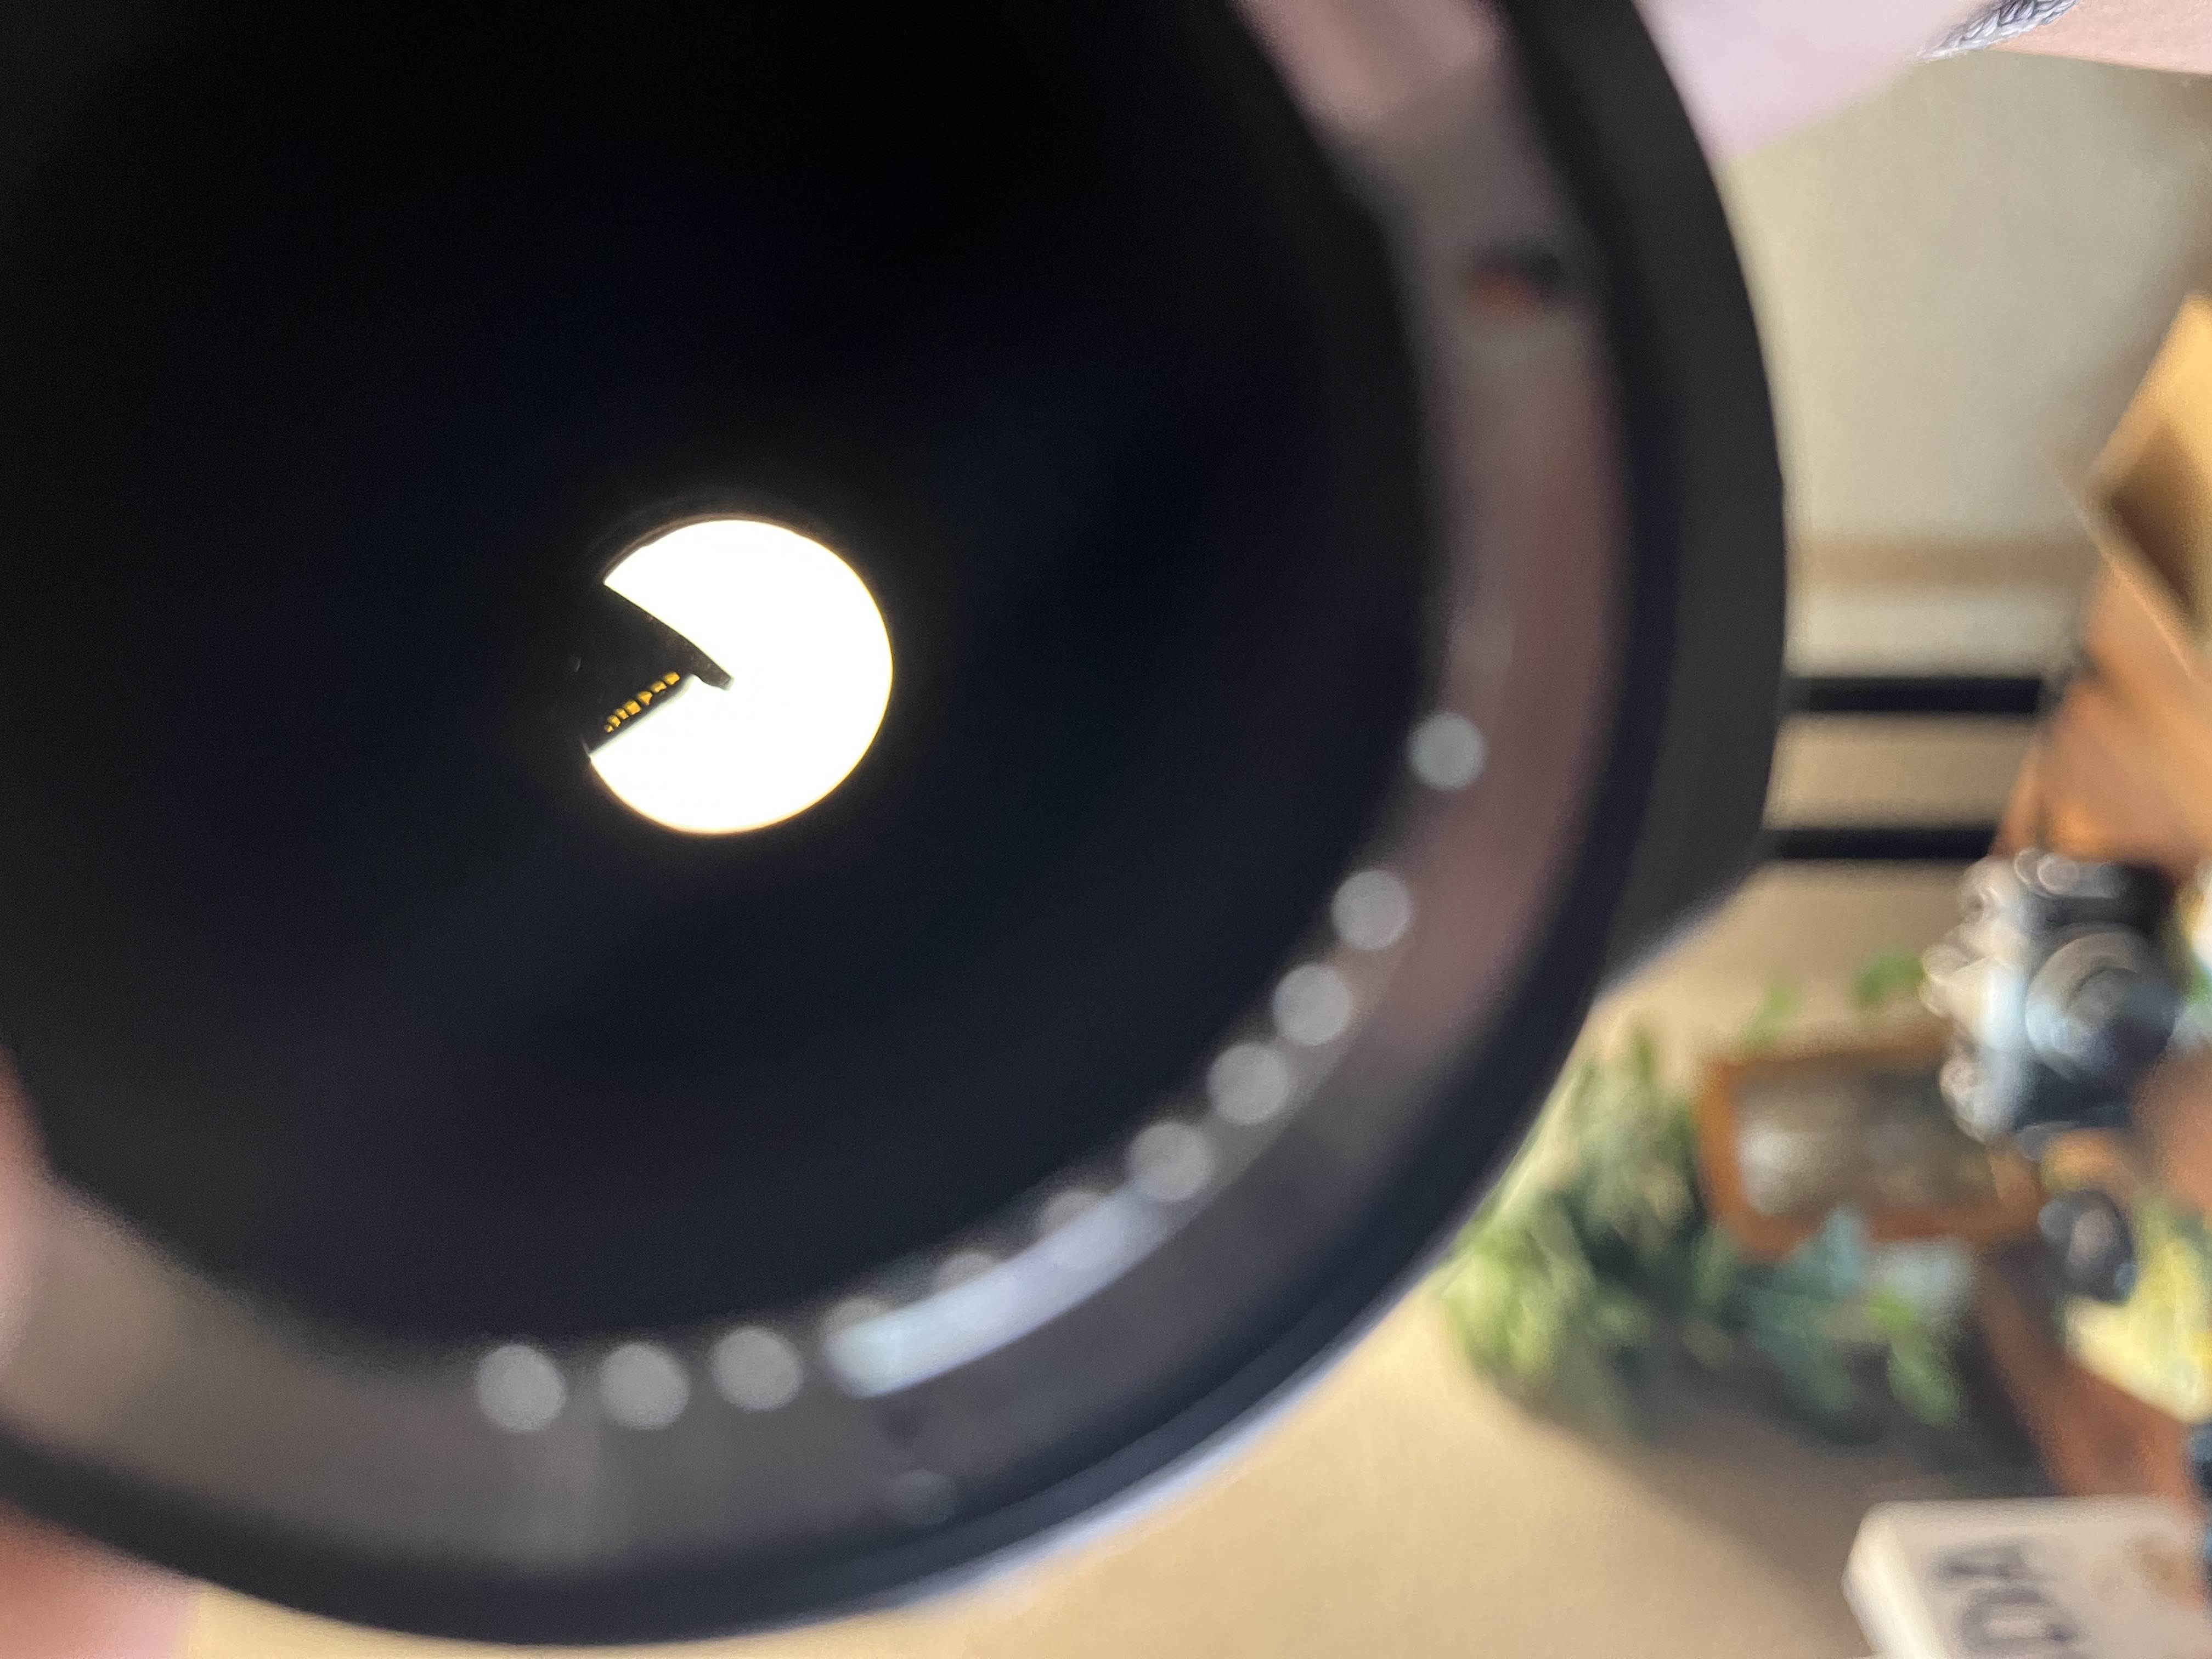
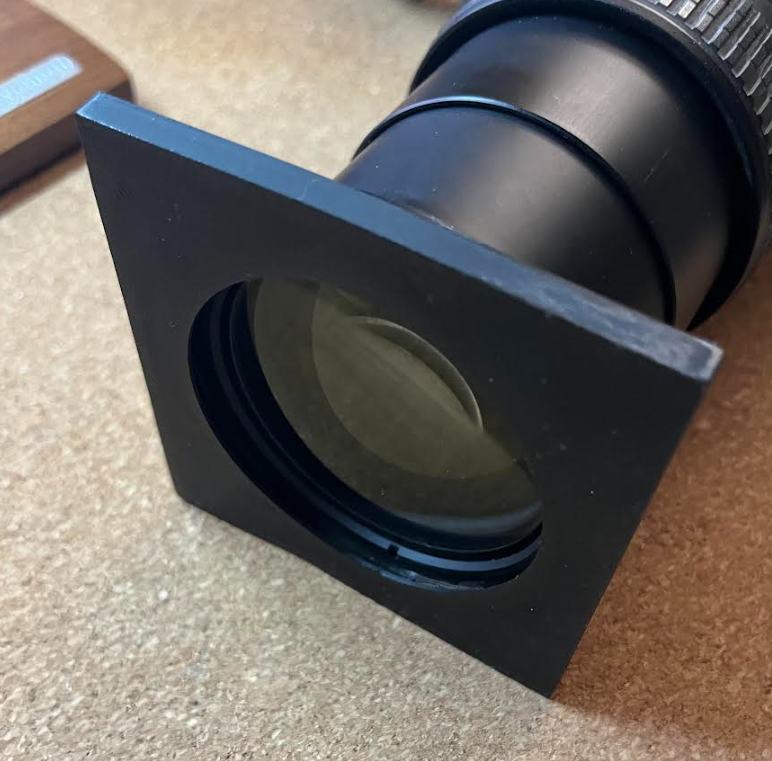
I also used a 3D printed lens tube to bing the focal distance in. This one holds the f-mount aperture slider open
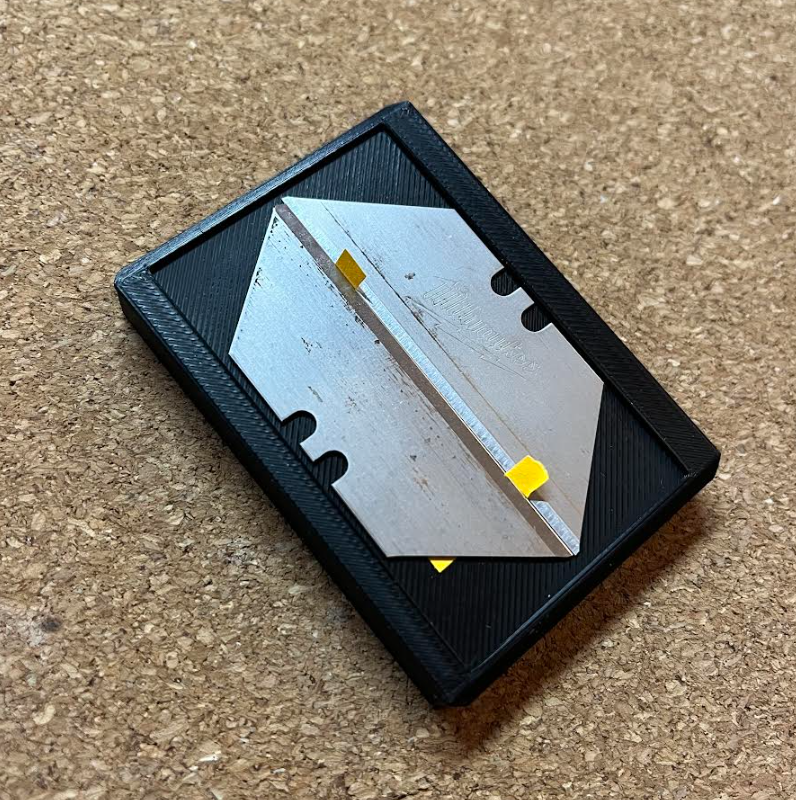
The slit is made by magnetically holding two carpenter blades, edges towards each other, uniformly separated using two strips of paper.
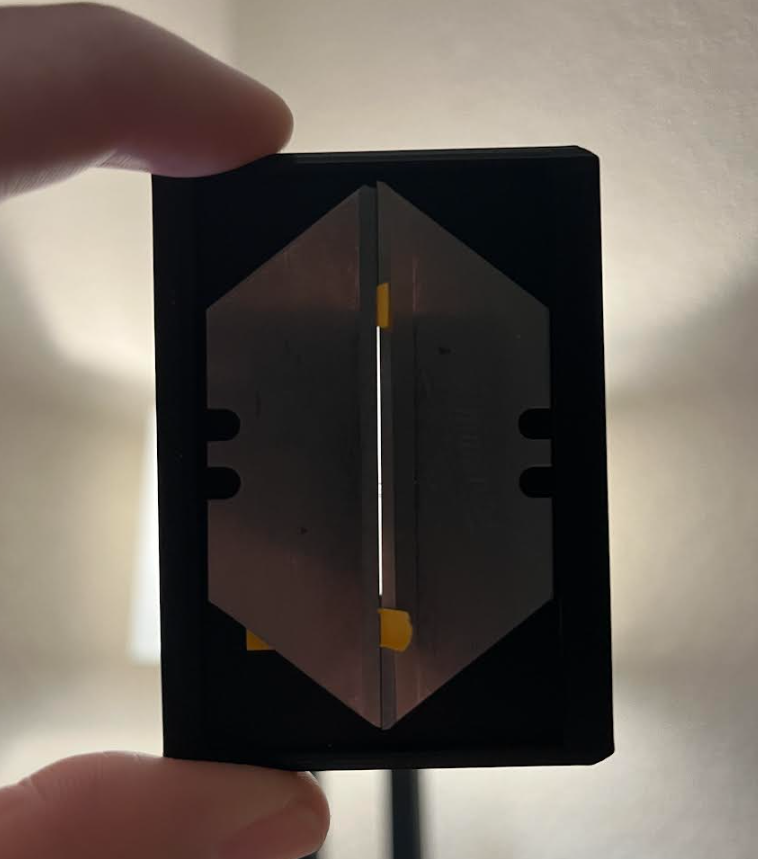
On my first iteration, I seem to have completely forgot that it needs a diffusion filter. I never really revised the model to include a means to hold the diffusion filter since I ended up re-using the “ground glass” from my 3D printed medium format camera. It is just a piece of frosted acrylic. (If you want one for cheap, you can use the diffusion material from a broken lcd tv)
Measurements
To make my life easier, I opted to place the contraption on a table in the garage. This would allow me to switch from broad-band illuminant (daylight) to know-peaks spectrum (florescent) light by simply opening and closing the garage door. The lazy choice of daylight-ish will bite us back later.
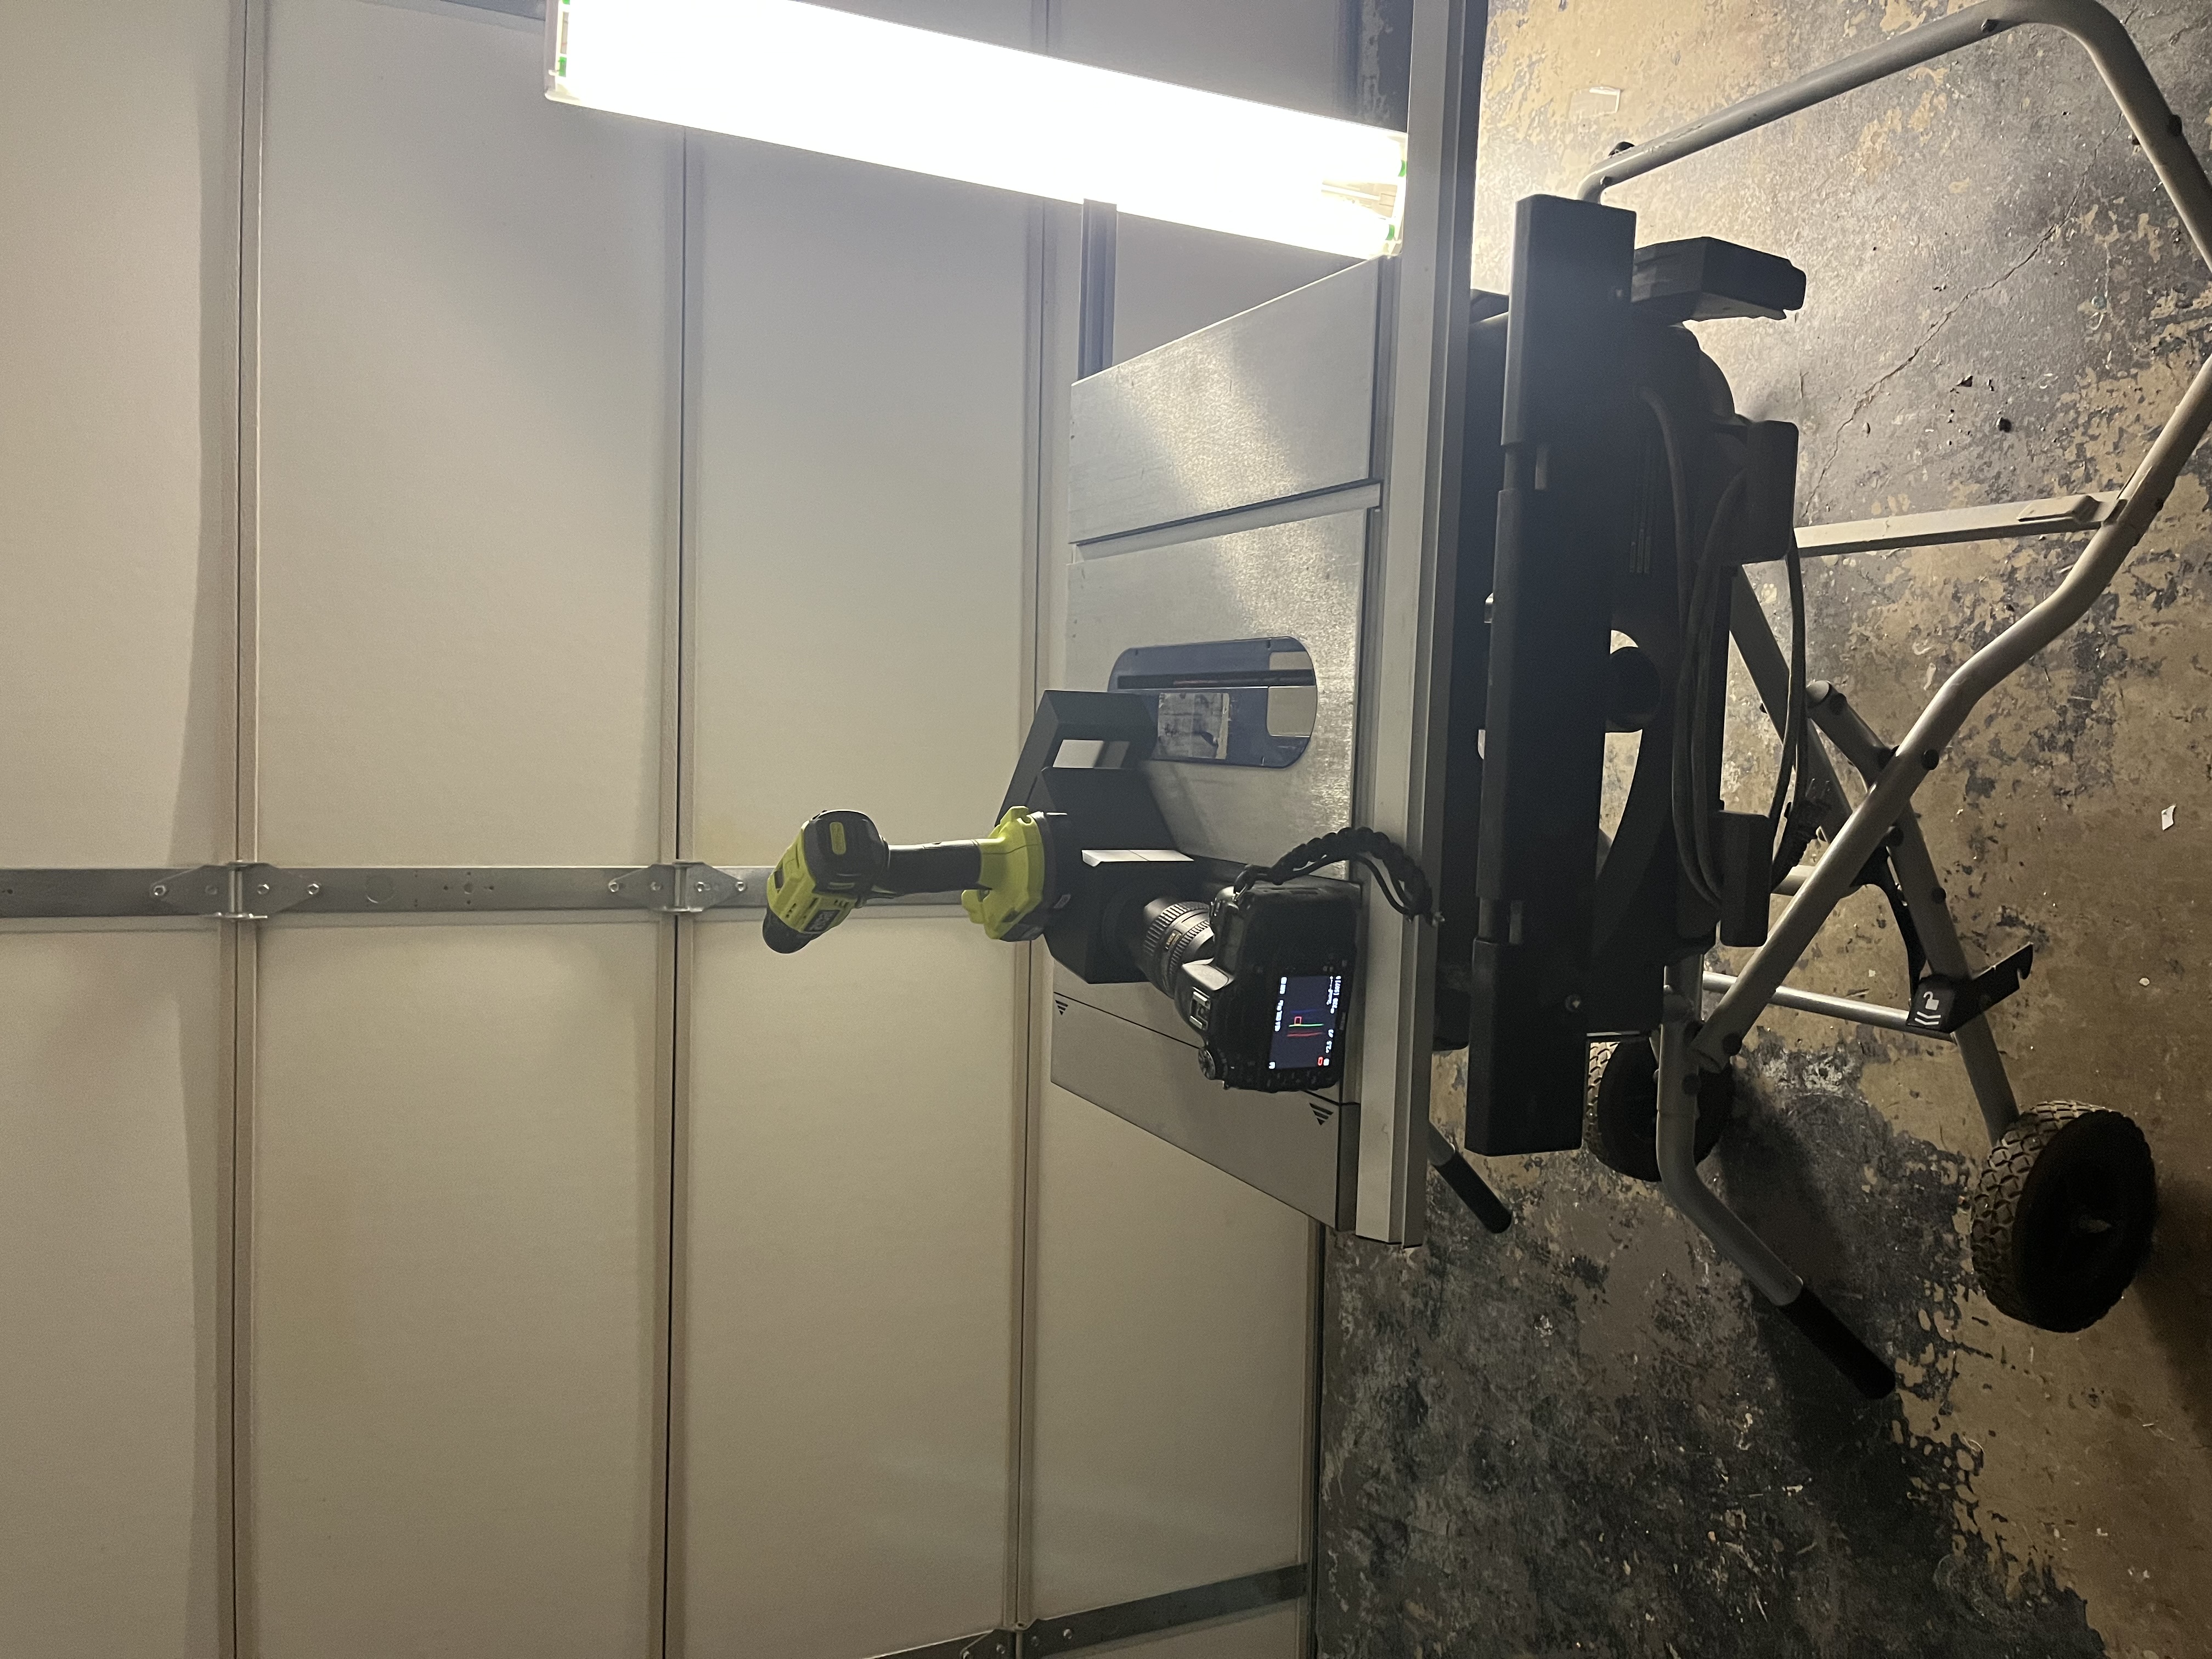 Drill used as weight to hold enclosure shut and keep everything fixed in place between shots
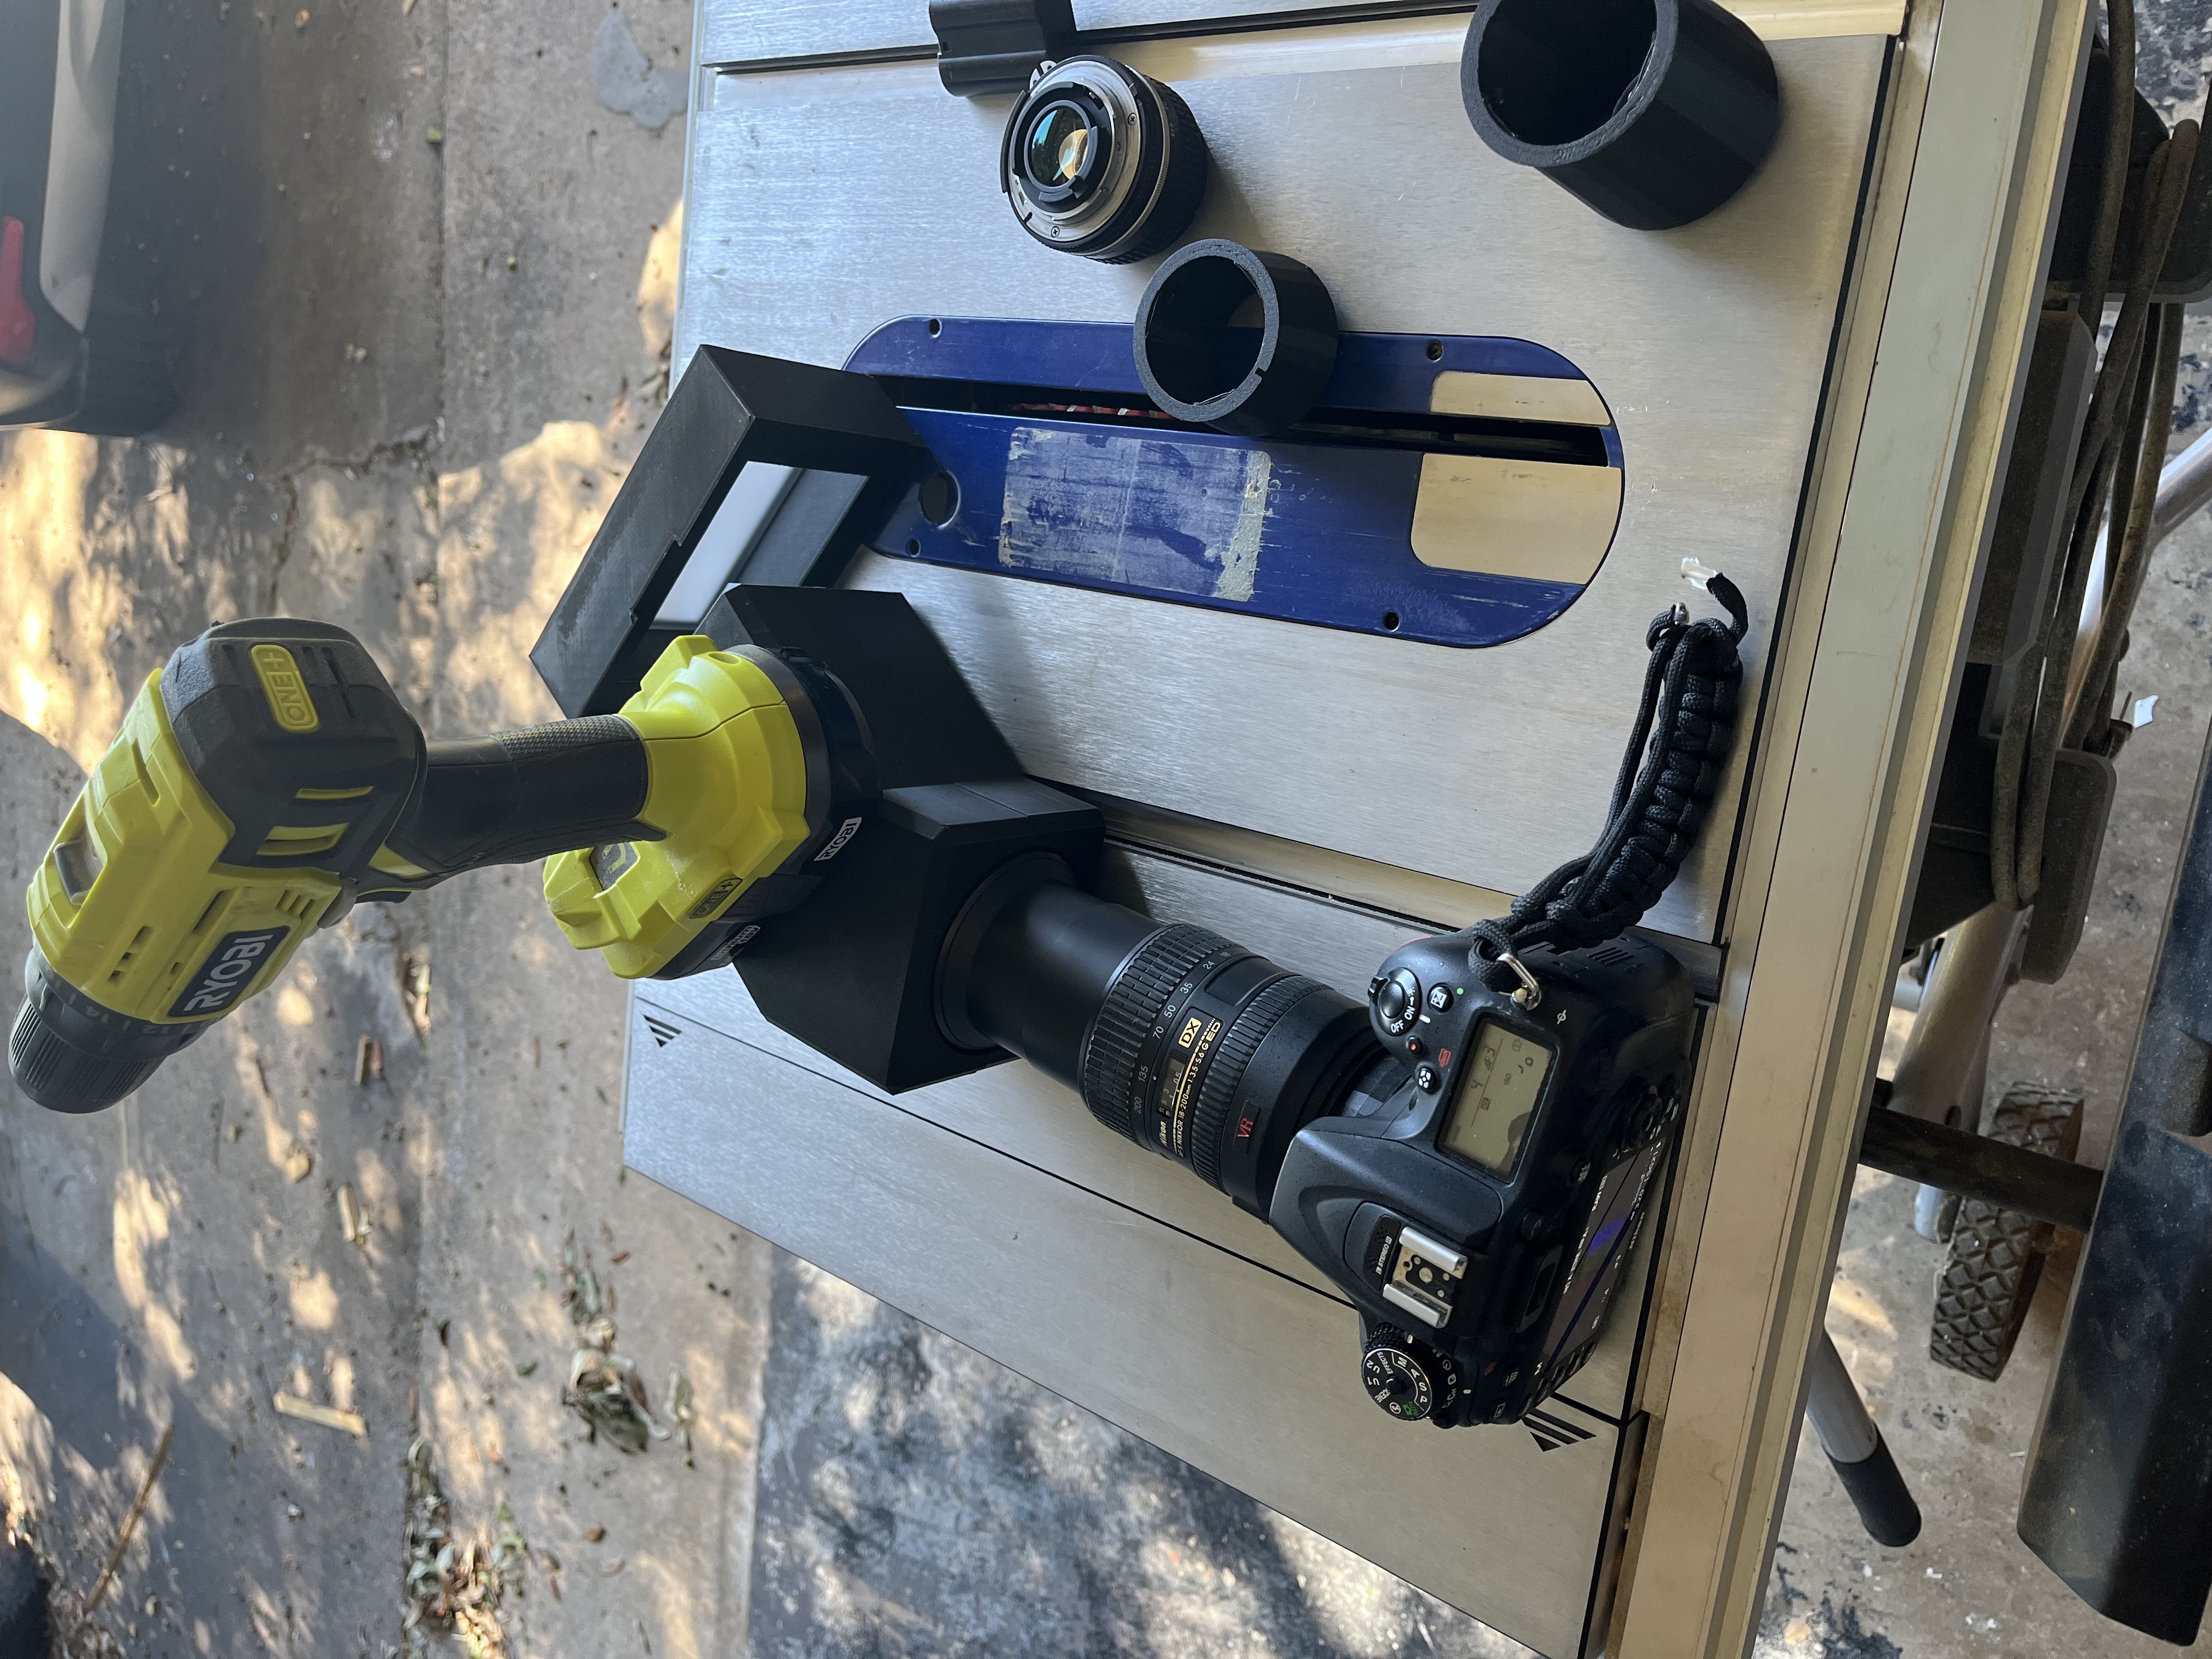 Yes, not only is the lens broken, but so is the lcd on top. My poor Nikon
Processing
At first I tried Glenn’s rawproc, and it worked okay. For convenience, I used vkdt for the pre-processing. I opened the two images in vkdt
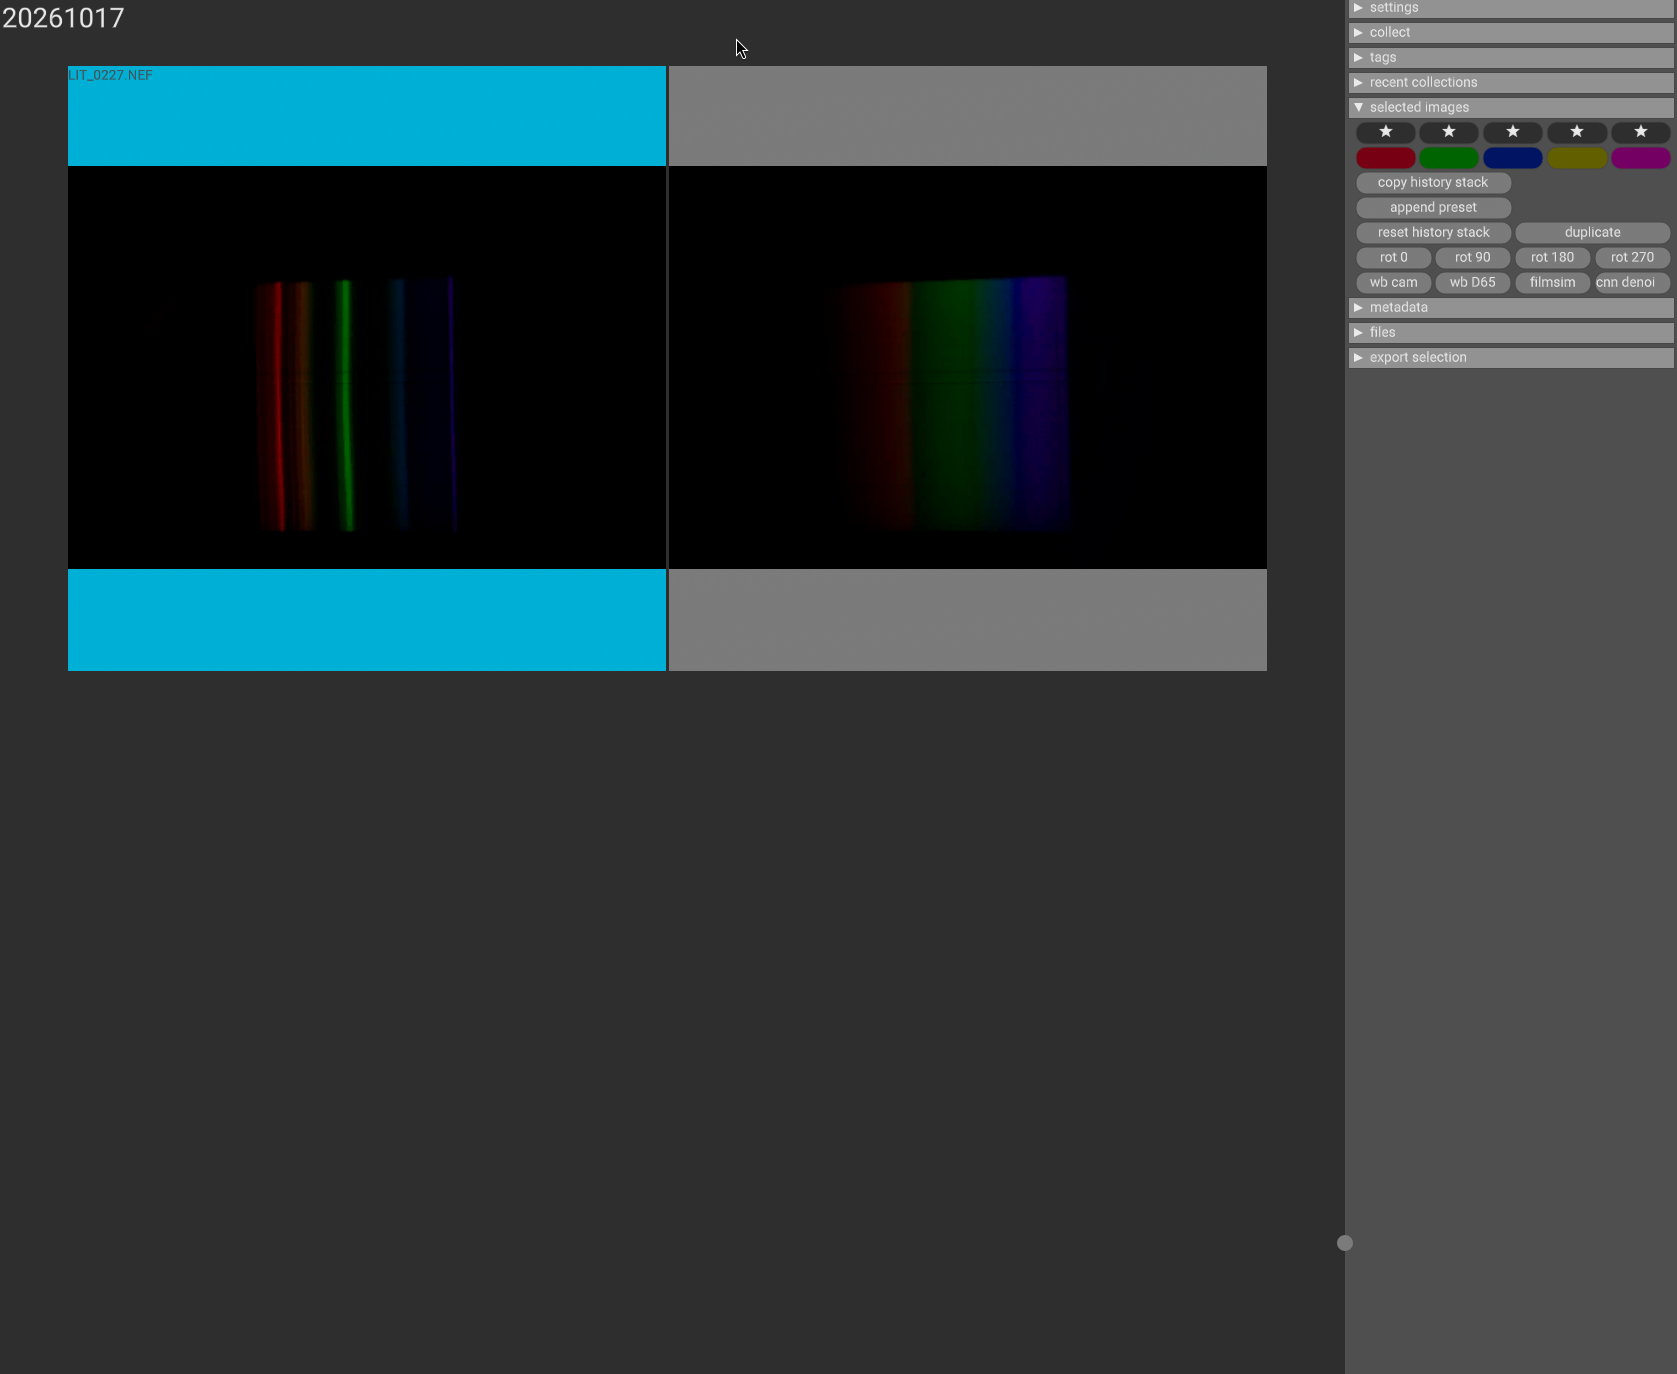
Configured the pipeline so it is only denoise (white/blank norm), demosaic, crop, and exposure.
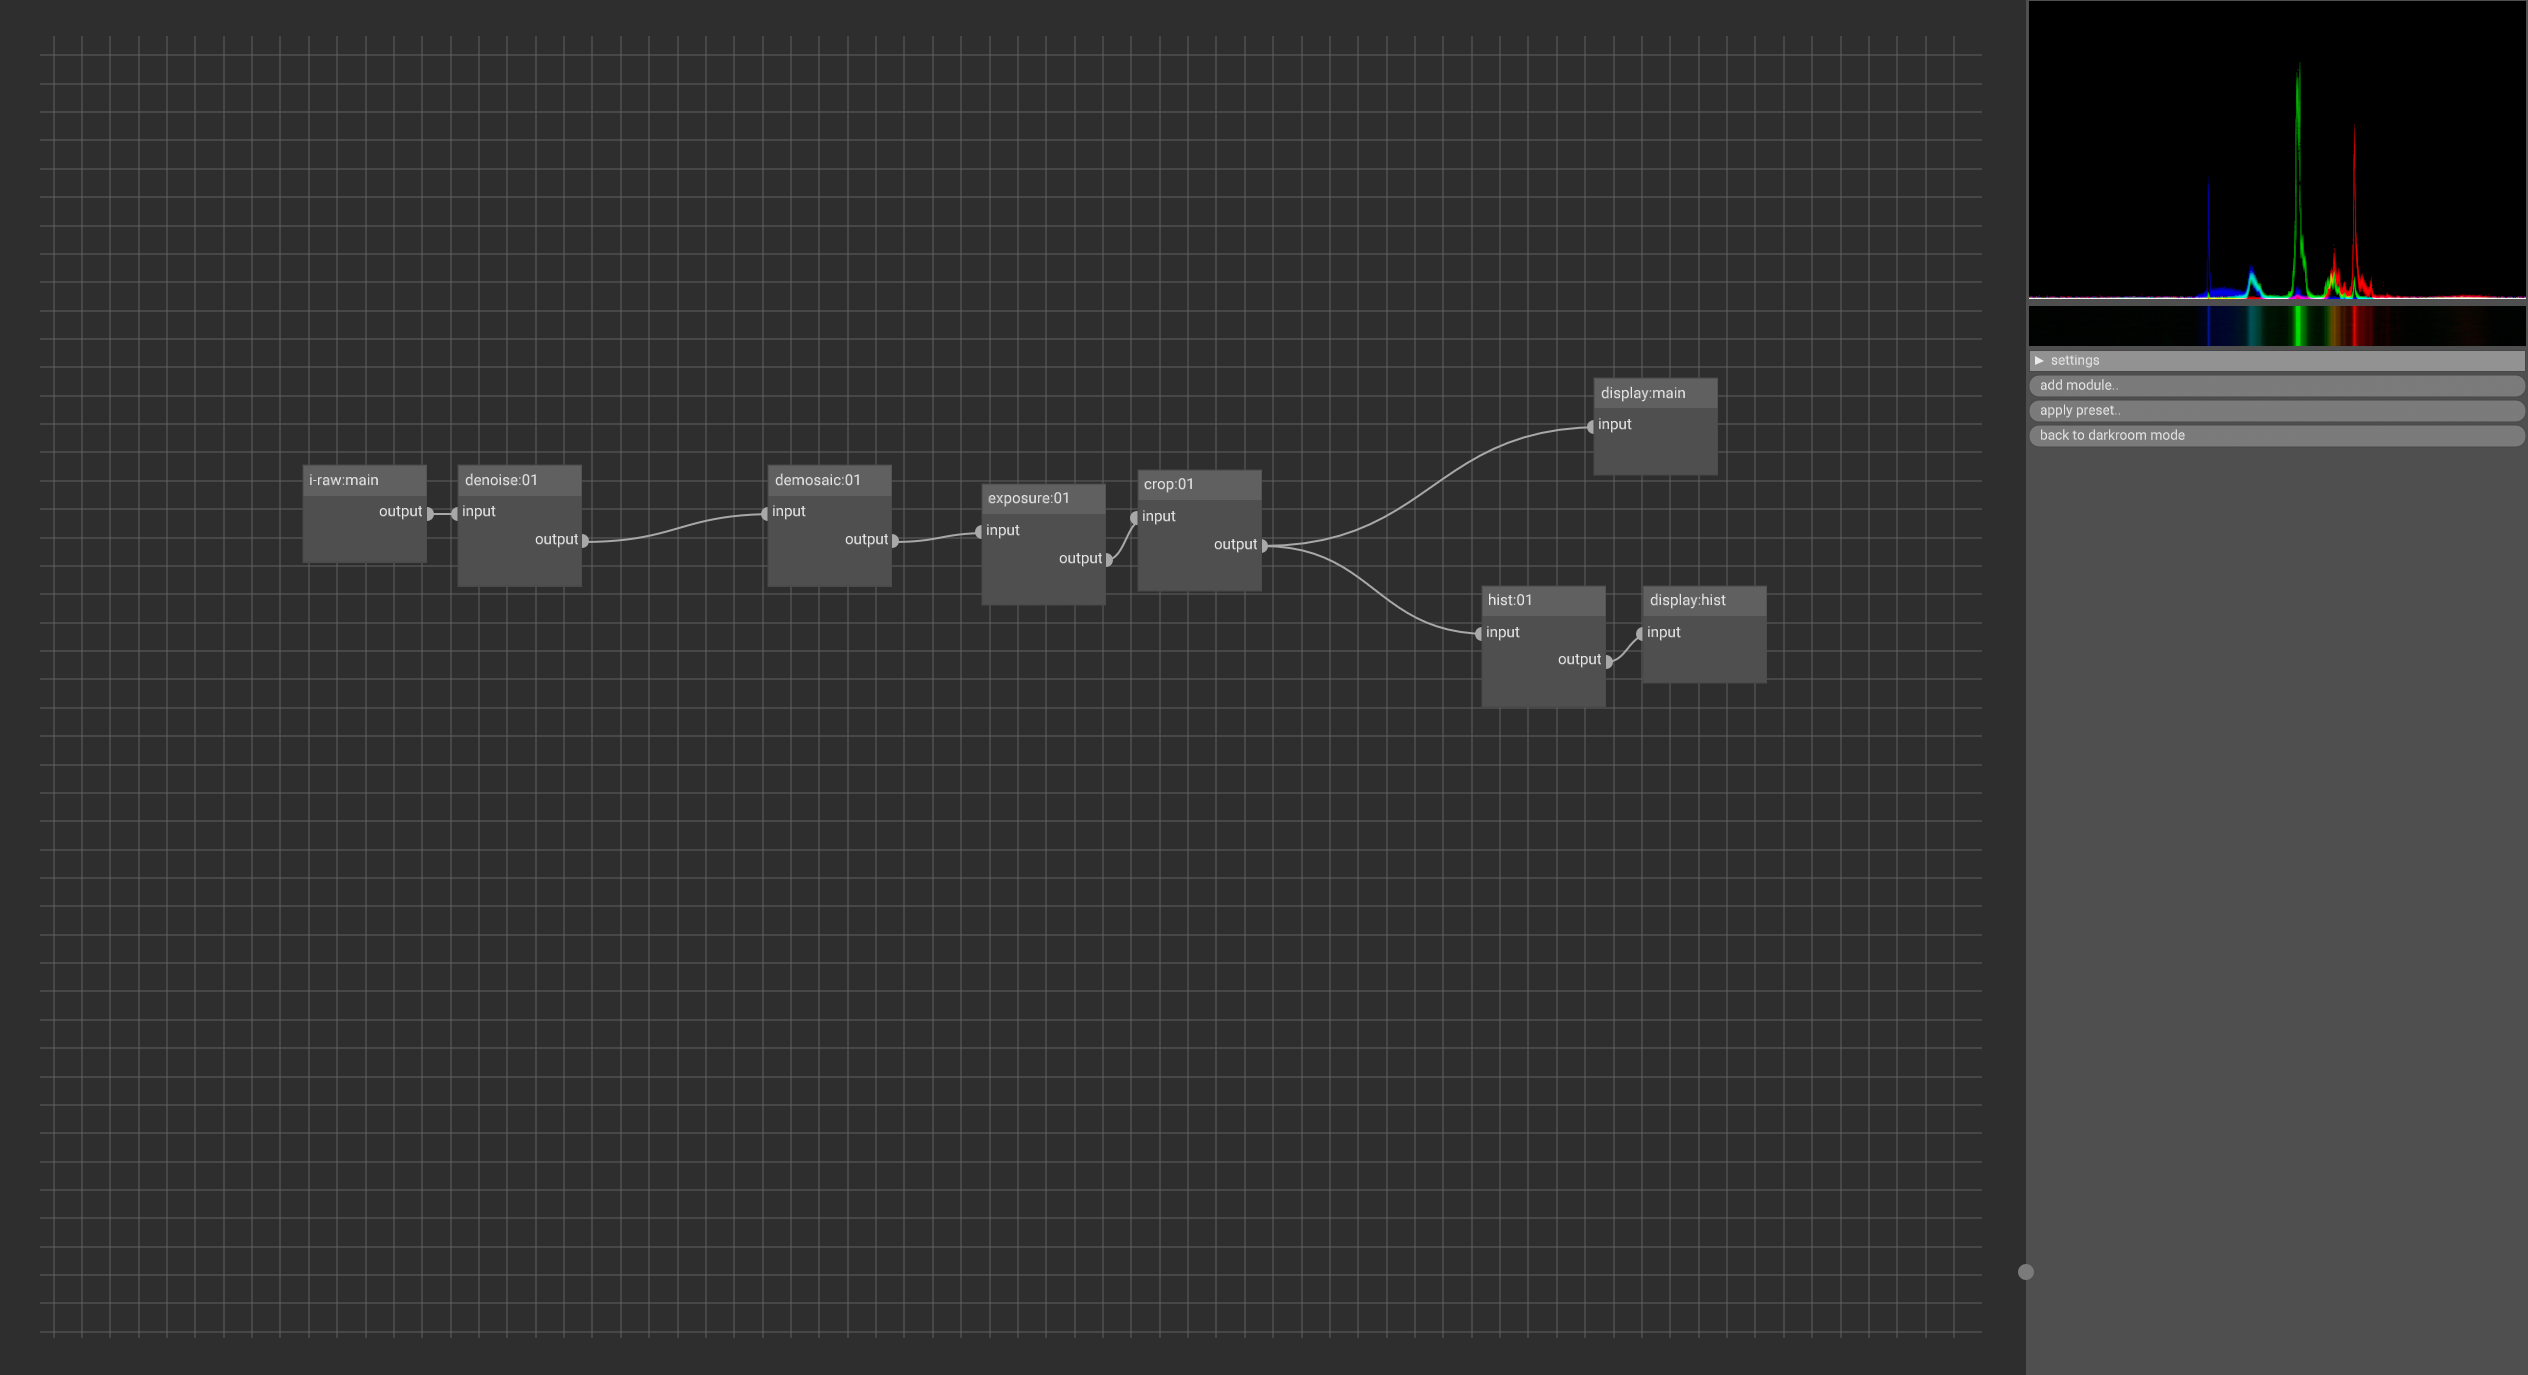
then copying the .cfg to the other image so it gets the exact same treatment. I then exported as linear to exr.
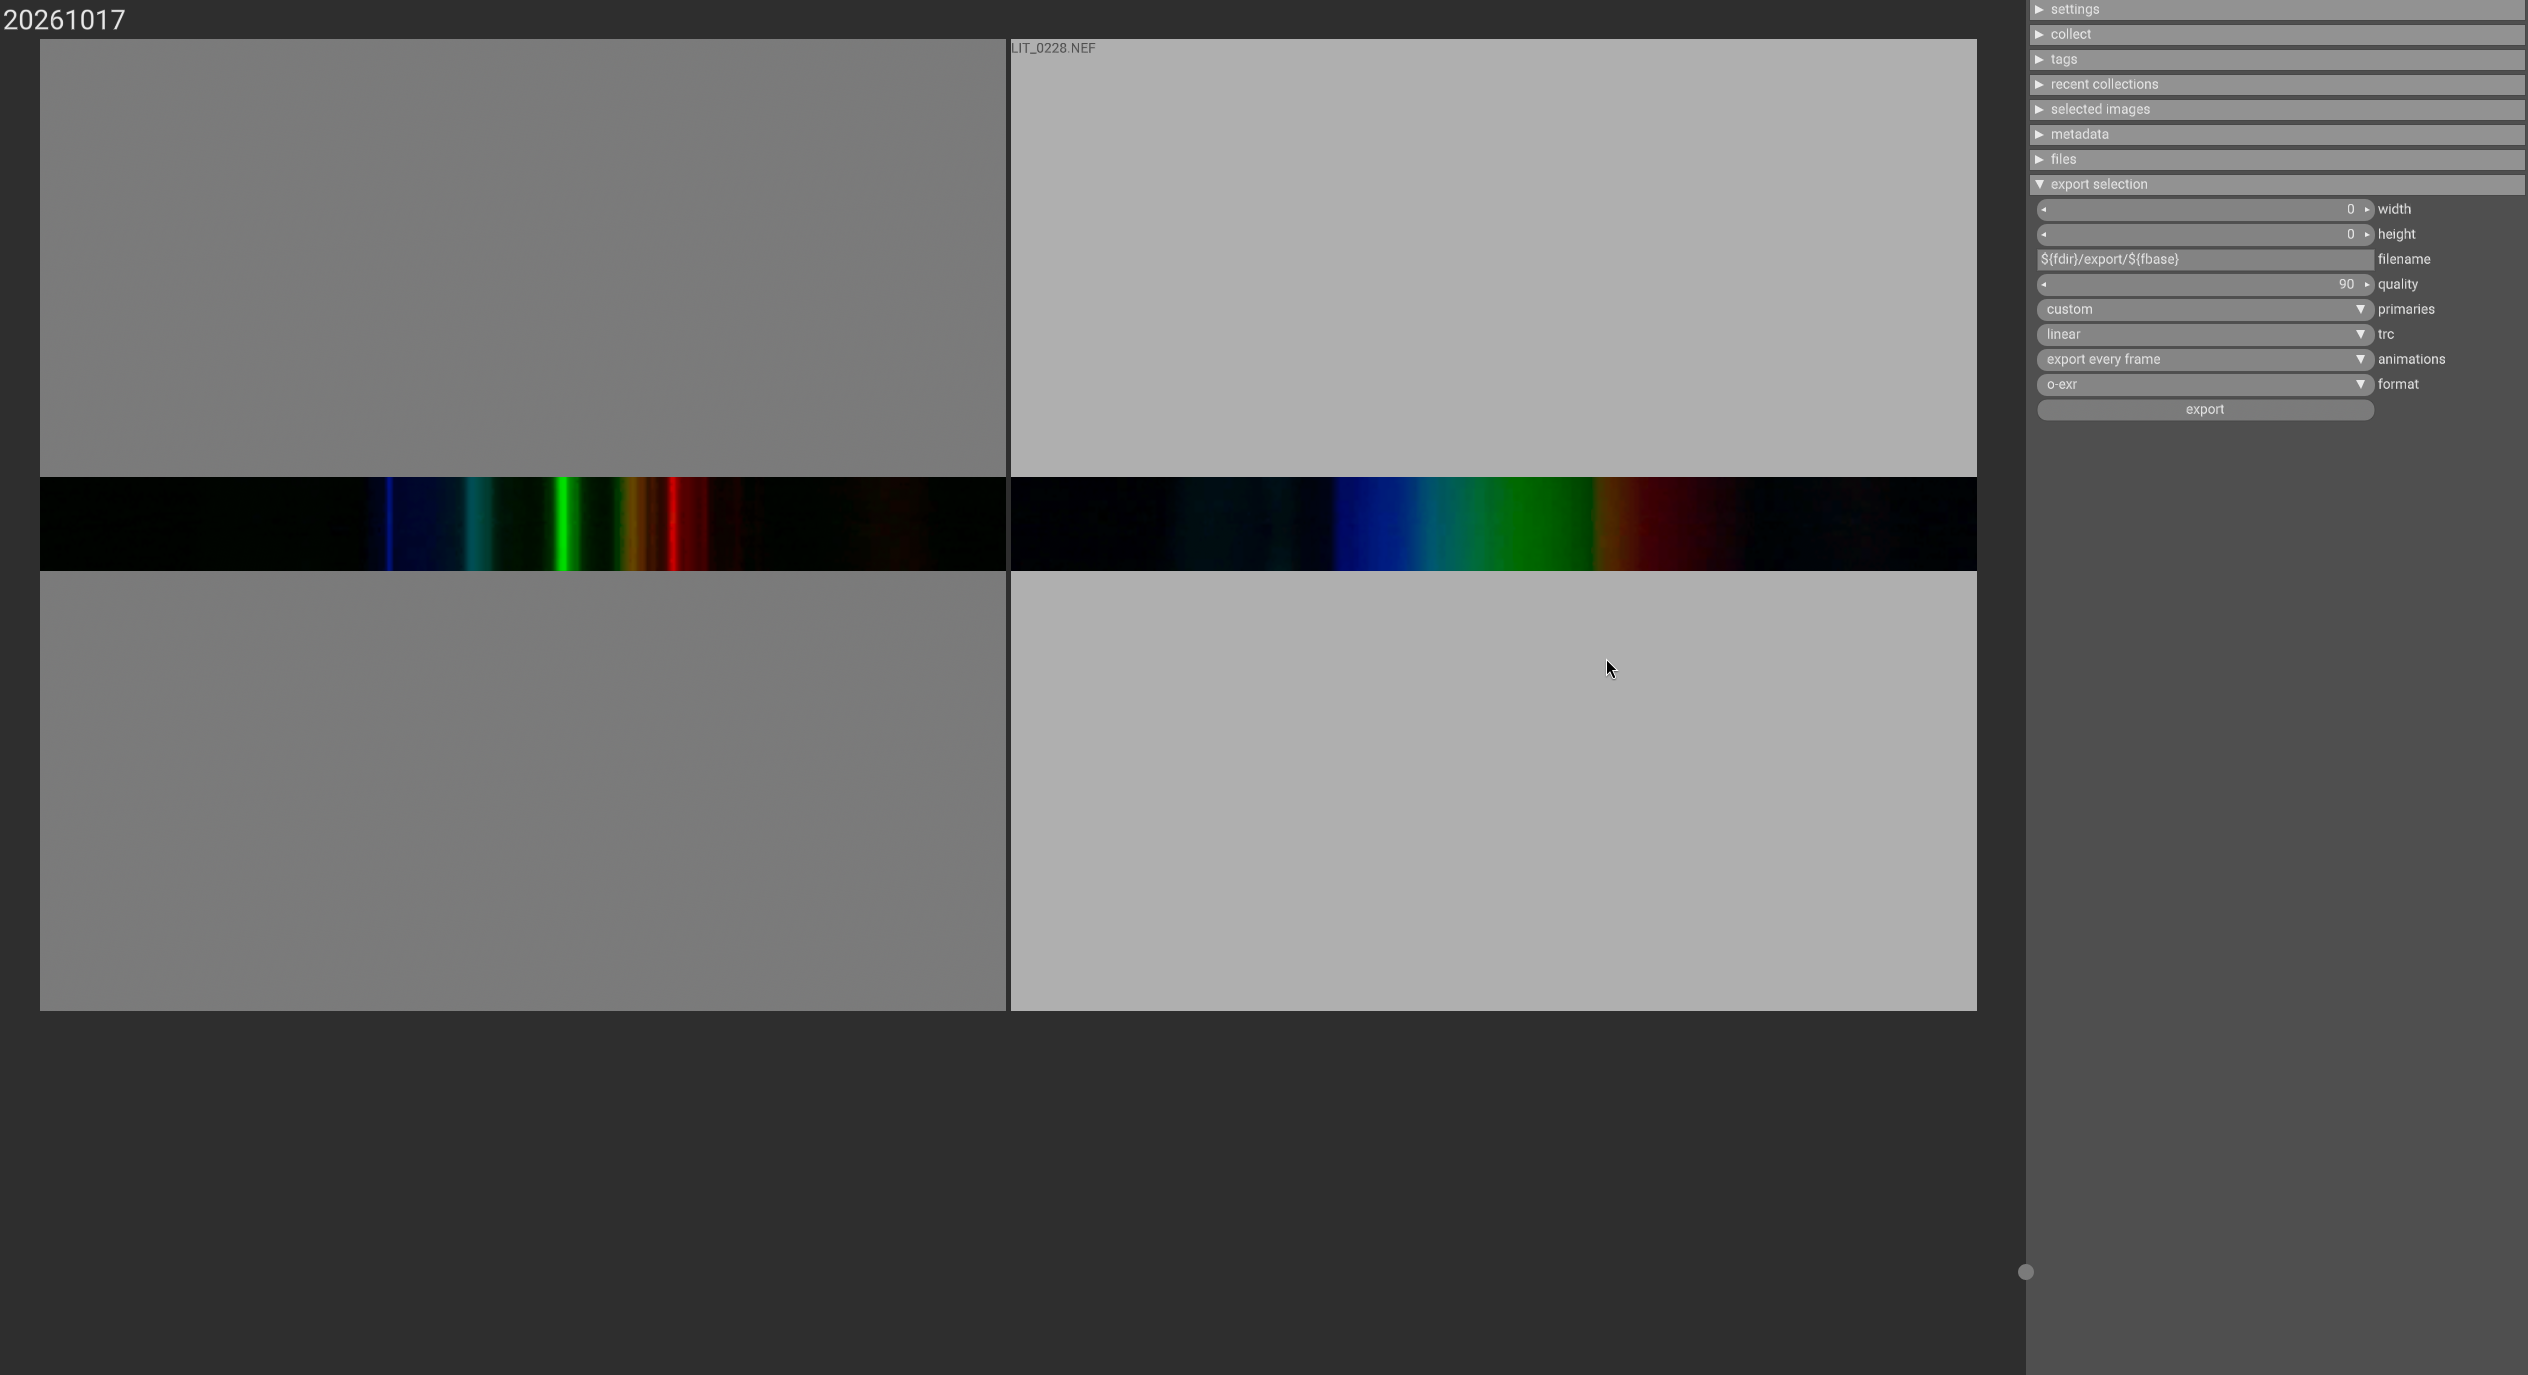
Glenn’s tiff2specdata only accepts tiff, so I had to convert them
spectrum=LIT_0228            # broadband source through slit + grating
calib=LIT_0227               # CFL: 436/546/611 nm lines for wavelength calibration
magick "$spectrum.exr" -flop -depth 16 -set gamma 1 .spec16.tiff
magick "$calib.exr" -flop -depth 16 -set gamma 1 .cal16.tiffthen get the specdata with the tiff2specdata and ssftool.
power=D65_1nm.csv            # SPD of the broadband source (CIE D65 = daylight)
markers="blue=437,green=546,red=611"
calibdata() { tiff2specdata .cal16.tiff; }
pipe() {     # $1 = wavelength range
  tiff2specdata .spec16.tiff \
    | ssftool wavelengthcalibrate "$markers" <(calibdata) \
    | ssftool intervalize "$1" \
    | ssftool powercalibrate "$power" \
    | ssftool normalize
}
pipe 400,730,5 > D7100_ssf.csv
pipe 380,780,5 | awk -F, '{printf "%d %.7f %.7f %.7f\n",$1,$2,$3,$4}' > "Nikon D7100.txt"Output of “Nikon D7100.txt”
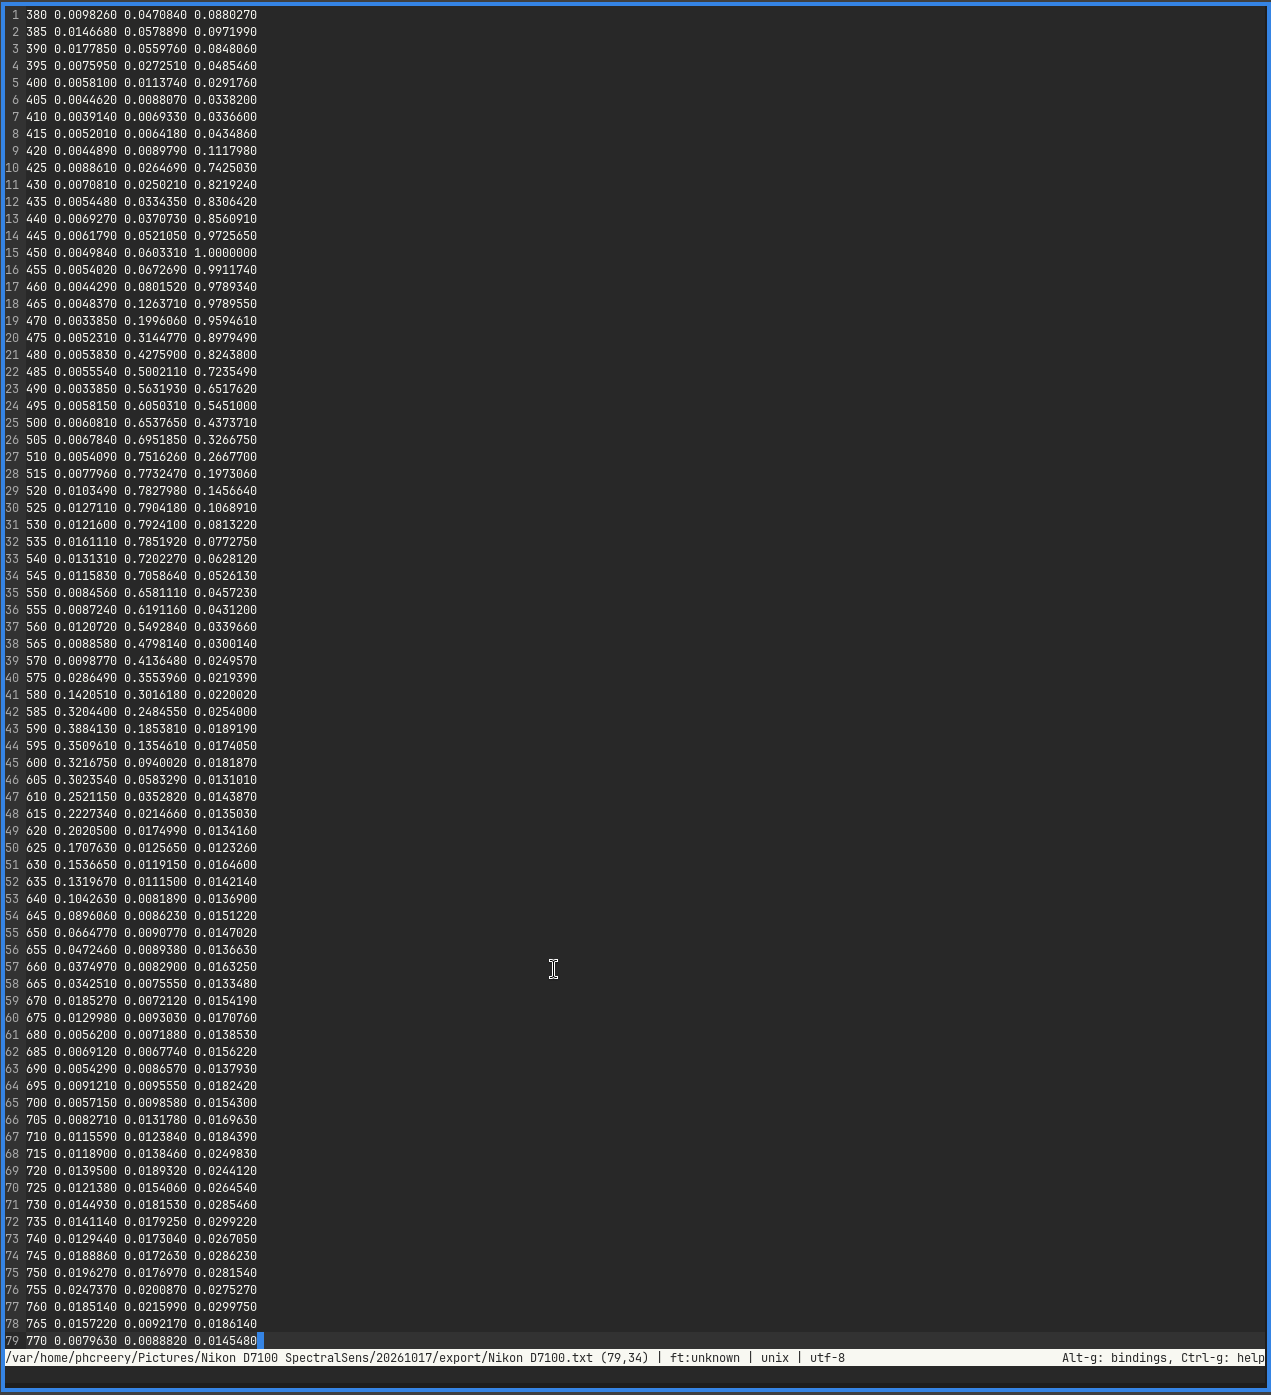
we can then feed this into vkdt
vkdt mkclut "Nikon D7100"this produces a Nikon D7100.lut which can then be copied into ~/.config/vkdt/data/
Results
I finally got the measurements from ssftool, and, umm, thats not right…
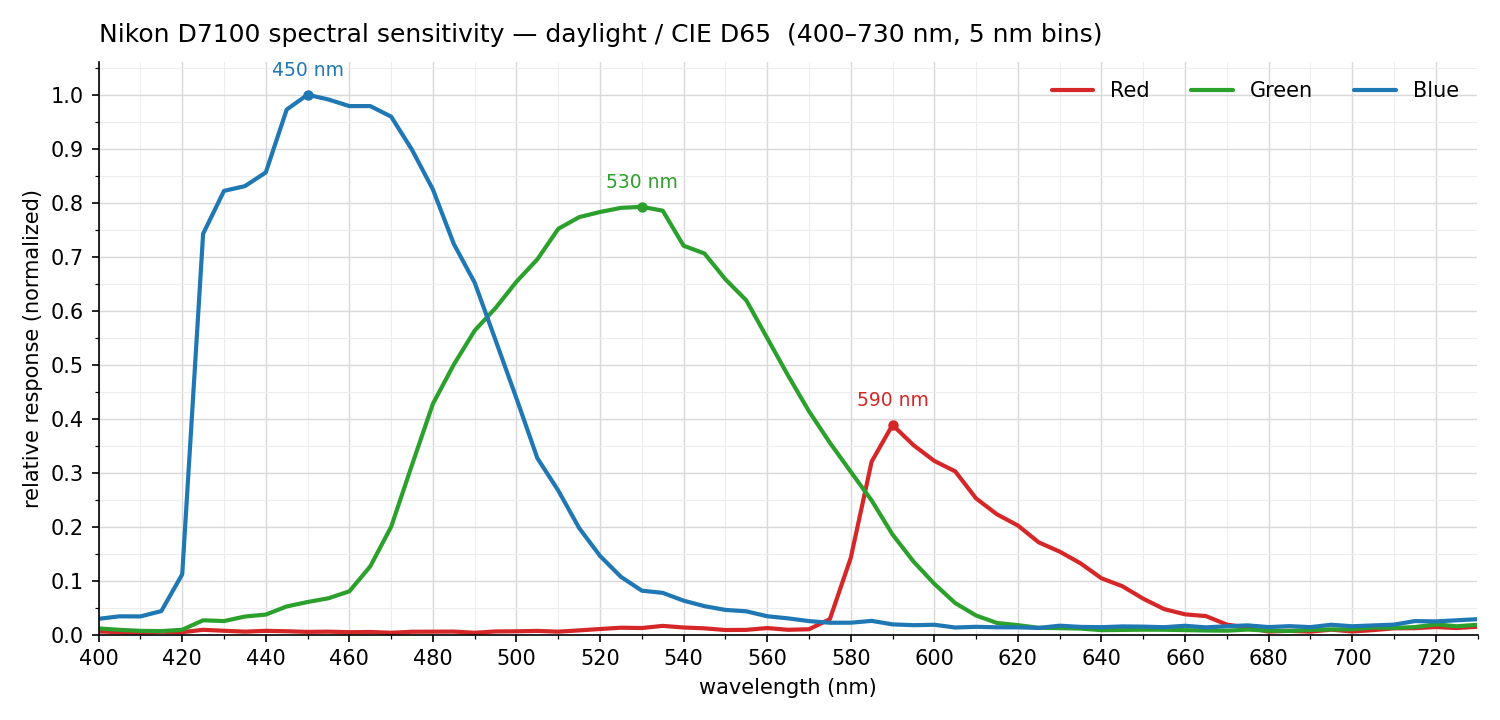
It should look similar to that in another dataset
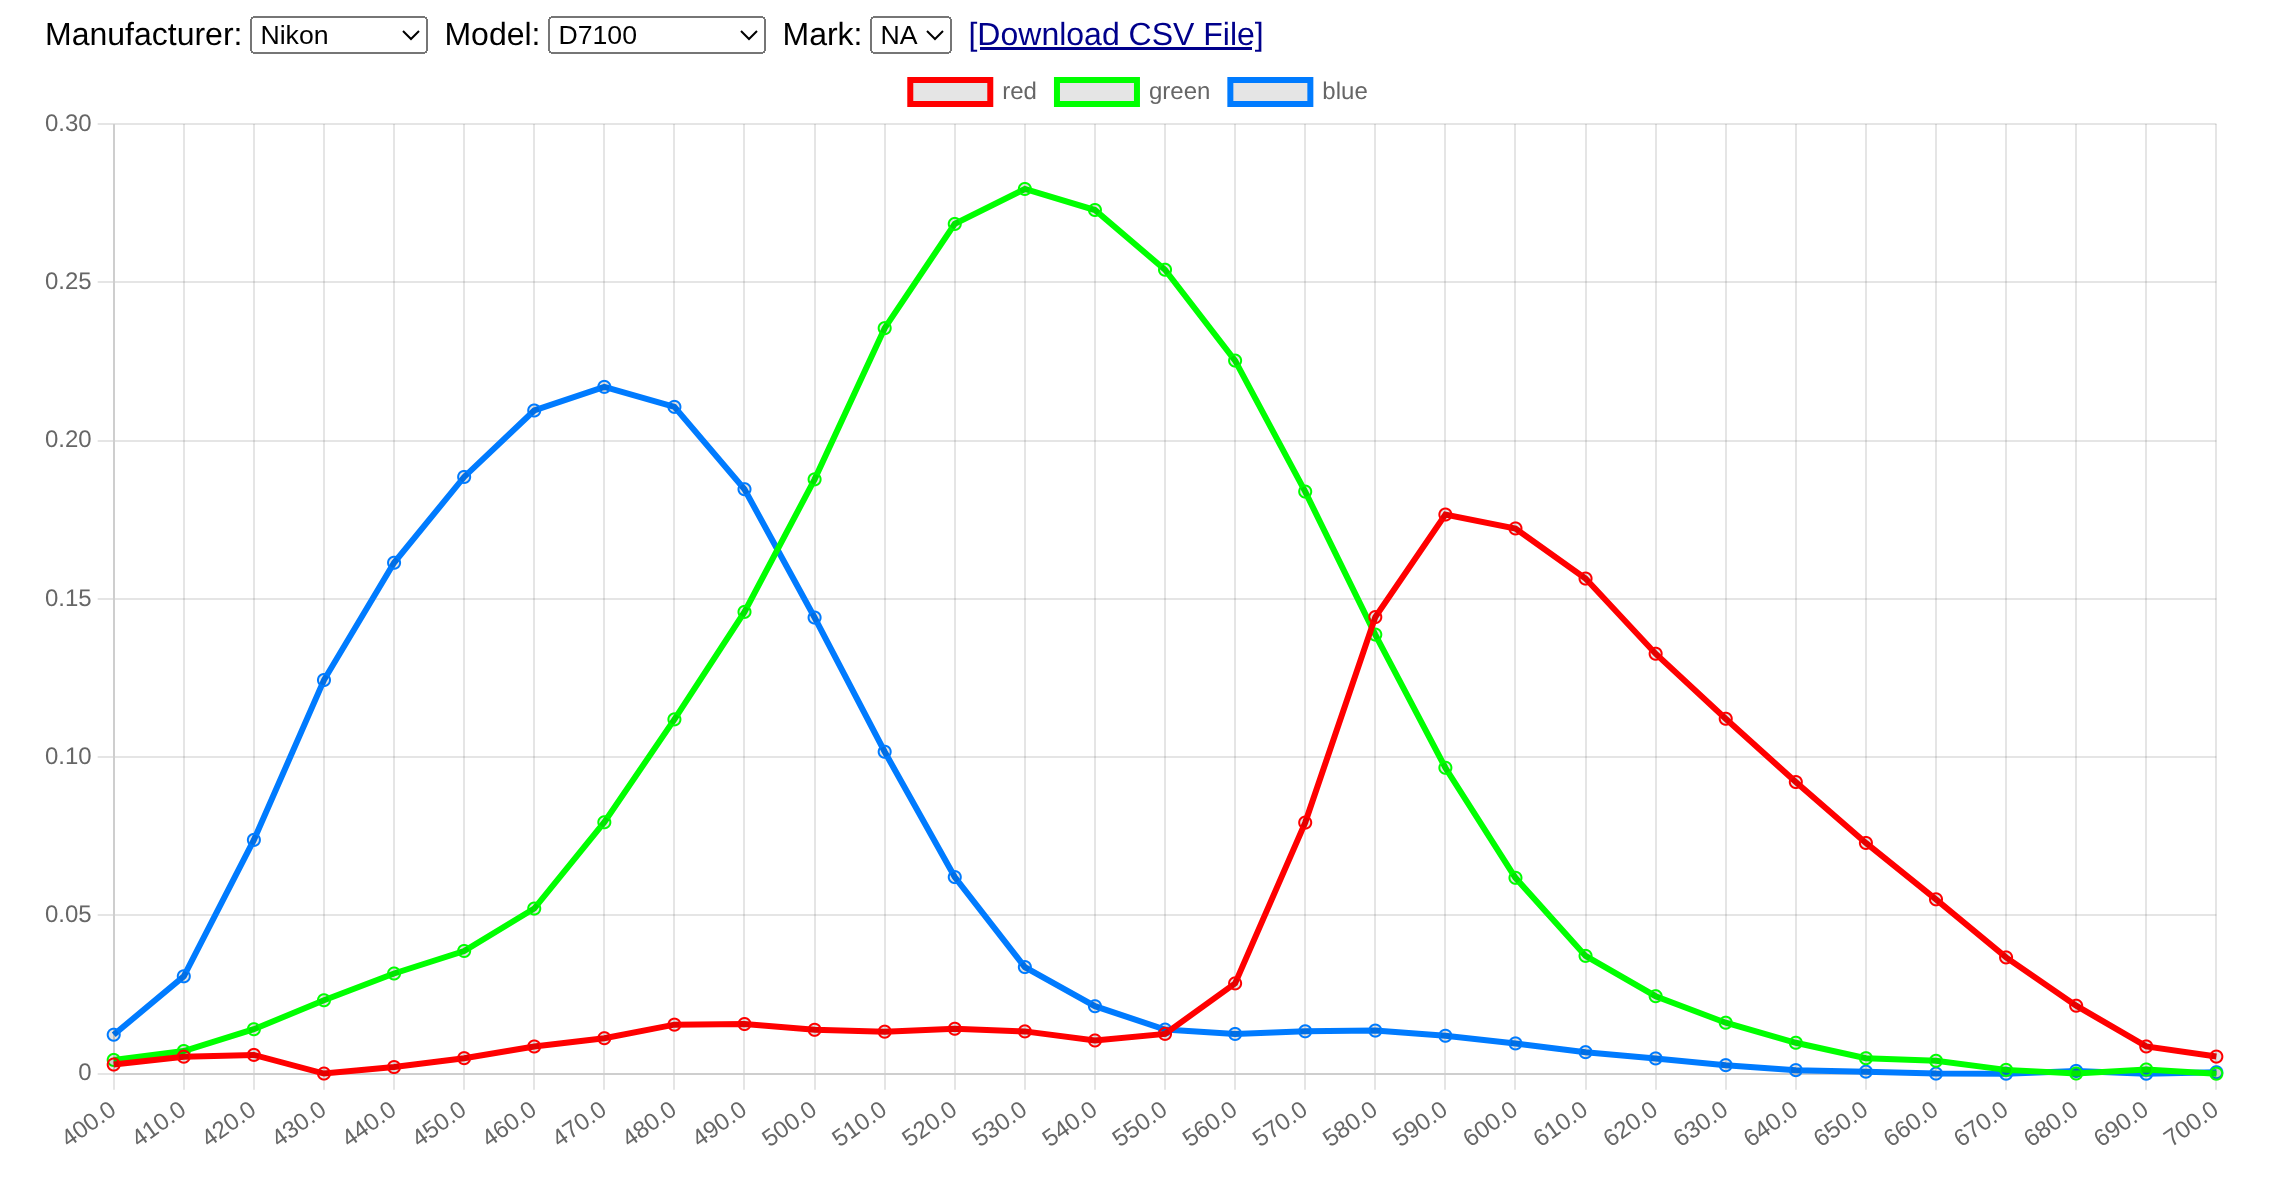 https://color-lab-eilat.github.io/Spectral-sensitivity-estimation-web/#camera-dataset-section
This seemingly lop-sided profile has a dumb reason. My broad-band white-balanced illuminant sample of daylight wasn’t actually D65 white balanced. Sure, I took it at noon in Texas, but, there are probably three reasons why this was a bad idea (c’mon, I was trying to be cheap).
- I was not pointing the spectrometer directly at the sun. Instead it was absorbing mostly sky light, which is cooler, and the reflection of pavement, grass, trees, a fence, maybe a car, etc. It was polluted and skewed from what it should have been. This is not a known-spectrum so I can’t create a SSF from it.
- Ideally you would go with something more similar to a black-body radiant. Daylight isn’t very smooth to start with. Even if I did orient it right, “outdoor daylight” is almost never CIE D65 — D65 is a standardized smooth SPD. My measurement has those little Fraunhofer lines.
- It is not reproducible. If I try this measurement again, I will end up with different results.
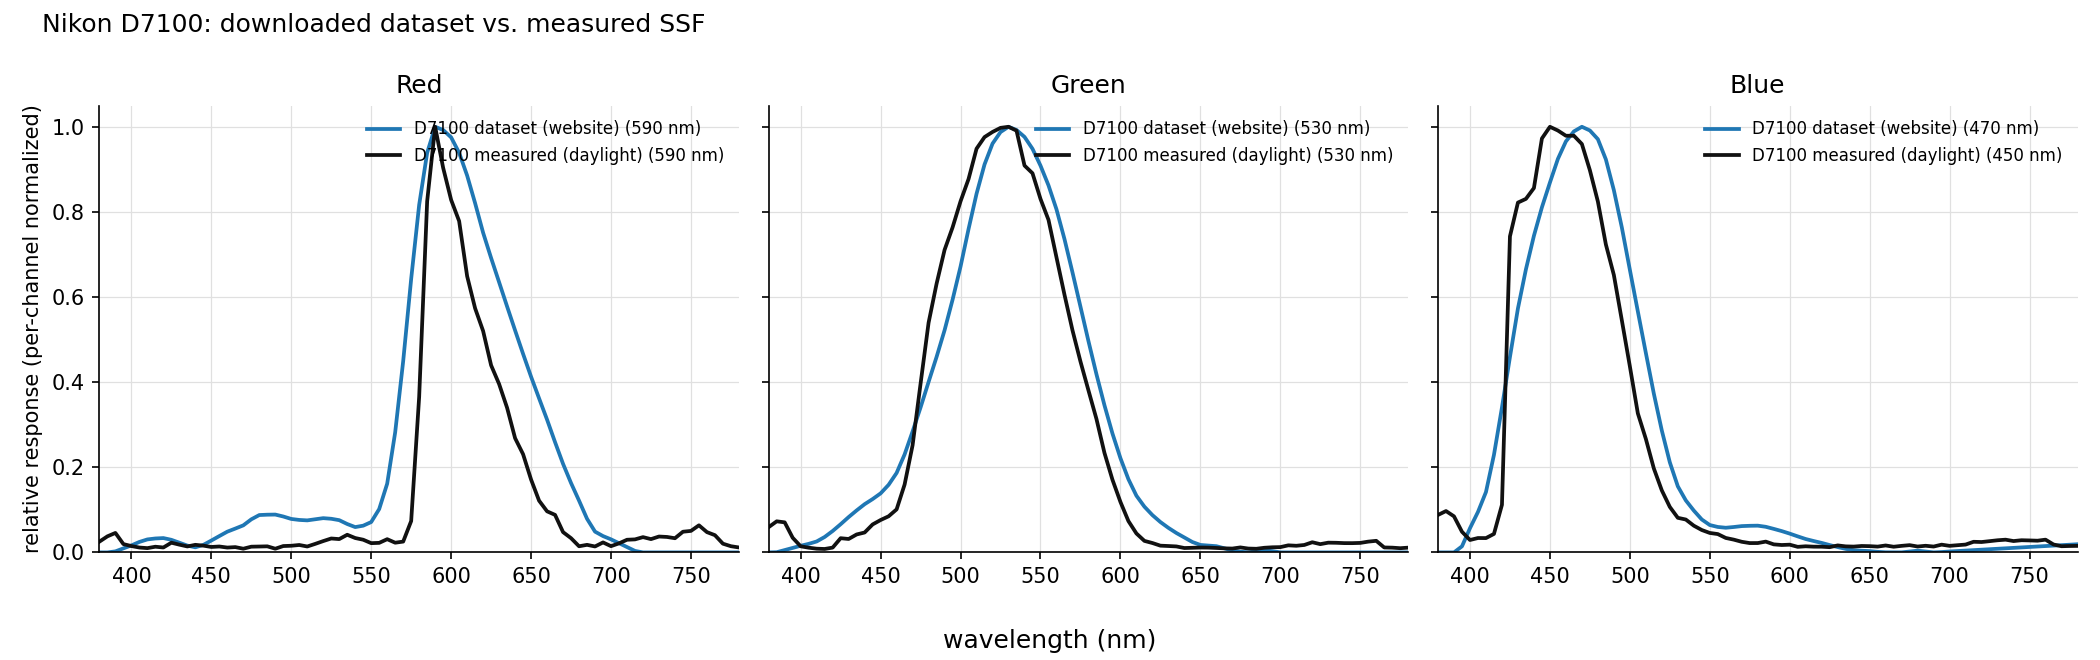
Anyways, I will continue on and call it an artistic touch (I think I can WB this out). To help re-instill confidence, here is what it looks like next to a the spectra I downloaded from https://color-lab-eilat.github.io/
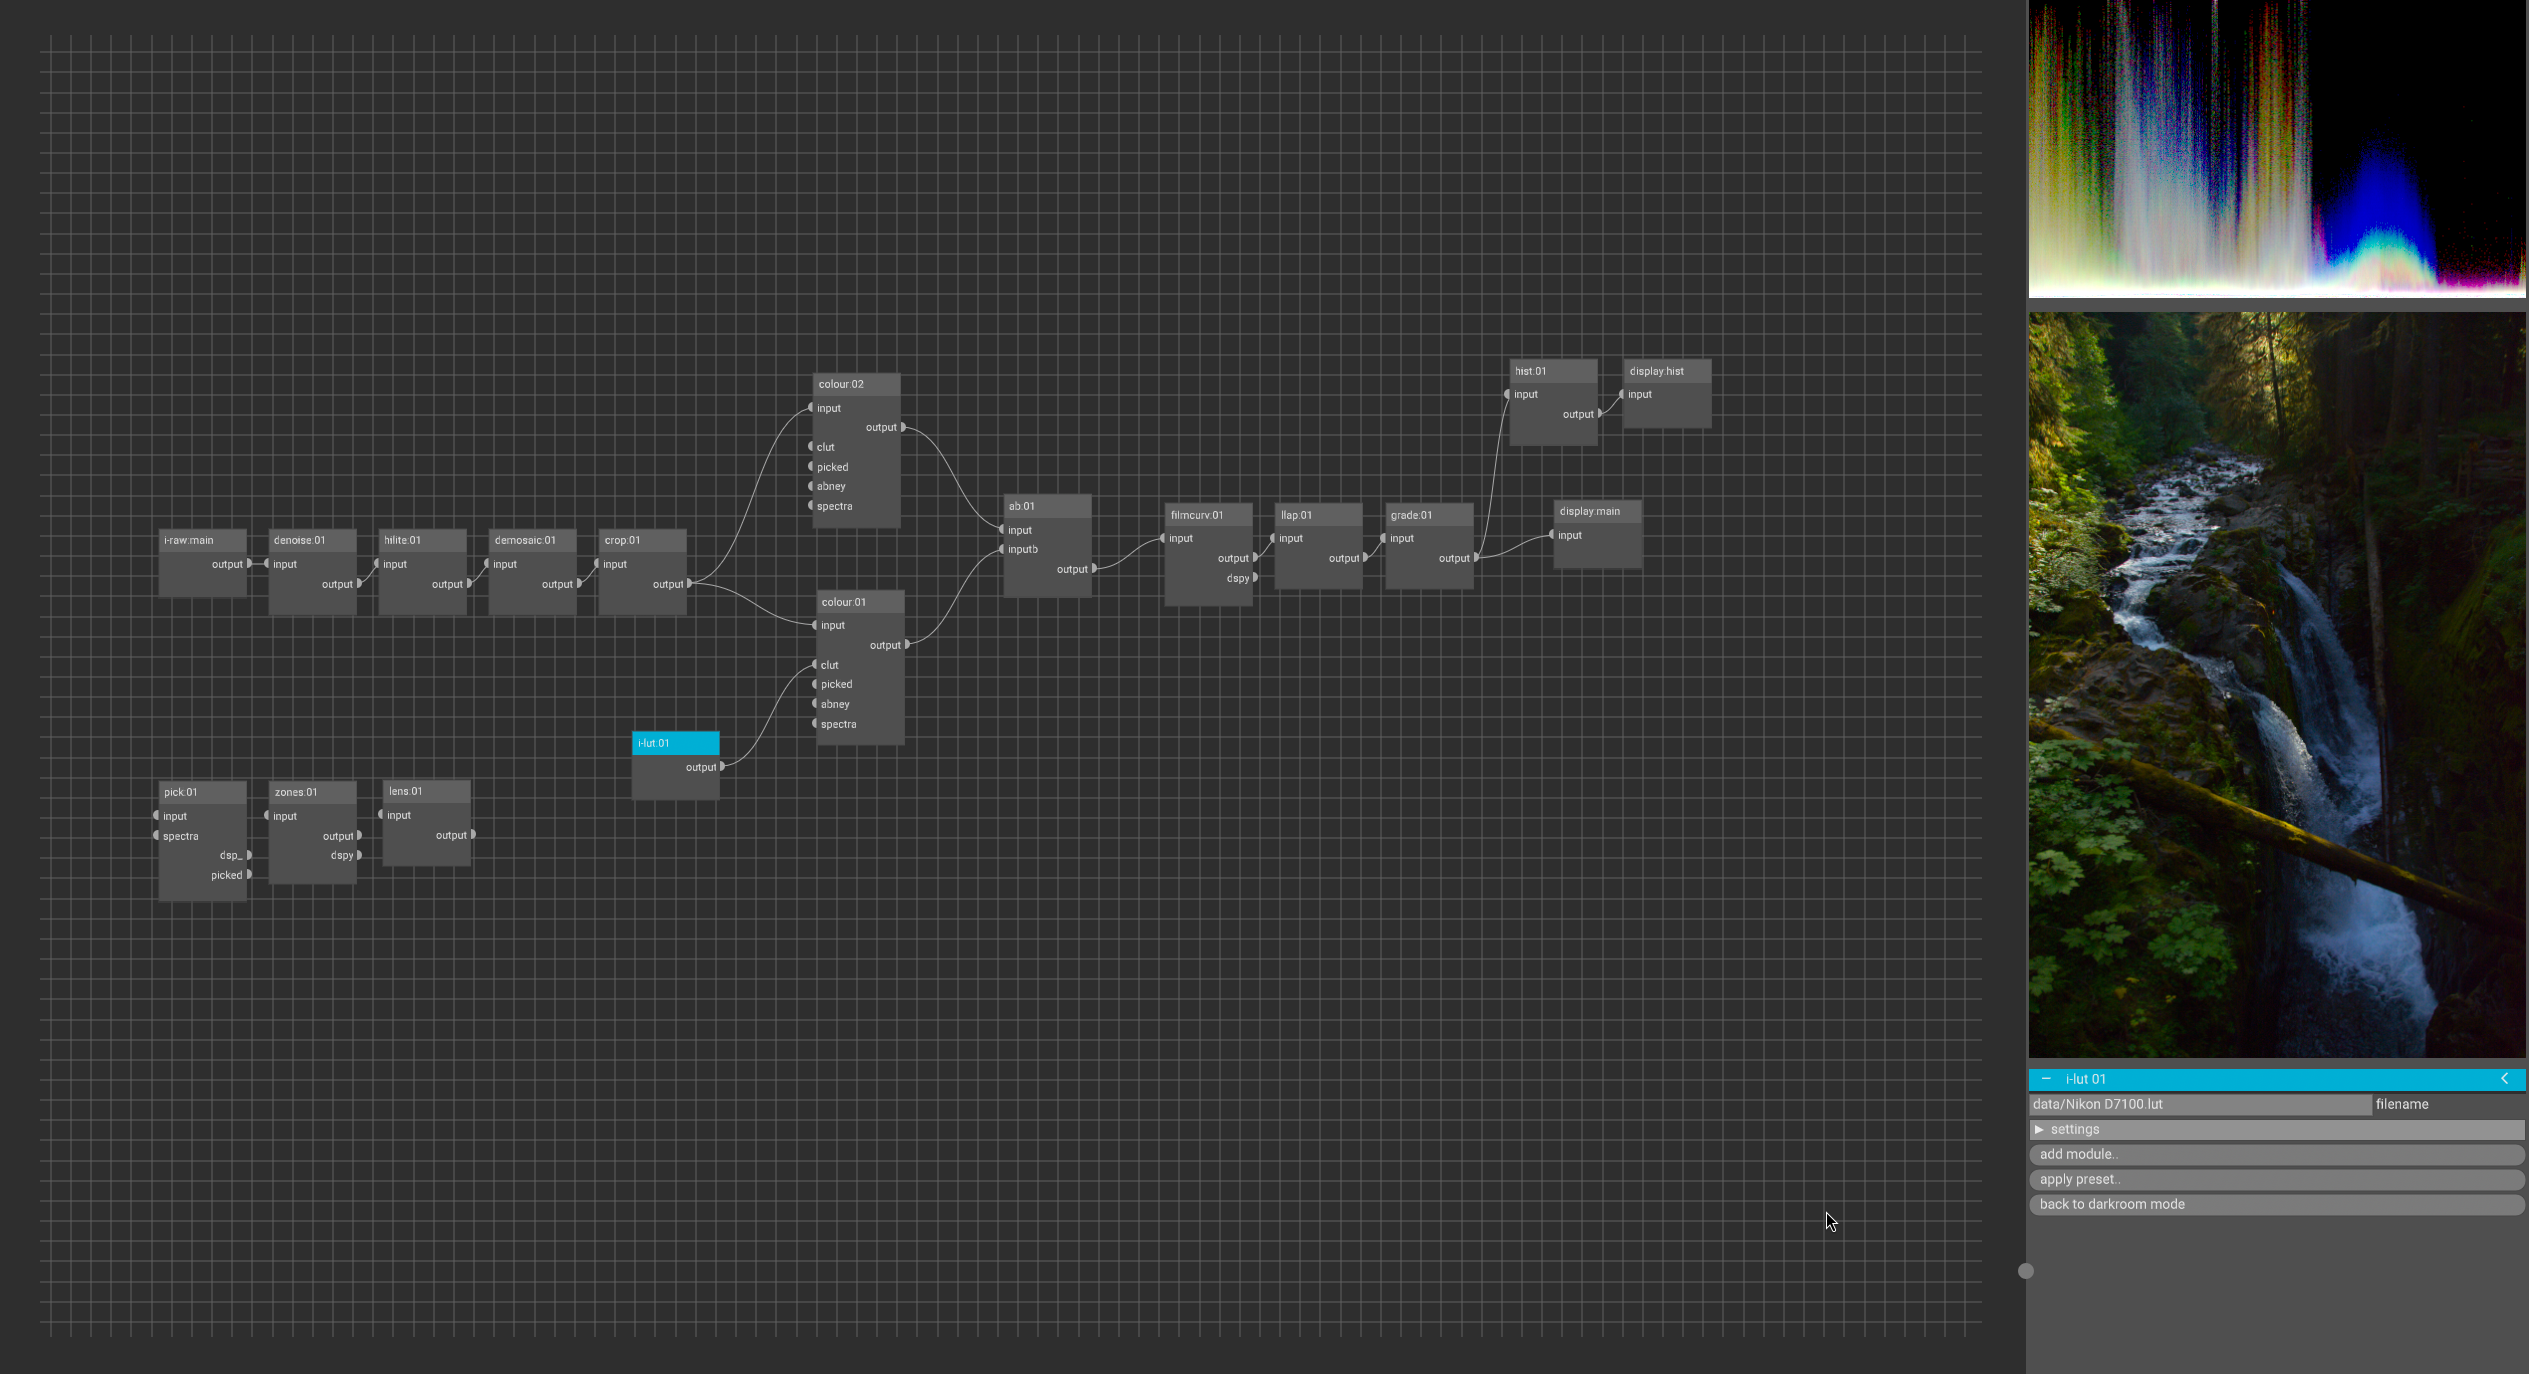
Now we can open an image (take on out nikon D7100) in vkdt, add a i-lut module, set the filename to our data/Nikon D7100.lut and connect it to the clut input on the colour module as well as set the colour matrix param to clut.
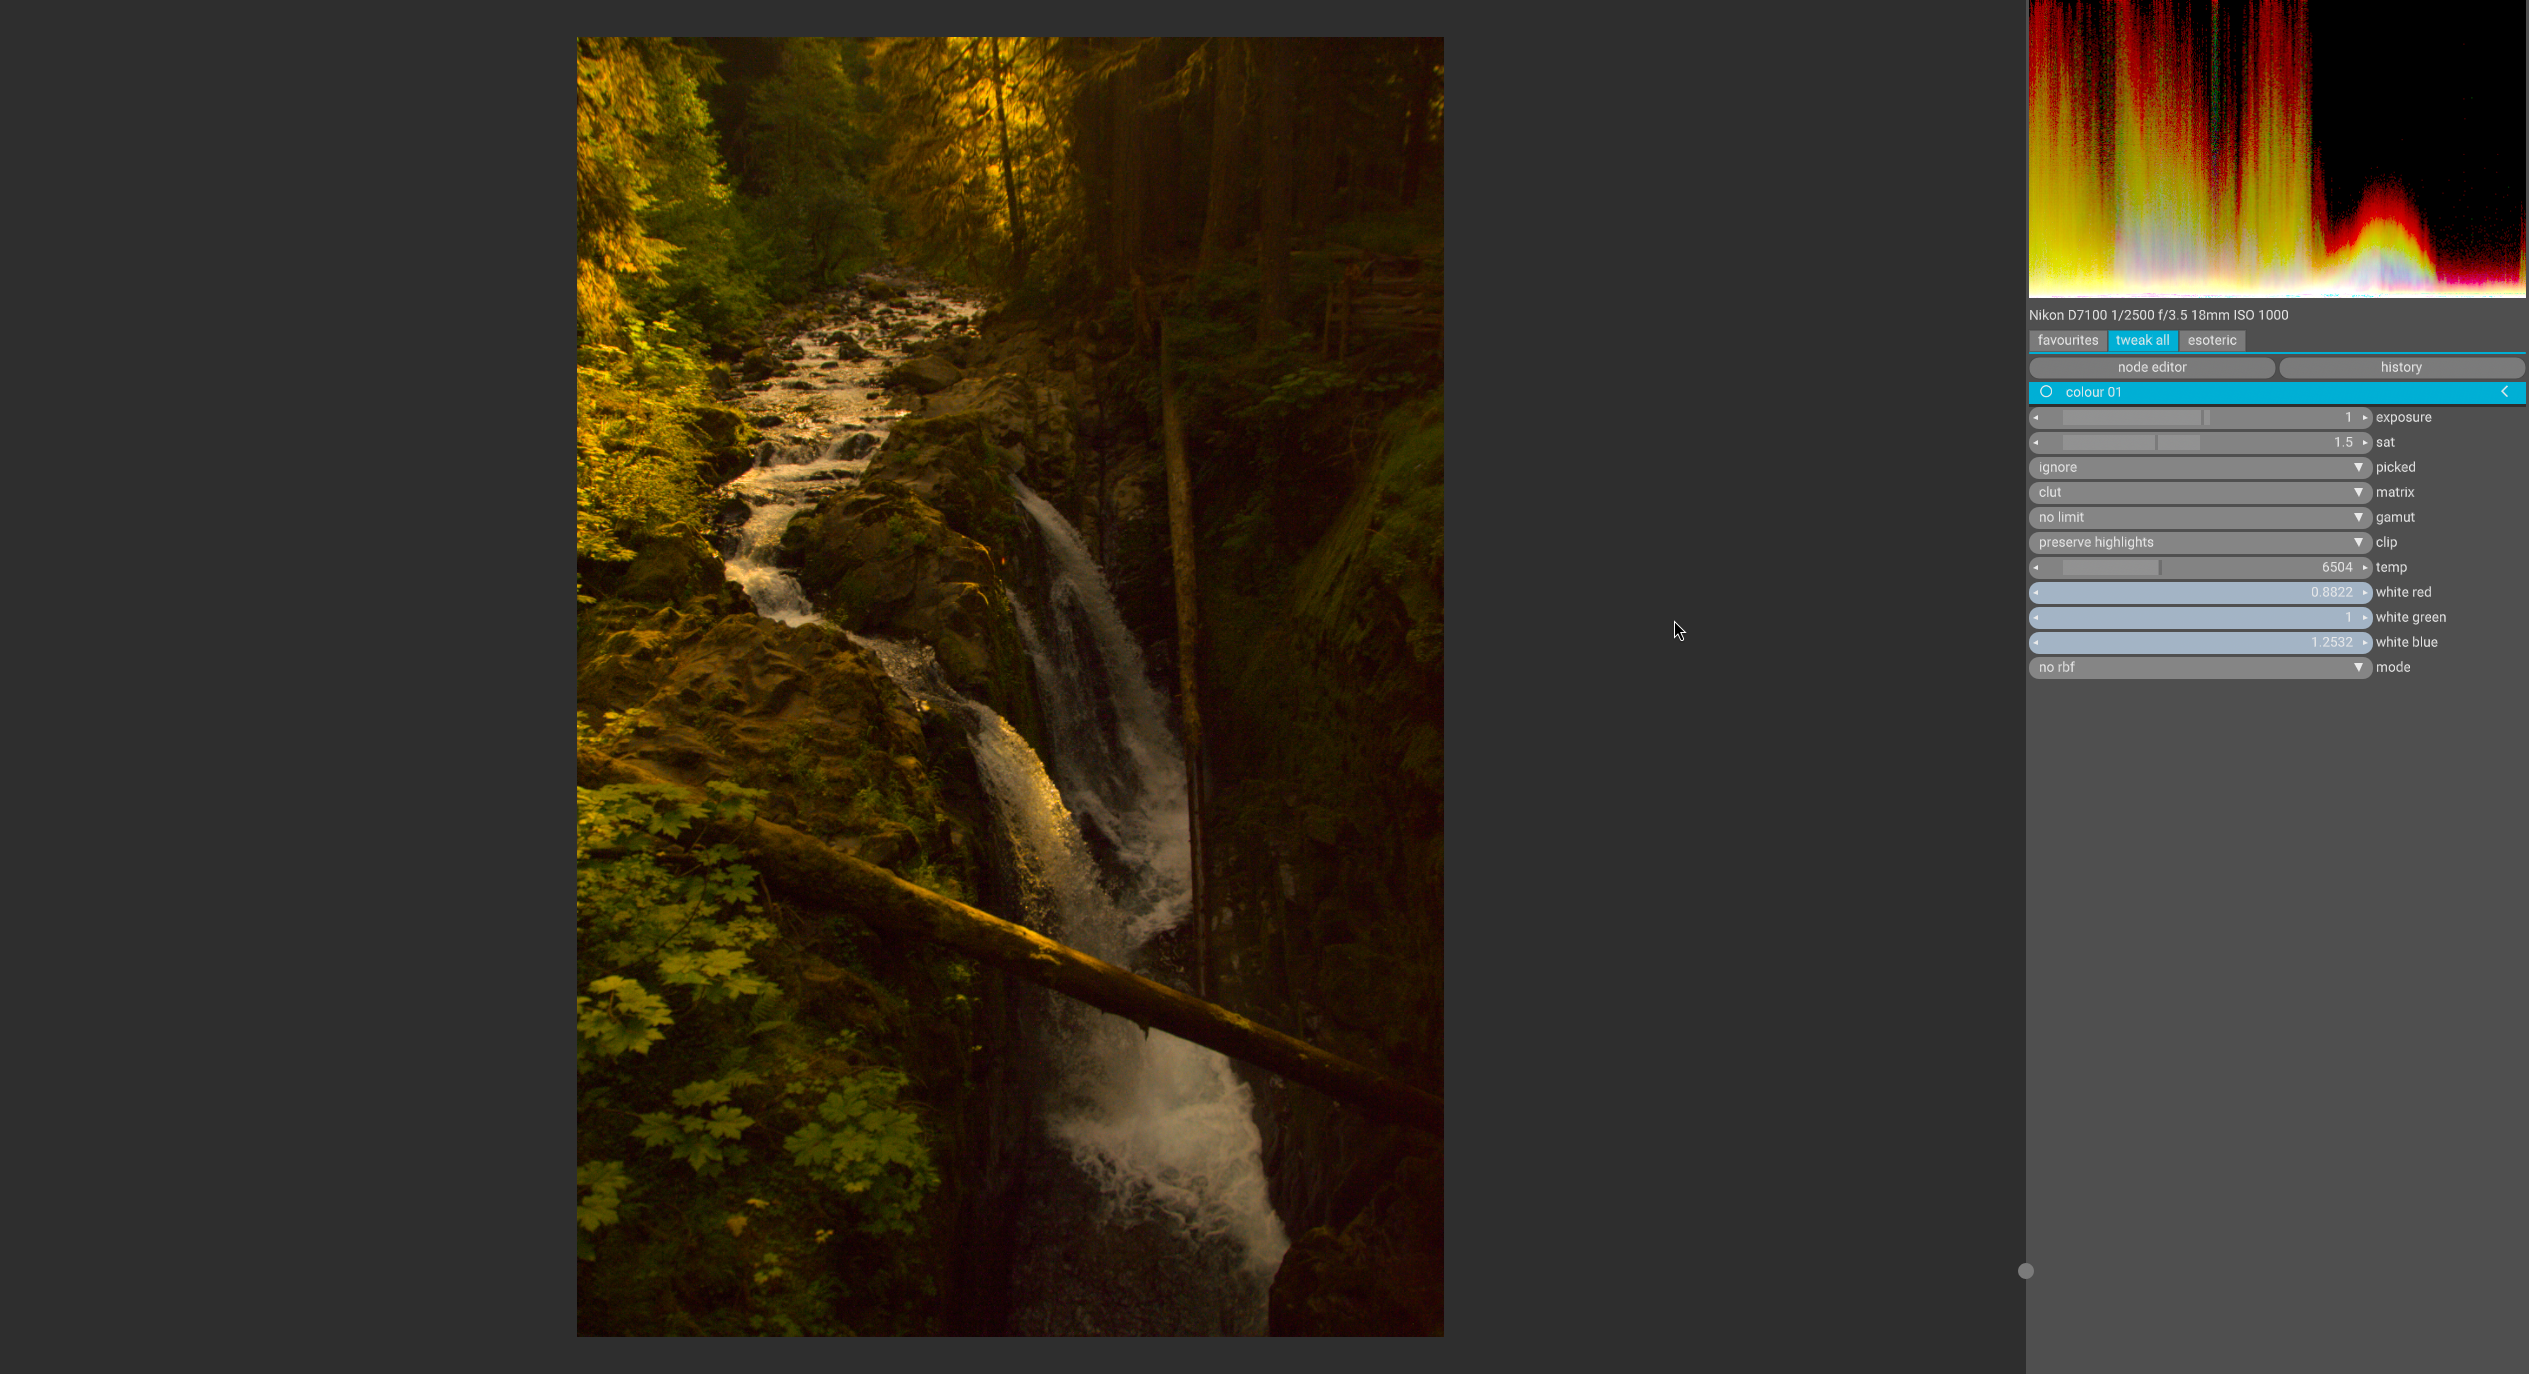
This reveals a temp slider, and a white balance thrown way off.
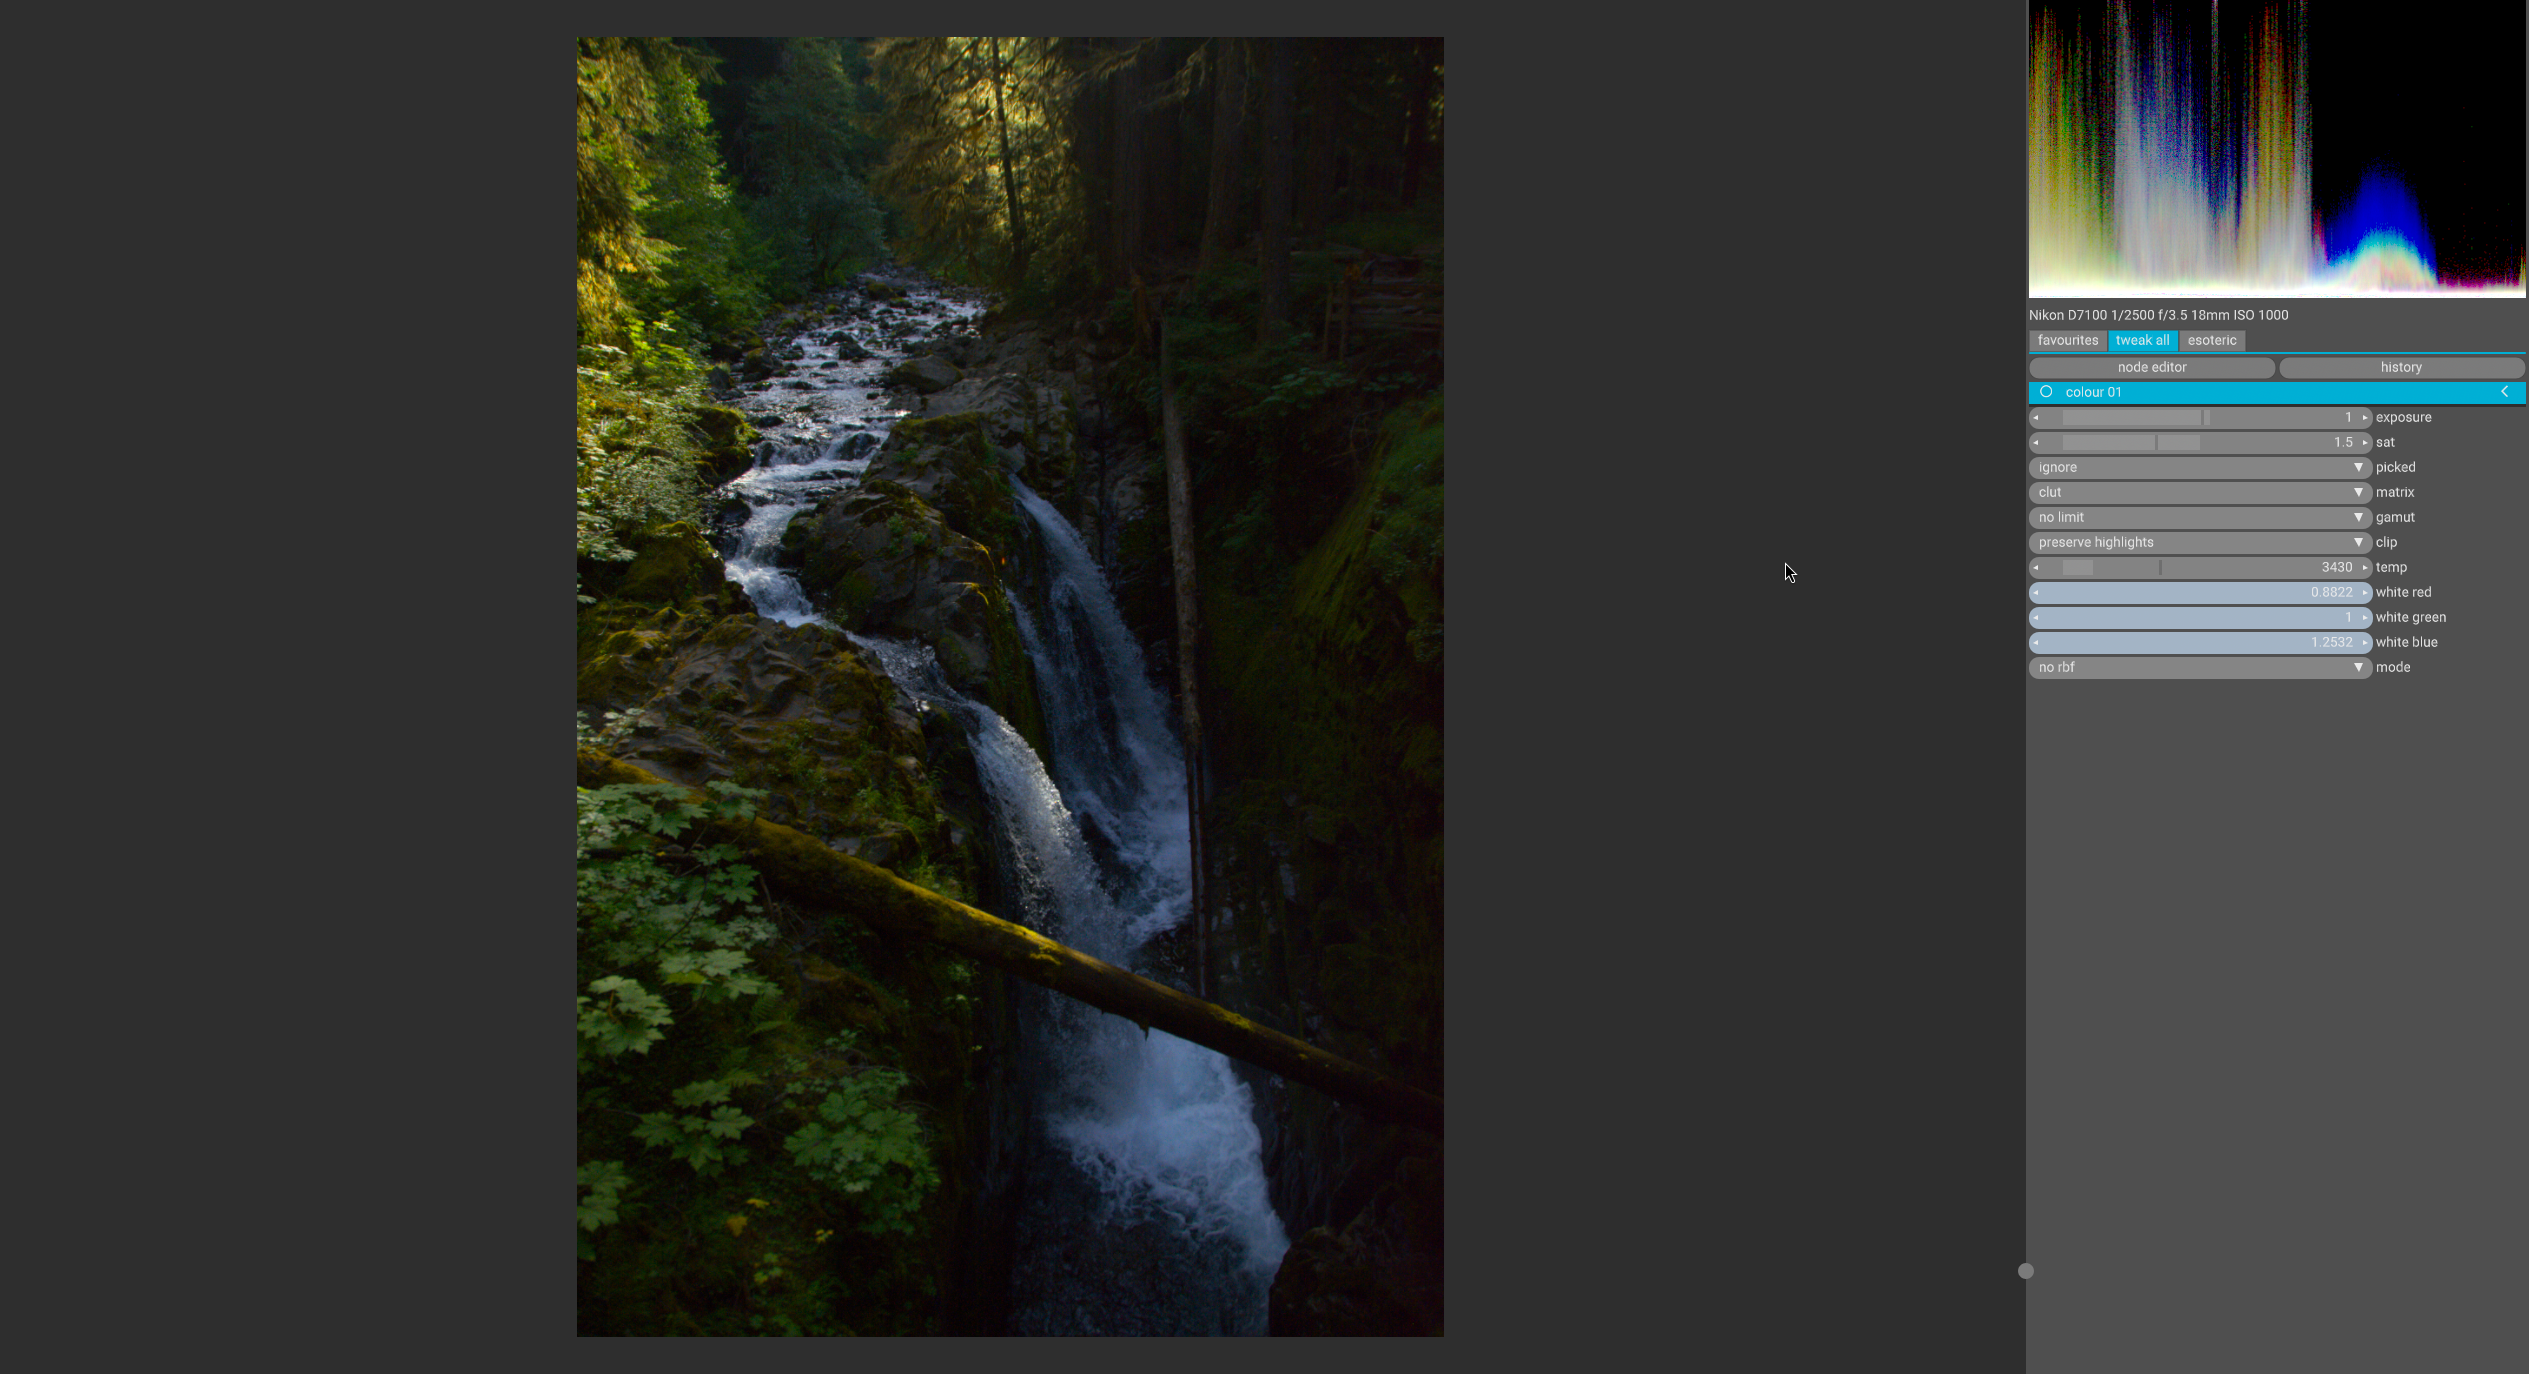
If it drop the temp down (to compensate for our dumb artistic choice earlier), we get attractive results
Is this actually better than the 3x3 transform matrix?
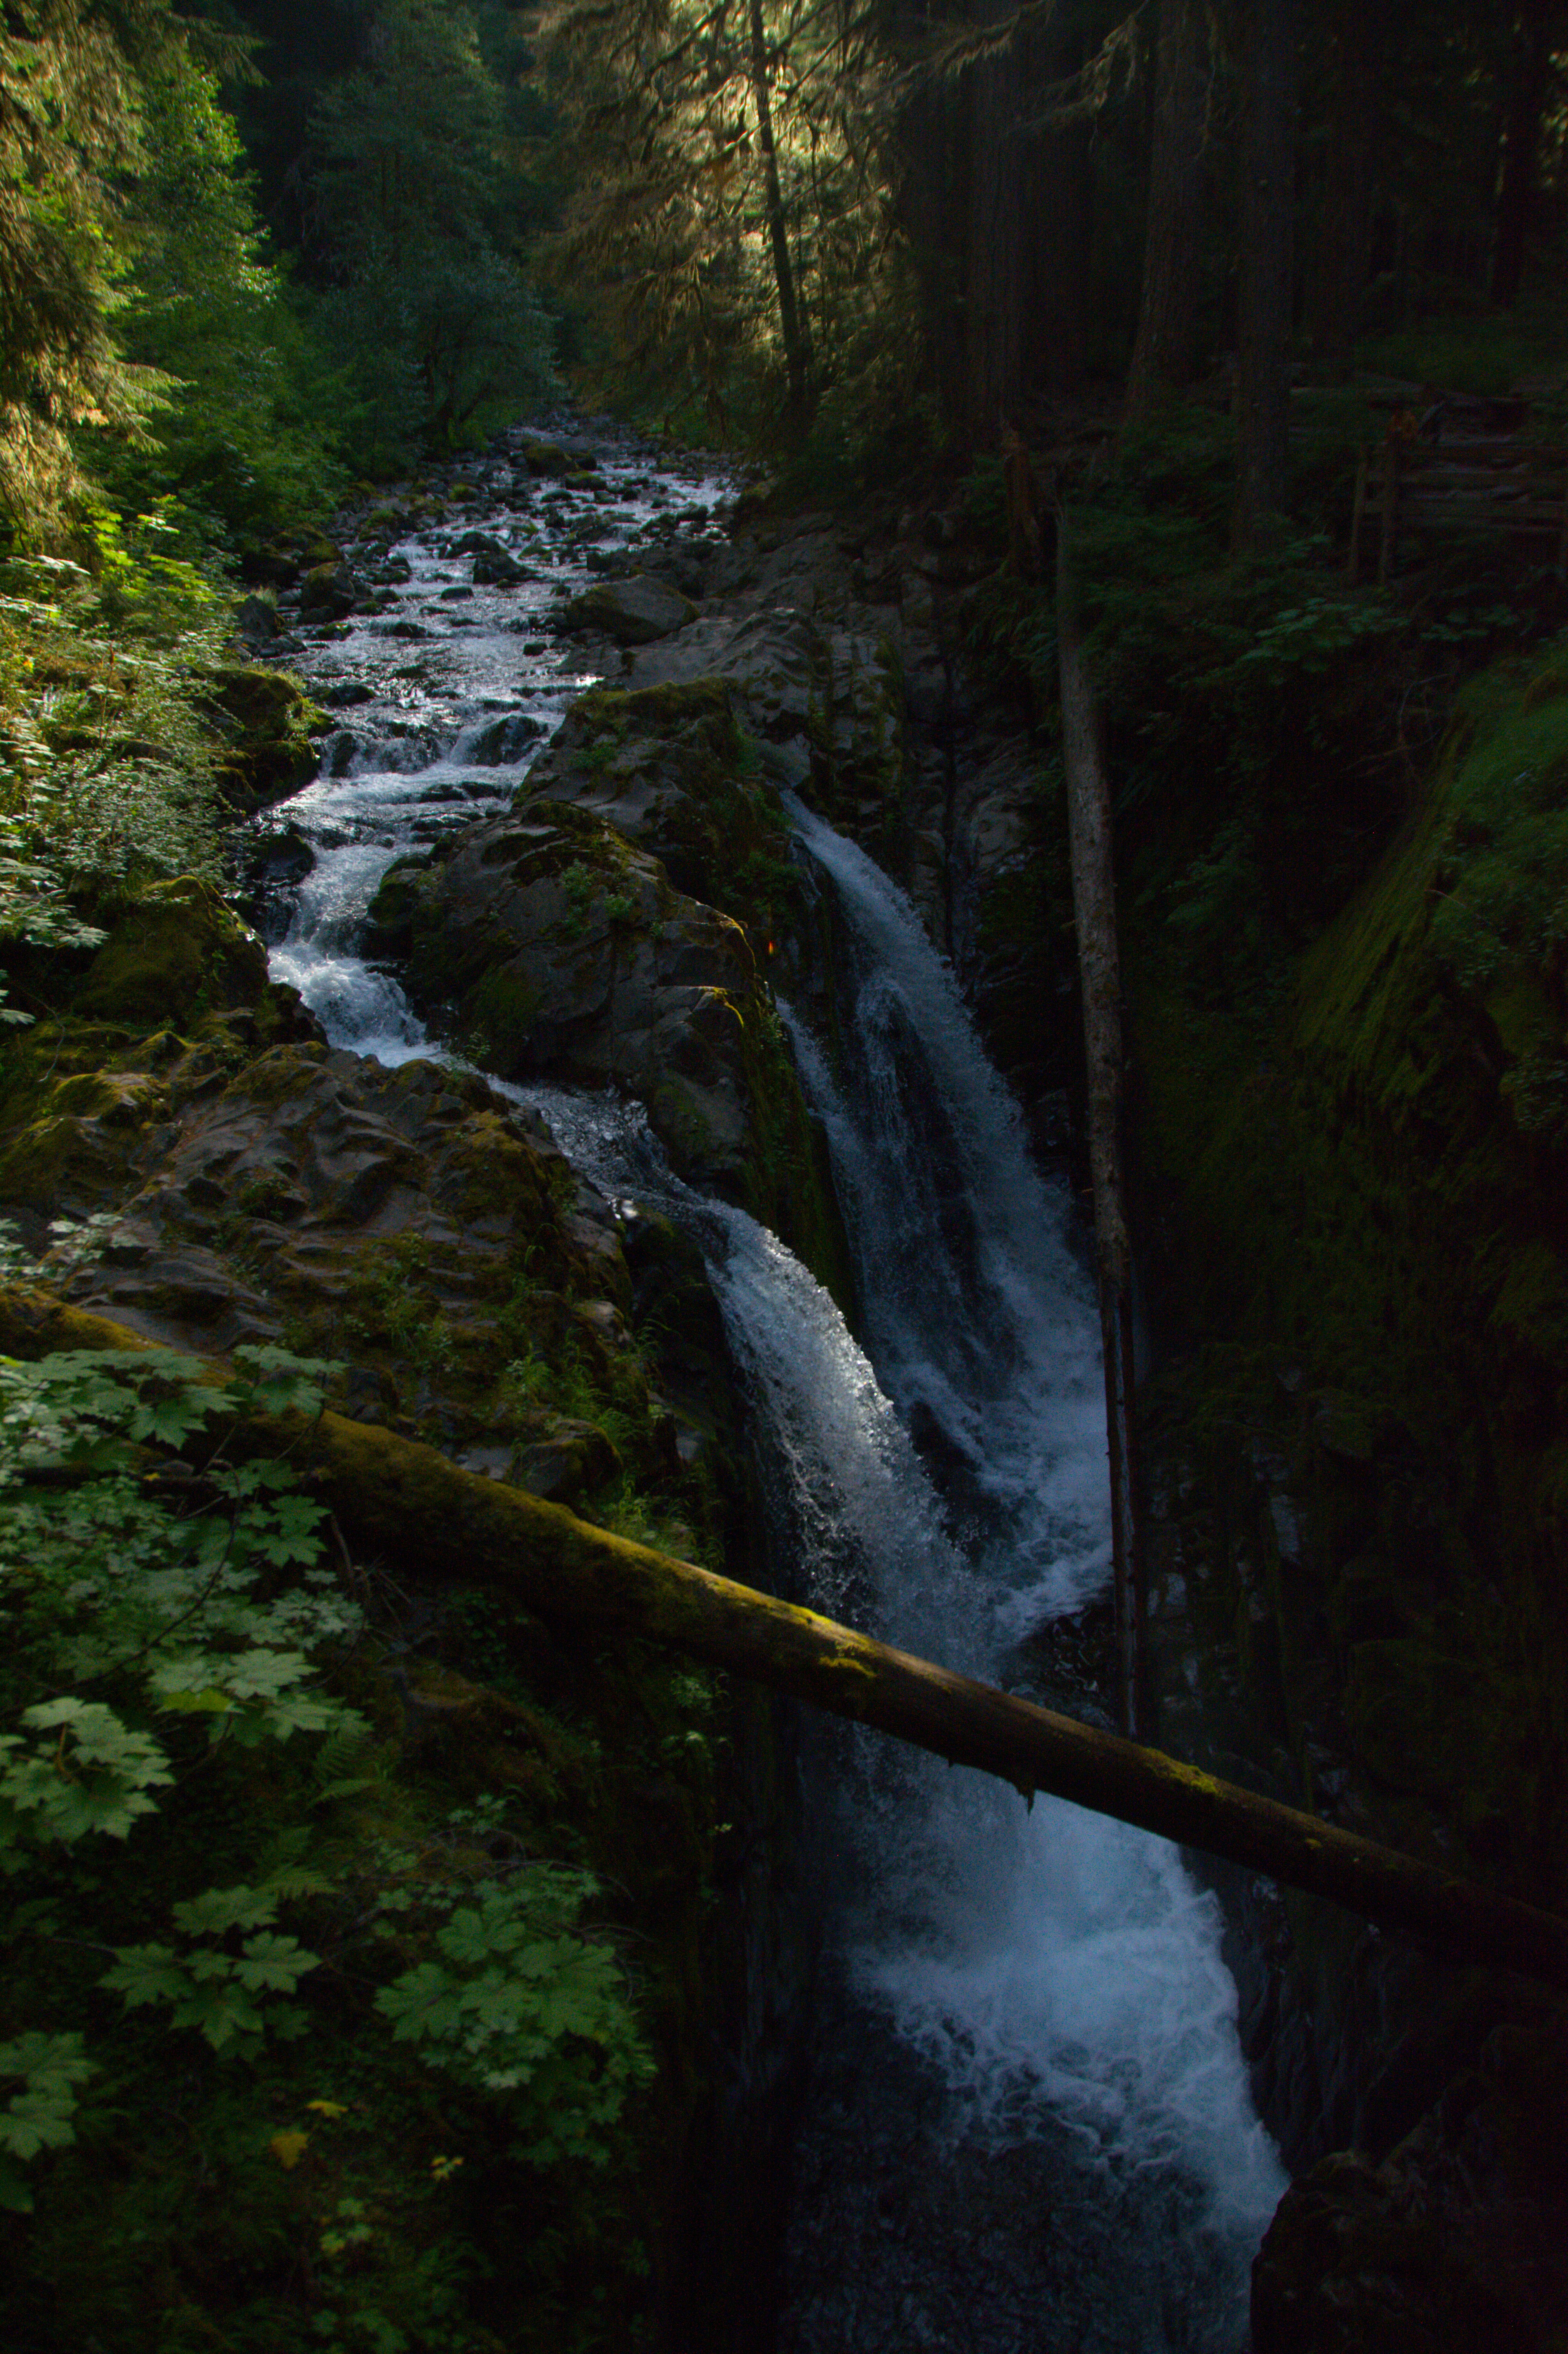 Default processing with raw file embedded 3x3 transform matrix
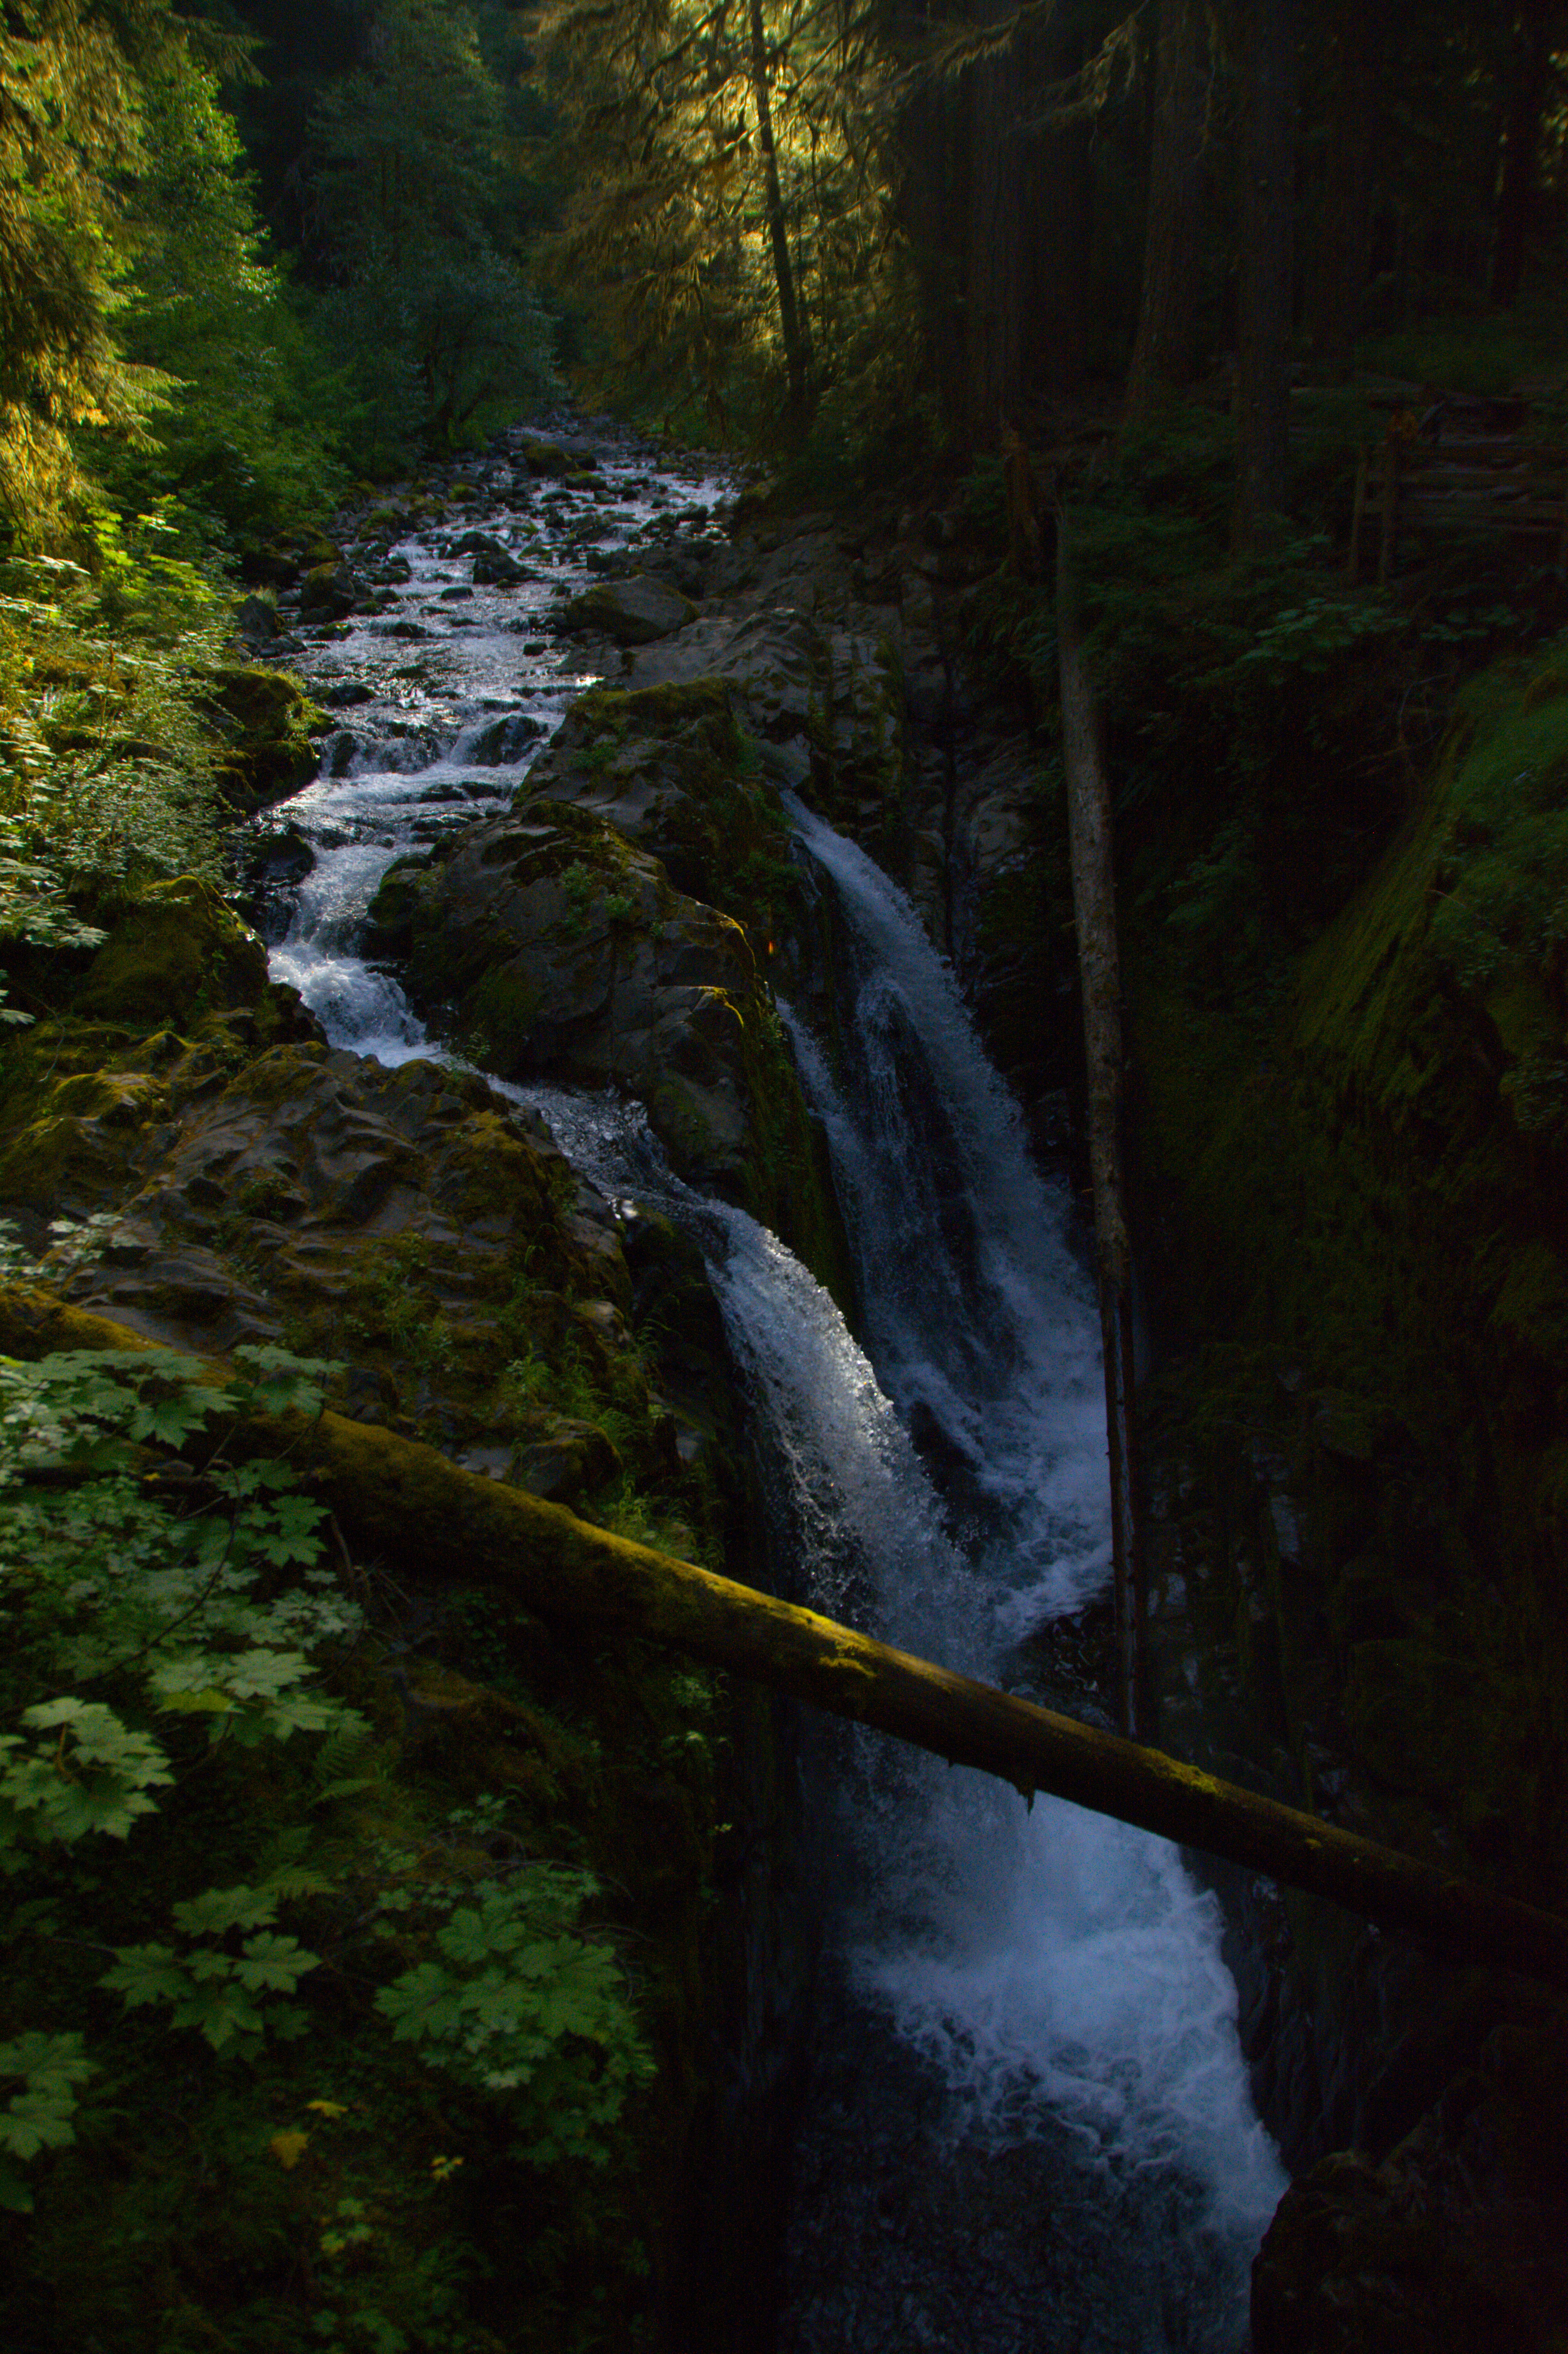 Spectral processing with profile we just created
I had to toy with the WB and exposure to get these to look similar. everything else is identical. It is very subtle, but the greens seem more saturated, especially the top-center tree.
I decided to add in the D7100 dataset I found online at Spectral Sensitivity Estimation Without a Camera. Comparing them side-by-side is difficult. I am also lazy and only tested one image. If I get around to it, I might try some more challenging images.
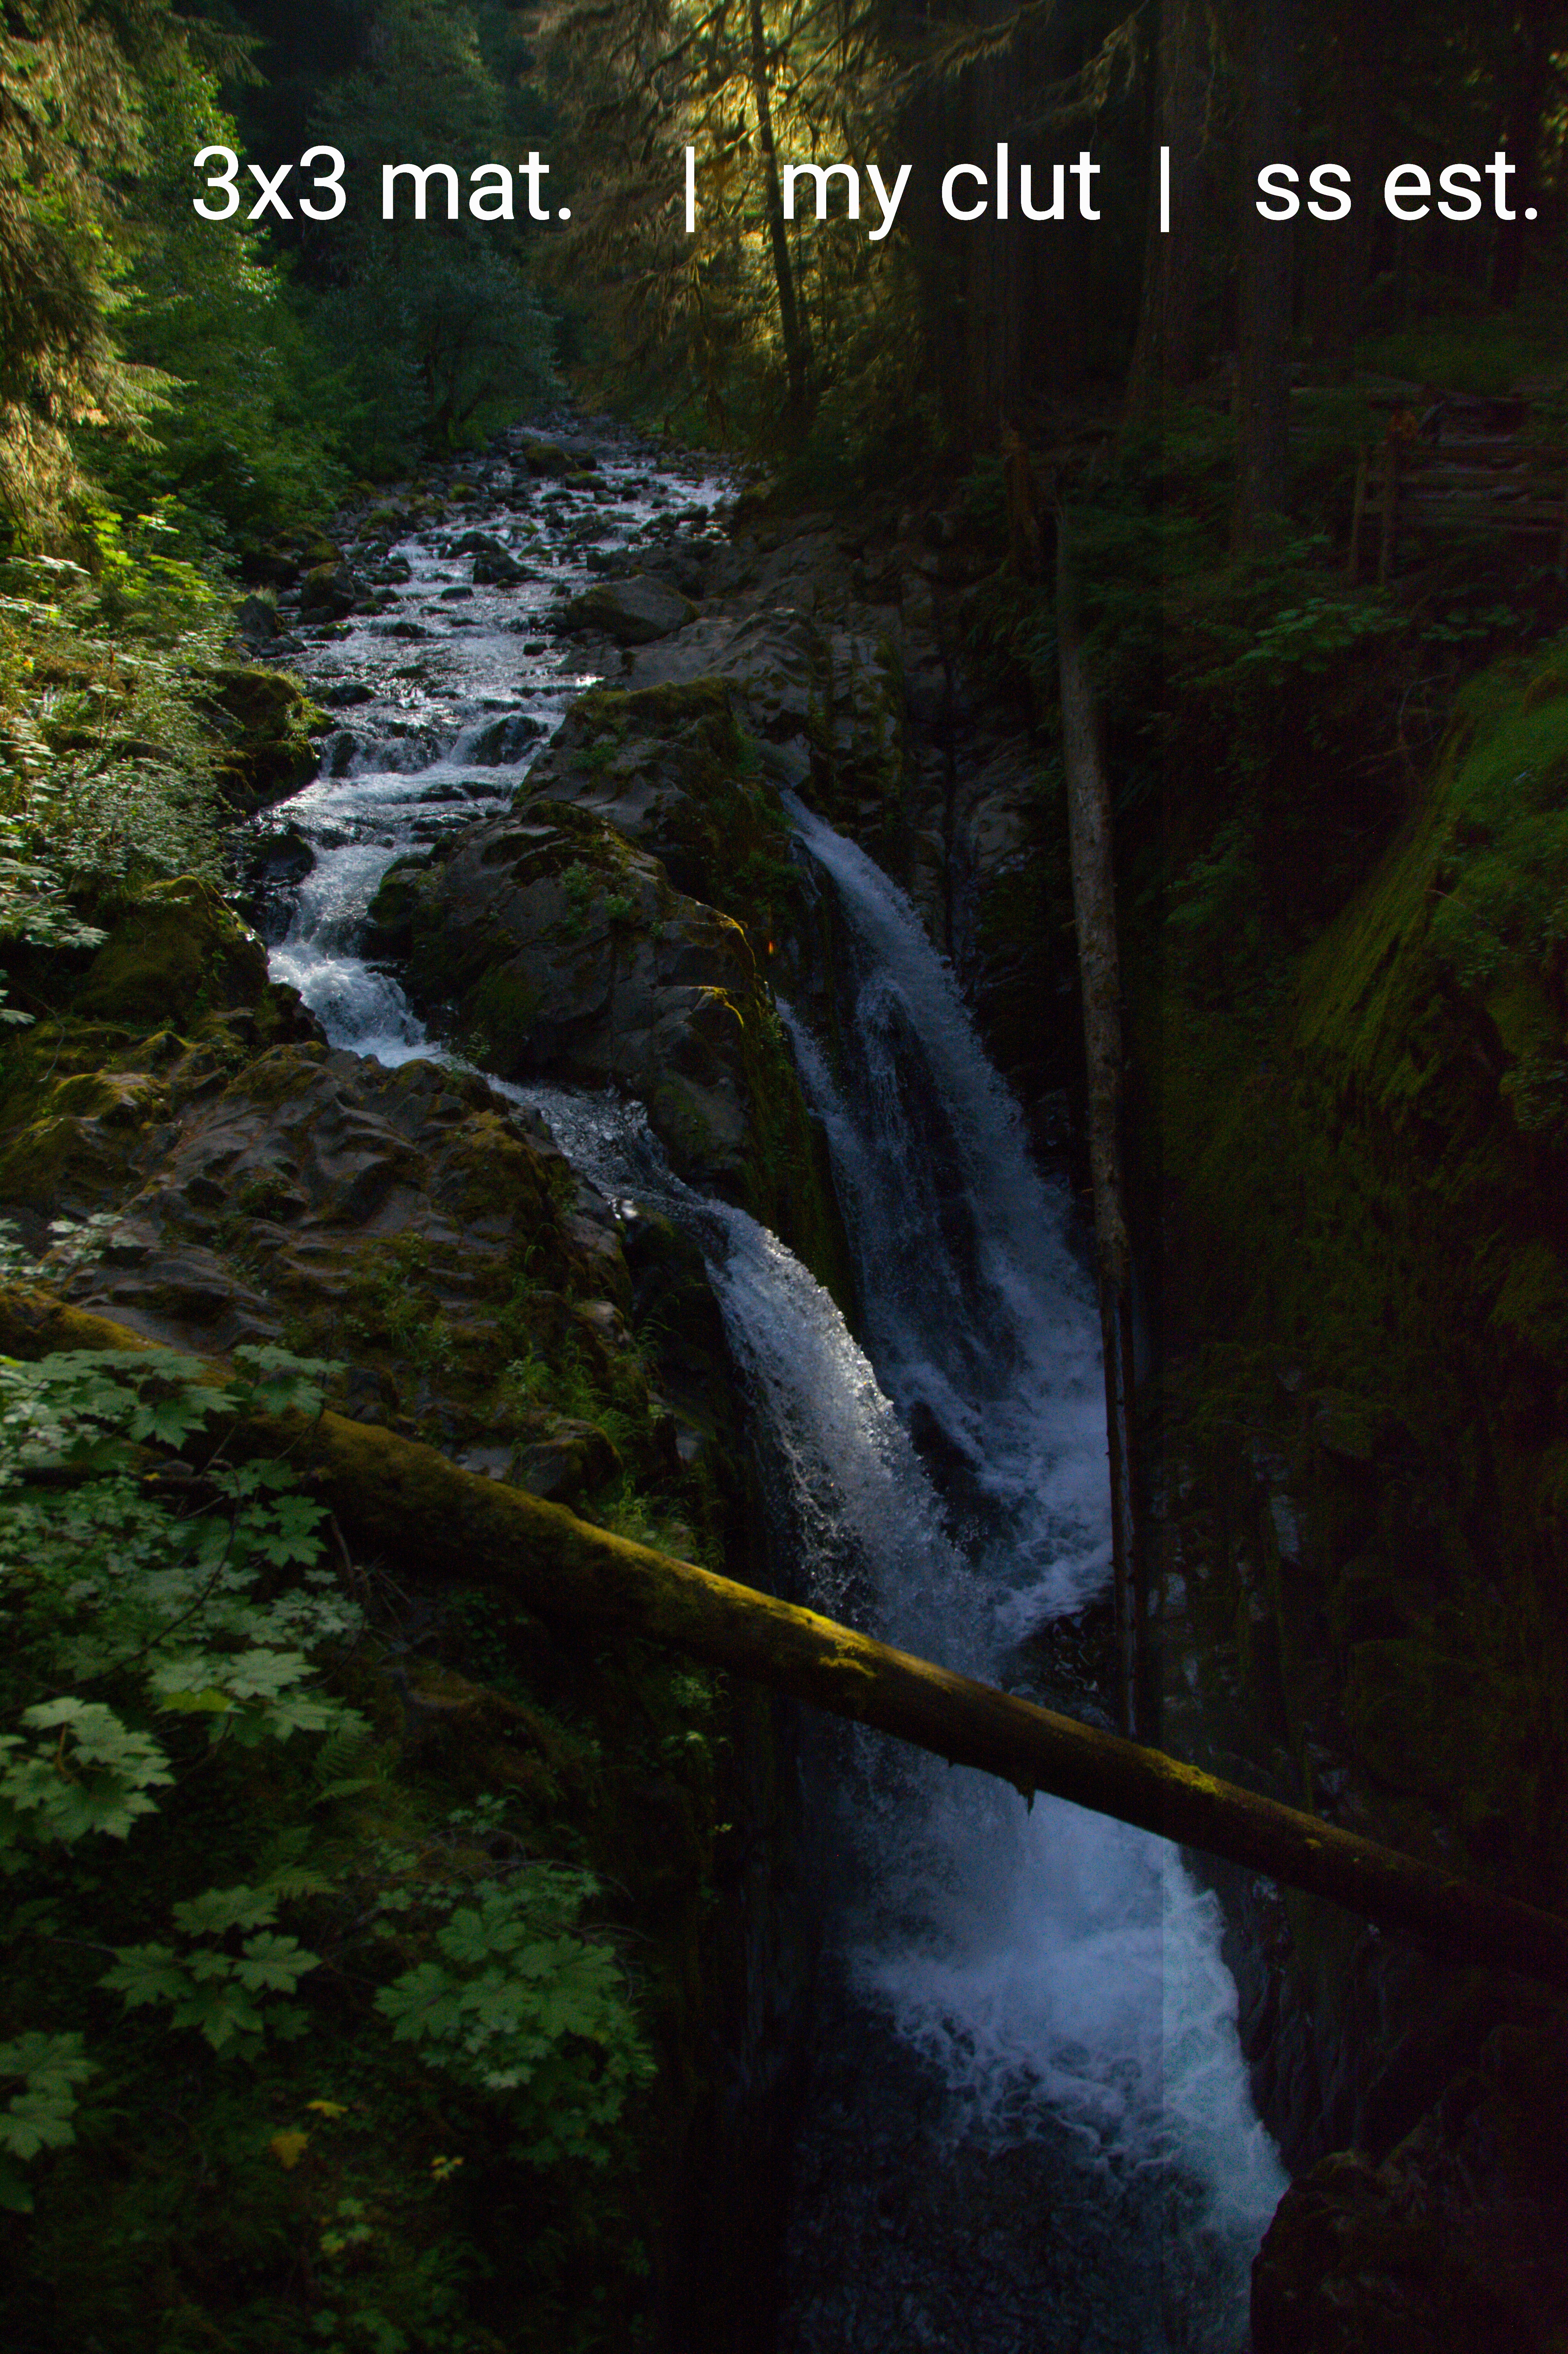 Left ot right: Standard 3x3 matrix color transform, my spectral measurement color lut, spectral estimate
This isn’t all on the up-side. My measured profile seems to have a orange cast in skin tones. You can see it in the straw roof in this image.
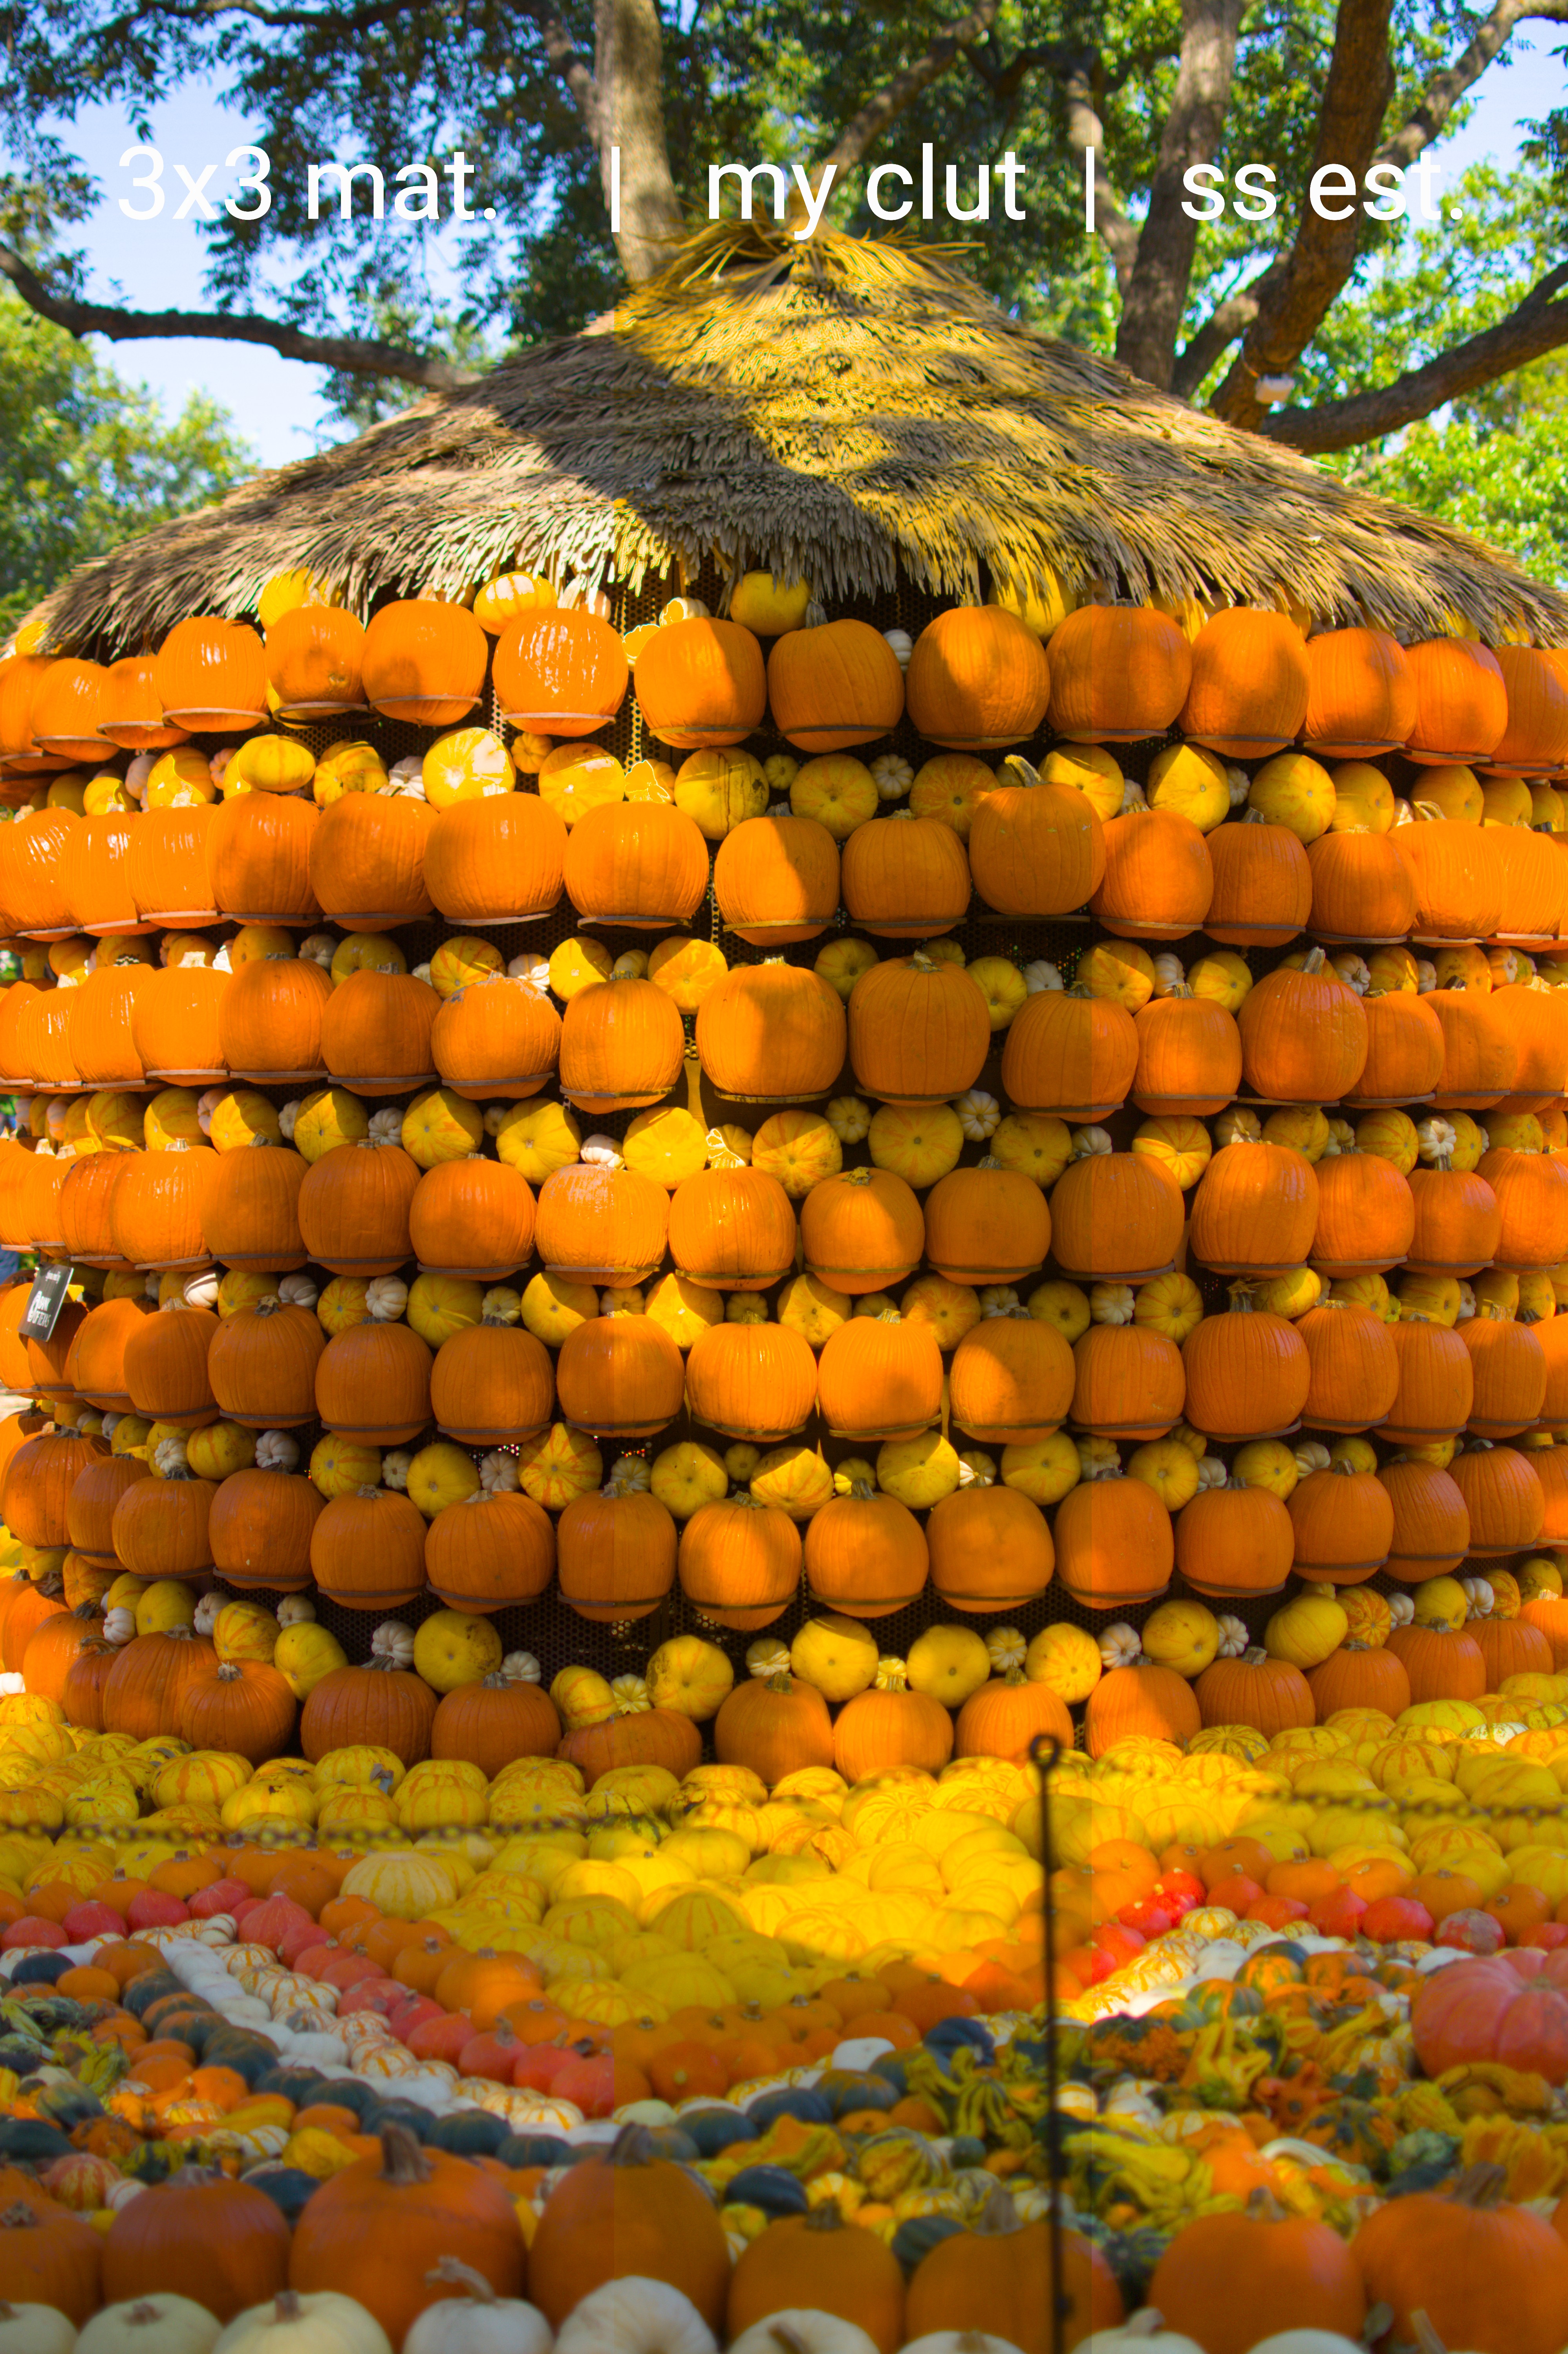 Left ot right: Standard 3x3 matrix color transform, my spectral measurement color lut, spectral estimate
looking at the output of vkdt eval-prof for each spectral measurements we have, it would seem our red-neck measurement performs better than the guess-timated one.
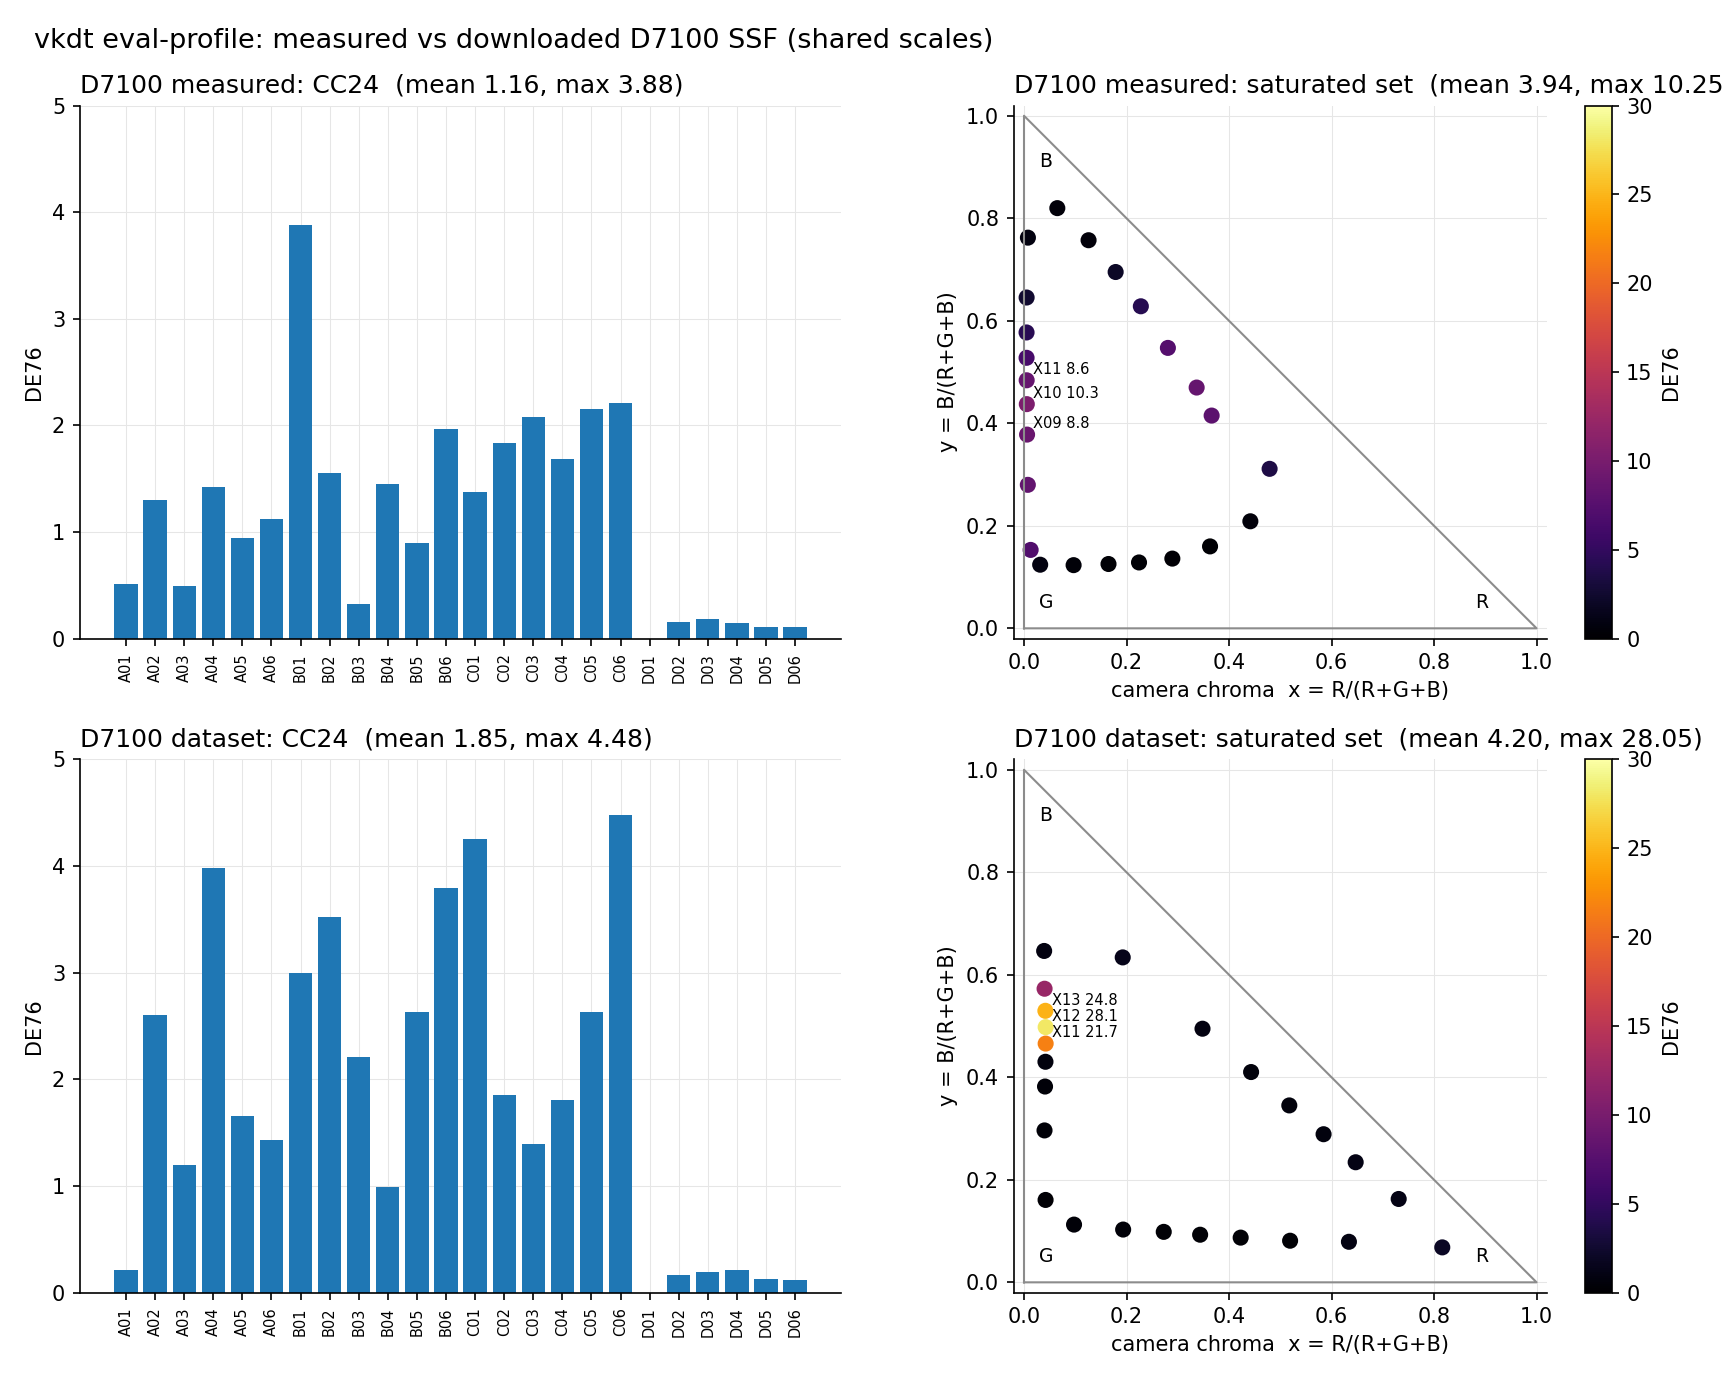
Learning
Even a crappy measurement can do OK.
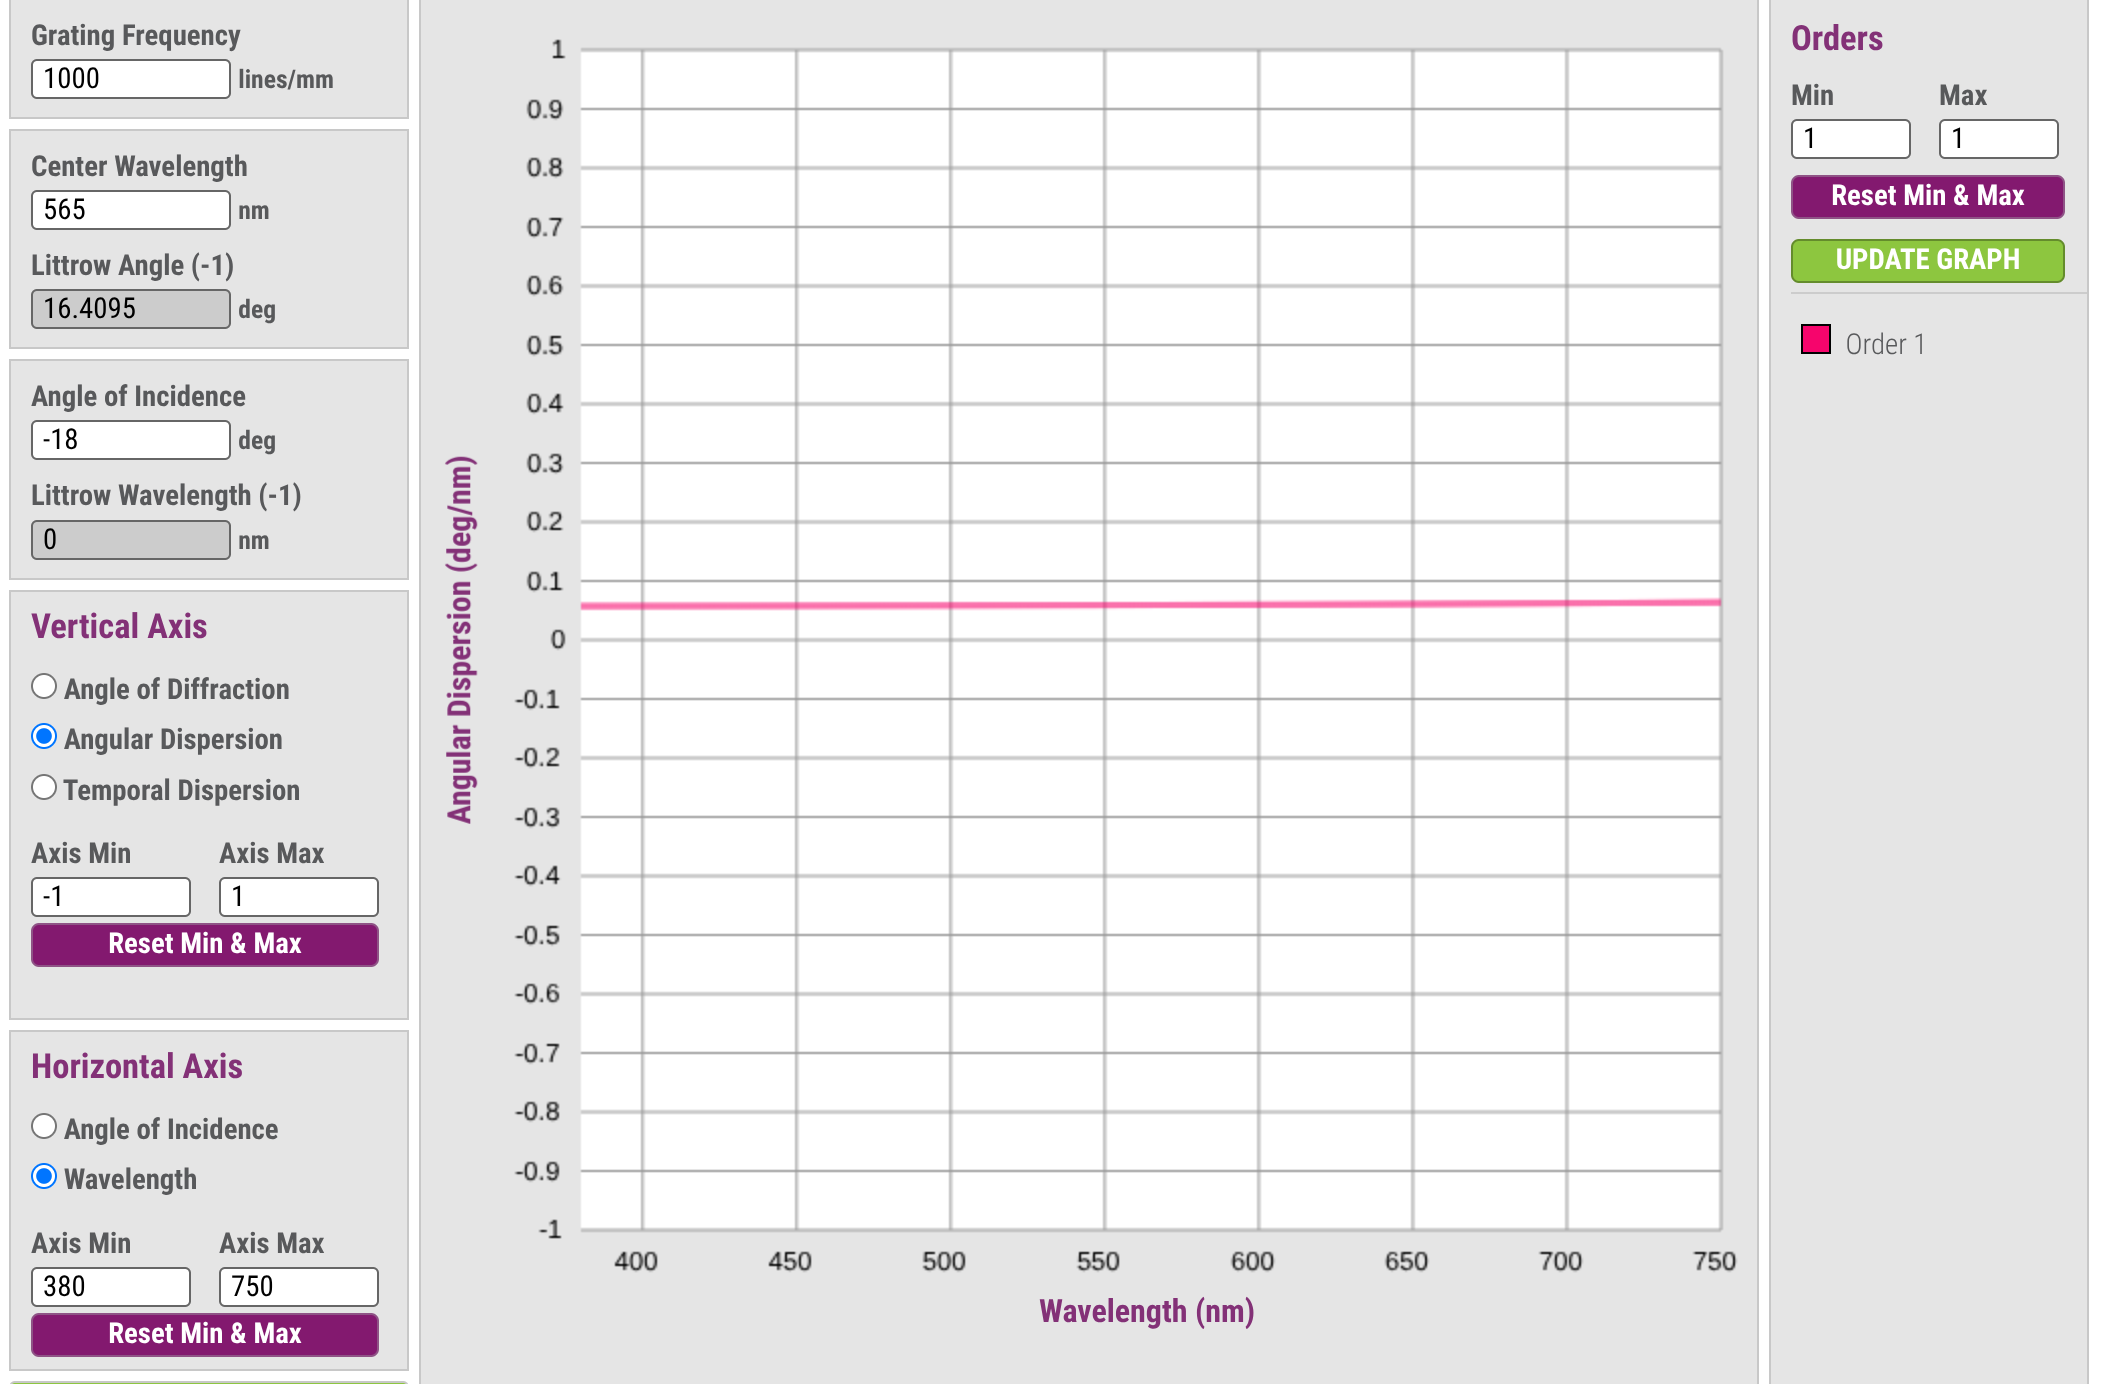
After trial-and-error, I found the setting the diffraction grating AOI to half-way produced the best results. If we go back to our grating calculator, and set the y-axis as angular dispersion (or change in angle of diffraction with wavelength, dθm/dλ), we can see a grating perpendicular to the illumination will cause a non-uniform spectrum for our wavelength range.
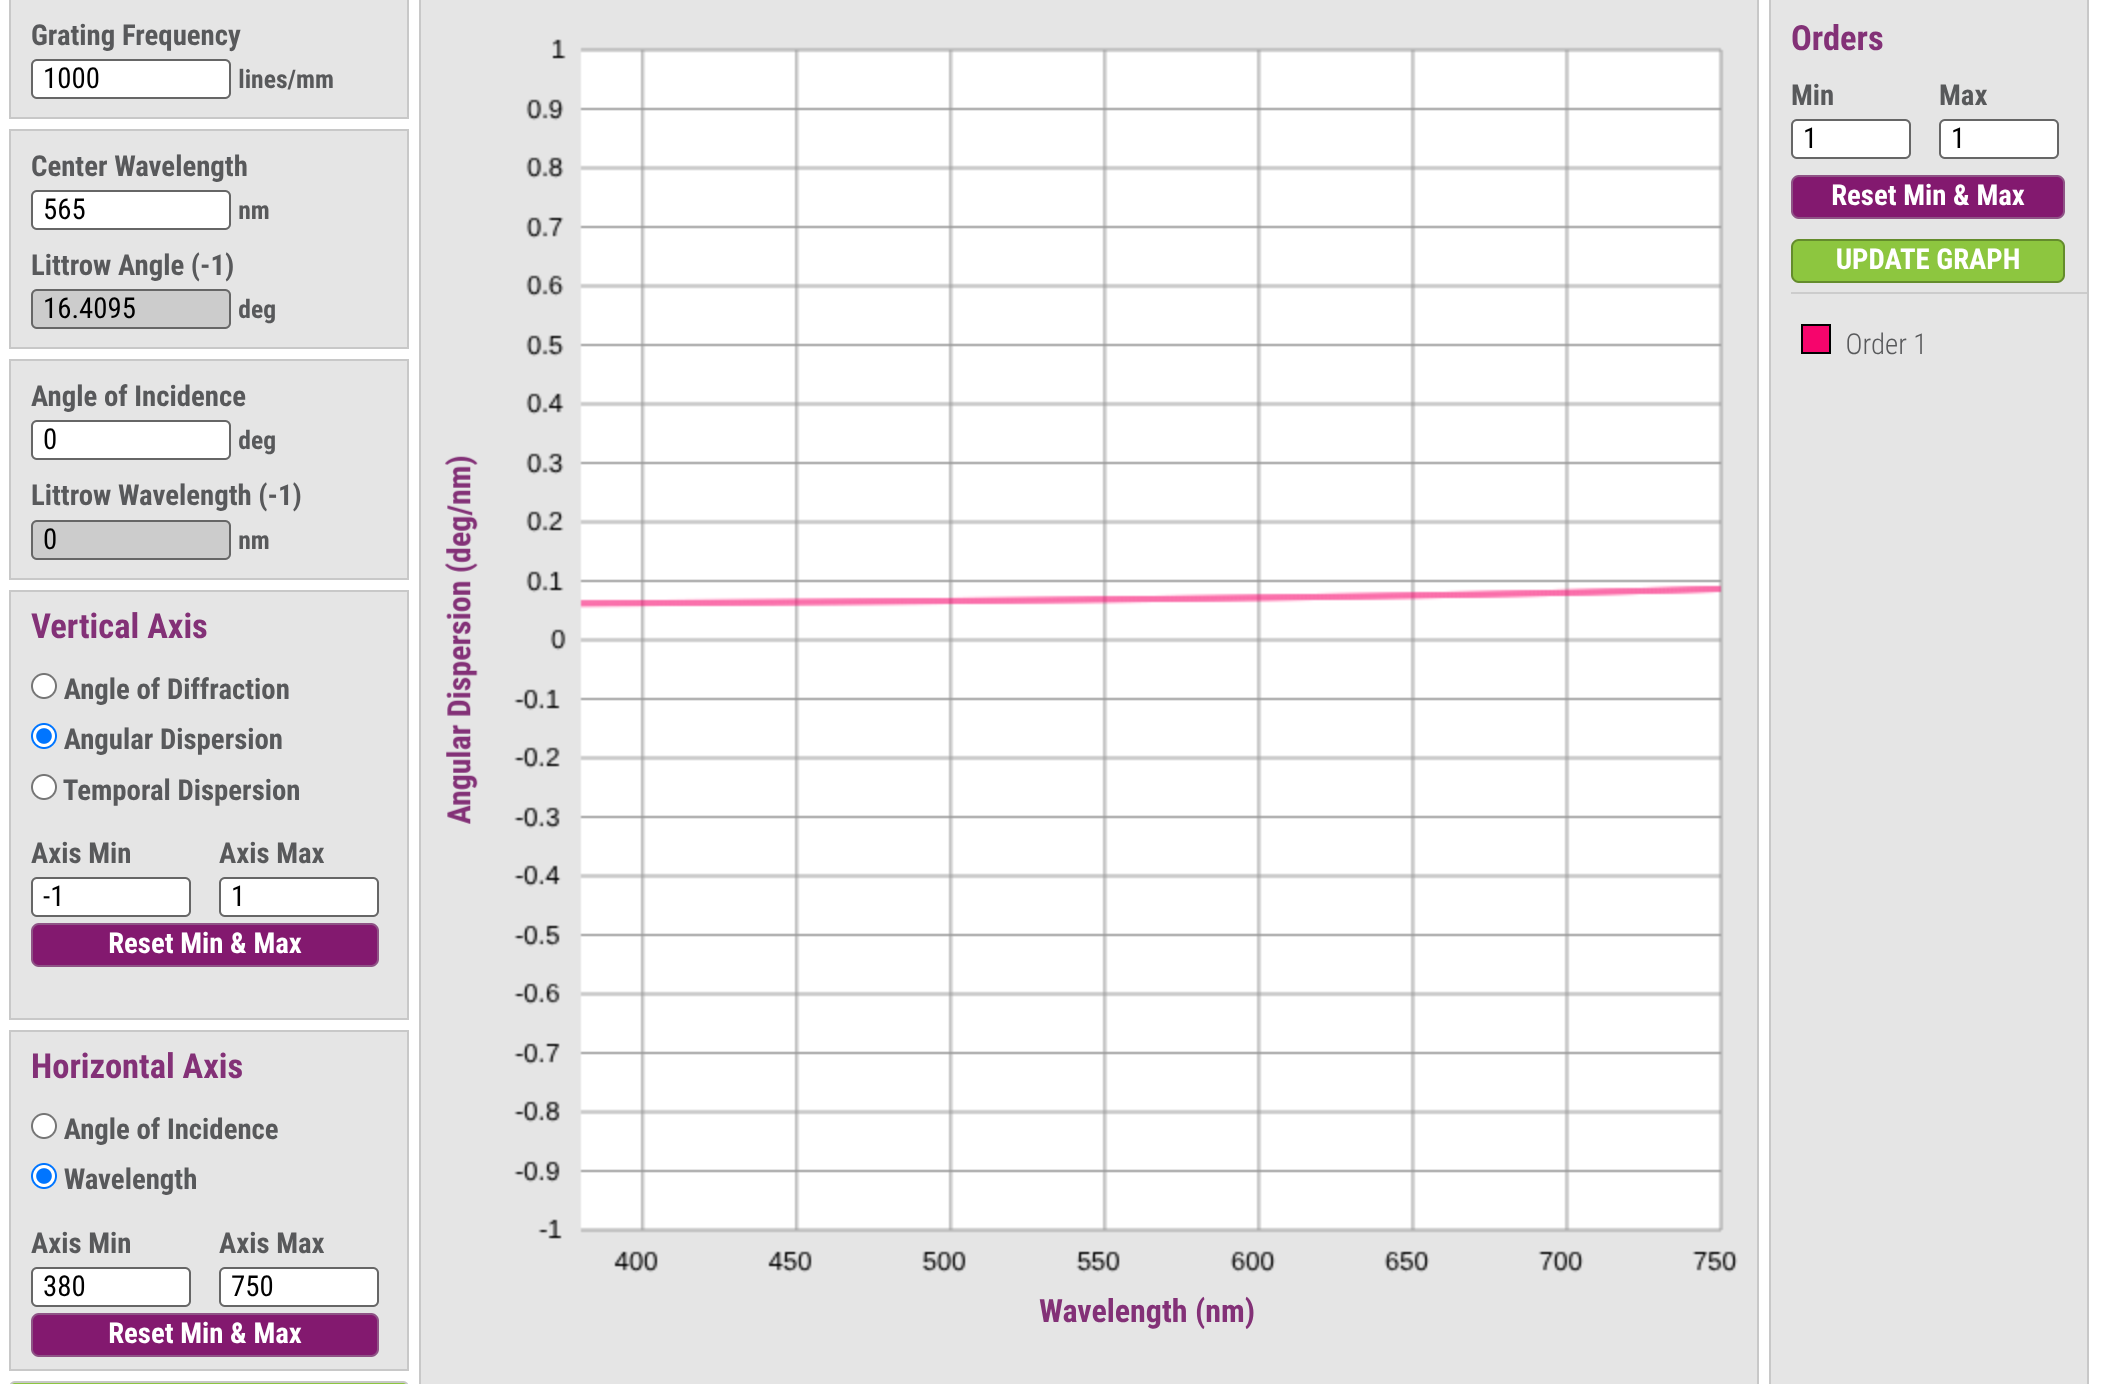
If you squint really hard, you can see the line in our original calculation isn’t linear. Setting out AOI to -18 yields a much more constant line.
Conclusion
I am not an expert in color transforms, I had to create this blog because I was so excited to be able to create my own input device transform from spectral data I measured myself, on the cheap.
Typically I would post the artifacts and source for my work but I think for this project, the Nikon D7100 camera profile is of no use to anyone and the story and learnings are much more valuable. Now go try it yourself!
make-ssf.sh
#!/bin/bash
# Build a camera SSF from a broadband-spectrum frame + a CFL calibration frame.
# Usage: ./make-ssf.sh [-p source_spd.csv] [-c "blue=437,green=546,red=611"]
set -euo pipefail

spectrum=LIT_0228            # broadband source through slit + grating
calib=LIT_0227               # CFL: 436/546/611 nm lines for wavelength calibration
power=D65_1nm.csv            # SPD of the broadband source (CIE D65 = daylight)
markers="blue=437,green=546,red=611"
VKDT=${VKDT:-$HOME/Documents/c/vkdt/bin/vkdt}

while getopts p:c: option; do
  case "$option" in
    p) power=$OPTARG;;
    c) markers=$OPTARG;;
    *) exit 1;;
  esac
done

# -flop: red must end up on the left and blue on the right. tiff2specdata reads
#        right-to-left, so the data then runs in increasing wavelength order.
# No gamma: the EXRs are scene-linear camera RGB (vkdt exports from 'crop',
#        bypassing the colour/matrix/WB chain). TIFF tags are irrelevant here.
magick "$spectrum.exr" -flop -depth 16 -set gamma 1 .spec16.tiff
magick "$calib.exr"    -flop -depth 16 -set gamma 1 .cal16.tiff

calibdata() { tiff2specdata .cal16.tiff; }
pipe() {     # $1 = wavelength range
  tiff2specdata .spec16.tiff \
    | ssftool wavelengthcalibrate "$markers" <(calibdata) \
    | ssftool intervalize "$1" \
    | ssftool powercalibrate "$power" \
    | ssftool normalize
}

# --- dcamprof profile input, 400-730 nm ---
pipe 400,730,5 > D7100_ssf.csv
ssftool dcamprofjson D7100_ssf.csv "Nikon D7100" > D7100_ssf.json

# --- vkdt mkclut input, 380-780 nm at 5 nm: "w R G B" ---
pipe 380,780,5 | awk -F, '{printf "%d %.7f %.7f %.7f\n",$1,$2,$3,$4}' > "Nikon D7100.txt"
if [ -x "$VKDT" ]; then
  "$VKDT" mkclut "Nikon D7100" >/dev/null 2>&1 || true
fi

rm -f .spec16.tiff .cal16.tiff
echo "wrote D7100_ssf.csv, D7100_ssf.json, Nikon D7100.txt${VKDT:+ and Nikon D7100.lut}"